

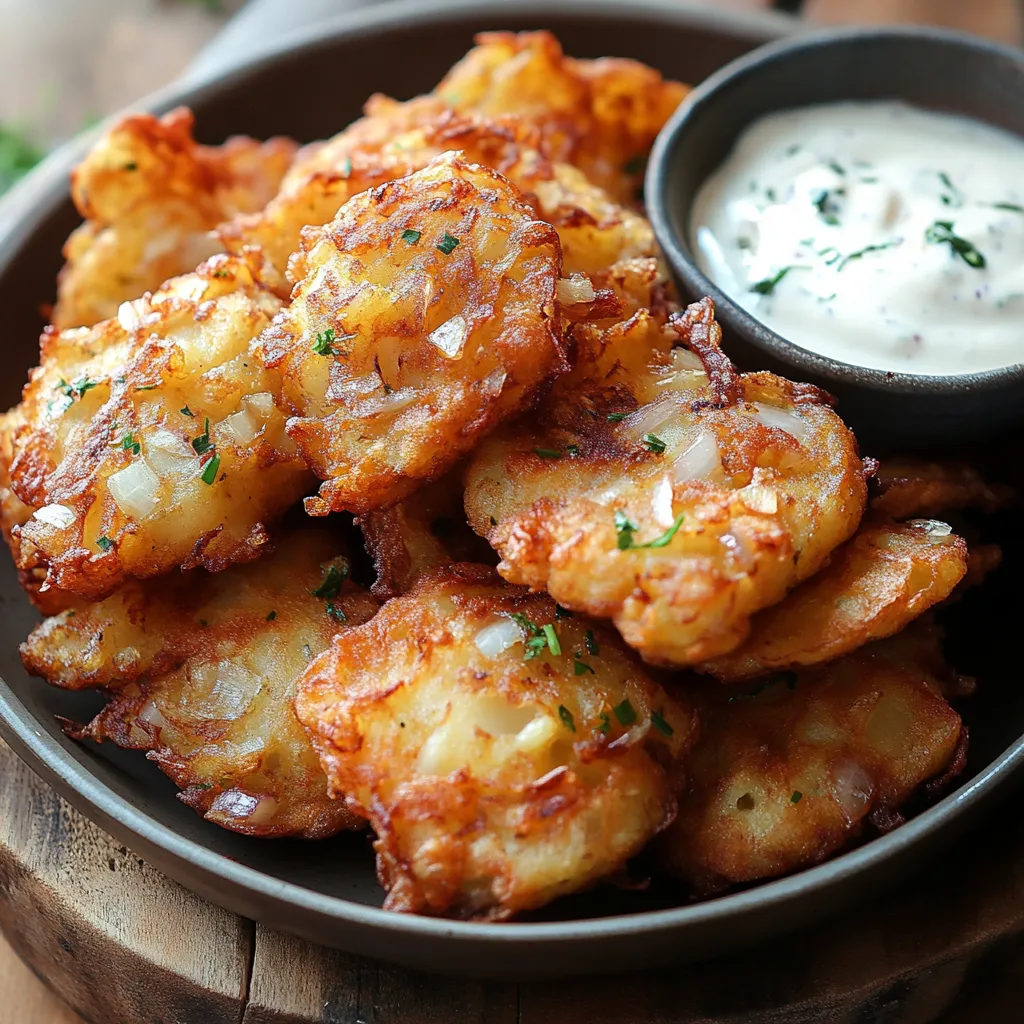
When I think of comfort food, I can’t help but picture something simple, satisfying, and absolutely irresistible—like crispy Amish onion fritters. These golden little bites are the perfect snack or appetizer, with their crispy outer coating and tender, flavorful onions inside. The best part? They’re easy to make and sure to please anyone who’s lucky enough to try them.
Inspired by Amish cooking, these fritters pack all the goodness of traditional comfort food while being light and crispy. It’s one of those recipes that has been passed down through generations, bringing with it a sense of nostalgia and warmth. Whether you’re serving them at a family dinner or enjoying them as an afternoon snack, they’re bound to become a favorite in your home.
I first discovered this recipe during a trip to Amish country, where I had the pleasure of tasting these fritters fresh out of the fryer. I remember how the golden exterior crackled when I bit into it, revealing perfectly cooked onion rings inside. There was just something about that perfect balance of crispy and tender that made me want to make these at home. So, I brought the recipe back with me, and now, I’m excited to share it with you!
If you’re craving something savory and satisfying, these Amish onion fritters are the way to go. They come together quickly and are made with simple ingredients you probably already have in your kitchen. Plus, they’re a great way to get a little creative with your snacks. Whether you serve them with a classic dipping sauce or enjoy them on their own, they’re sure to disappear in no time.
Ingredients:
- 2 large onions, thinly sliced
- 1 ½ cups all-purpose flour
- 2 teaspoons baking powder
- 1 teaspoon salt
- 1 teaspoon black pepper
- 1 teaspoon garlic powder
- 1 teaspoon paprika
- ¾ cup milk (dairy or non-dairy)
- 1 large egg
- Vegetable oil, for frying
Step 1: Slice the Onions
Start by slicing your onions into thin rings. A sharp knife works best here to ensure the slices are even. You can also use a mandoline slicer if you have one—this will make the job even quicker and ensure uniform slices. After slicing, separate the rings from each other and set them aside. This is the first step to getting that perfect onion-to-batter ratio, so take your time here.
If you’re like me and love onion rings, you’ll notice that the thin slices will give you a crispier texture, which is exactly what you want when making fritters. As the onions cook, their natural sweetness will really shine, adding a subtle flavor that complements the crispy batter. Trust me, the aroma while they fry will have everyone in the house wondering what smells so delicious!

Step 2: Mix Dry Ingredients
Now that your onions are prepped, let’s move on to the dry ingredients. In a large bowl, whisk together the flour, baking powder, salt, black pepper, garlic powder, and paprika. This combination of spices adds just the right amount of flavor—nothing too overpowering, but enough to elevate the taste of the fritters. The paprika gives it a little smoky flavor, while the garlic powder adds that savory punch.
Don’t skip the baking powder—it’s essential for making sure your fritters turn out light and crispy instead of dense and heavy. This is the secret to that perfect crunchy exterior that everyone loves in a good fritter.

Step 3: Prepare Wet Ingredients
Next, grab another bowl and beat together the egg and milk. Whether you’re using dairy or a non-dairy alternative like almond or oat milk, either will work just fine here. Just make sure the milk is at room temperature before you mix it with the egg. This helps create a smooth batter that will coat the onions evenly.
This simple mixture of egg and milk is what binds the dry ingredients together and helps create that golden, crispy coating once fried. It’s easy, it’s quick, and it’s the foundation for making these fritters so delicious.

Step 4: Combine Wet and Dry Ingredients
Once your wet ingredients are ready, slowly add them to the dry ingredients. Stir gently as you go, and be careful not to overmix the batter. We’re aiming for a thick, smooth consistency—something that will easily coat the onion slices without being too runny. If you find the batter is a little too thick, you can add a splash more milk, but don’t make it too thin. You want the batter to hold on to those onions as they fry.
This is the point where the magic starts to happen. As you combine the wet and dry ingredients, you’ll see the batter come together. The onions will soon be added to the mix, and that’s when you know you’re almost there. Trust me, the aroma of this batter alone will have you eagerly awaiting that first bite of crispy fritter.

Frying the Fritters to Golden Perfection:
Now that the batter is ready and your onions are coated, it’s time for the exciting part—frying! This is where the magic happens, turning the simple batter and onions into crispy, golden fritters that will have everyone asking for seconds. But before you dive in, let’s talk about a few essential tips to ensure your fritters turn out perfectly crispy on the outside and tender on the inside.
Step 5: Coat the Onions
The next step is to add the thinly sliced onions to the batter. Gently toss the onion rings into the mixture, making sure every piece is evenly coated with that delicious, thick batter. I find it helpful to use my hands here to give everything a good toss, but a spoon works just as well if you prefer not to get too messy. Make sure the onion rings are fully coated but not clumped together. You want each ring to have that beautiful, even coating that will crisp up perfectly when fried.

Once the onions are well-coated, it’s time to move on to the frying process.
Step 6: Heat the Oil
To get that crispy texture we’re all craving, you need the oil to be just the right temperature. Heat about 2 inches of vegetable oil in a deep skillet or frying pan over medium heat. The key is to get the oil to a temperature of around 350°F (175°C). If you don’t have a thermometer, you can do a quick test by dropping a small spoonful of batter into the oil. If it sizzles and rises to the surface right away, you know the oil is hot enough.
It’s important to keep an eye on the temperature while frying. If the oil is too hot, the fritters will burn on the outside before the onions have a chance to cook through. Too cool, and the fritters will absorb too much oil, making them greasy rather than crispy.
Step 7: Fry the Fritters
Once the oil is at the perfect temperature, it’s time to fry the fritters! Using a spoon or your hands, carefully drop spoonfuls of the onion-batter mixture into the hot oil. I recommend frying the fritters in small batches to avoid overcrowding the pan. Overcrowding the pan can cause the temperature of the oil to drop, resulting in soggy fritters.
Fry the fritters for about 2-3 minutes per side, or until they turn golden brown and crispy. You’ll notice them puffing up a bit as they cook—this is a good sign! The batter is doing its job of creating that light, crunchy exterior. Use a slotted spoon to flip the fritters halfway through so they cook evenly on both sides.
As they fry, the aroma of the onions and spices will start to fill your kitchen, and you’ll know it won’t be long until they’re ready to eat. It’s honestly one of the best smells in the world.

Step 8: Drain the Excess Oil
Once the fritters are golden and crispy, use the slotted spoon to remove them from the oil. Place them on a plate lined with paper towels to drain any excess oil. This step is essential for keeping the fritters crispy and not greasy. Let them rest for a minute or two to cool slightly before diving in. You’ll be tempted to eat them right away, but trust me, letting them drain will give you the crispiest results.
Step 9: Serve and Enjoy
Now that your fritters are golden brown and crispy, it’s time to enjoy them! Serve them hot with your favorite dipping sauce, or eat them just as they are. If you want to keep it classic, a tangy ranch dressing or creamy sour cream dip will complement the fritters perfectly. However, feel free to get creative and try different sauces—maybe a spicy mayo or a garlic aioli for an extra kick.
These Amish onion fritters make for an amazing snack on their own, but they’re also great as a side dish for a burger or grilled chicken. They’re crispy, flavorful, and totally addictive. The best part is that you can make a big batch and share them with family or friends (if you’re feeling generous!).

FAQ Section and Conclusion:
Now that you’ve mastered the art of making crispy Amish onion fritters, it’s time to answer some frequently asked questions and wrap things up with a few final tips. I know you’ll love these fritters, and there’s nothing better than having a few helpful pointers to make sure they turn out just right. So, let’s dive into the FAQ section!
1. Can I make the fritters ahead of time?
While these fritters are best served fresh, you can make them ahead of time if needed. Simply cook them, let them cool, and store them in an airtight container in the fridge for up to two days. To reheat, place them in an oven at 350°F (175°C) for about 5-7 minutes to get them nice and crispy again. Keep in mind that the texture may not be quite as perfect as when they’re freshly fried, but they’ll still taste delicious!
2. Can I use a different type of flour?
Yes, you can experiment with different types of flour if needed! If you want a gluten-free option, you can use a gluten-free all-purpose flour blend. The texture will be slightly different, but the fritters should still be light and crispy. Just make sure to check the consistency of the batter; gluten-free flours can sometimes absorb more liquid, so you might need to adjust the amount of milk slightly.
3. How do I know when the oil is the right temperature for frying?
The best way to check the oil temperature is by using a thermometer. You want the oil to reach about 350°F (175°C). If you don’t have a thermometer, you can drop a small amount of batter into the oil—if it sizzles and rises to the surface quickly, the oil is hot enough. Be careful, though; if the oil is too hot, the fritters will brown too quickly and not cook through properly. If it’s too cool, they’ll absorb more oil and become greasy.
4. Can I add other vegetables to the fritter batter?
Yes, absolutely! While the classic Amish onion fritters focus on onions, you can get creative by adding other vegetables like zucchini, carrots, or bell peppers. Just make sure to finely chop or shred them to ensure they cook evenly. You may also need to adjust the amount of flour in the batter, depending on the moisture content of the vegetables you add.
5. How long should I fry the fritters?
Fry each fritter for about 2-3 minutes per side, or until they turn golden brown and crispy. The exact time will vary depending on the size of your fritters and the temperature of the oil, but keep an eye on them as they cook. If they’re browning too quickly, lower the heat a bit to make sure they cook through.
6. Can I freeze Amish onion fritters?
Yes, you can freeze these fritters if you want to make a big batch in advance! Once they’ve cooled completely, place them in an airtight container or freezer bag, and store them in the freezer for up to one month. When you’re ready to eat them, simply reheat them in the oven at 350°F (175°C) for 10-12 minutes to crisp them up again. They’ll taste just as delicious as the first time!
7. What dipping sauces go well with Amish onion fritters?
The beauty of these fritters is that they pair well with a variety of dips. Classic choices like ranch dressing, sour cream, or a tangy barbecue sauce are all great options. If you want to get a bit more adventurous, try serving them with a spicy sriracha mayo or a garlicky aioli. The fritters are delicious no matter what you dip them in!
Conclusion: A Crispy Snack You’ll Make Again and Again
There you have it! A simple, delicious, and totally addictive snack that’s sure to become a favorite in your household. These Amish onion fritters are the perfect combination of crispy and tender, with a mild onion flavor that’s complemented by a light and airy batter. Whether you’re making them as an appetizer, a side dish, or just a snack for yourself, they’re guaranteed to impress.
The best part? They’re so easy to make. You don’t need any special equipment or fancy ingredients—just a few simple staples you probably already have in your kitchen. And once you’ve tasted that first crispy bite, you’ll be hooked!
I encourage you to give these fritters a try. They’re a fun way to experiment with frying, and I’m sure you’ll love the results. And if you end up making them, don’t forget to share your experiences! Let me know what dipping sauces you paired with them or if you added any twists of your own to the recipe. There’s always room for creativity in the kitchen, and I’d love to hear what you come up with.
Happy cooking and even happier eating!
Print
Amish Onion Fritters Recipe: Crispy & Delicious Snack
- Total Time: 25 min
Description
Thinly sliced onions coated in a simple, seasoned batter, then fried until crisp and golden. They’re crunchy, slightly sweet, and perfect with ketchup, ranch dressing, or spicy mayo.
Ingredients
-
2 large yellow or sweet onions (e.g. Vidalia), thinly sliced and rings separated
-
1 cup all-purpose flour
-
1 tsp baking powder
-
½ tsp salt
-
¼ tsp black pepper
-
½ tsp paprika (optional—adds color/flavor)
-
1 large egg
-
1 cup milk (or dairy-free alternative)
-
Oil for frying (vegetable, canola, or avocado)
Instructions
1️⃣ Prep onions:
Separate onion slices into individual rings (discard root ends).
2️⃣ Make the batter:
In a bowl, whisk together flour, baking powder, salt, pepper, and paprika. In another bowl, beat the egg with milk until combined. Slowly stir wet into dry ingredients until smooth and slightly thick.
3️⃣ Heat the oil:
Pour oil into a heavy skillet or Dutch oven to a depth of about ¼ inch. Heat over medium-high until it reaches around 350°F (175°C). If you don’t have a thermometer, flick in a tiny drop of batter—it should sizzle and bubble immediately.
4️⃣ Batter and fry:
Dip each onion ring into the batter, letting excess drip off, and carefully lay into hot oil. Don’t crowd the pan—fry in batches of 4–6 rings.
5️⃣ Cook to crispy:
Fry for 2–3 minutes per side, or until golden brown and crisp (turn once midway). Use tongs or a slotted spoon for easy flipping.
6️⃣ Drain:
Transfer fritters to a wire rack or a paper towel–lined plate to drain. Season with a pinch of salt while still hot.
7️⃣ Serve:
Enjoy immediately with ketchup, ranch, or a drizzle of hot sauce.
Notes
-
Extra crispiness: Add ¼ cup cornmeal or panko crumbs to the dry mix for crunch.
-
Flavor boost: Fold in 2–3 tbsp finely chopped fresh herbs (like chives or parsley) or a dash of garlic powder.
-
Baked version: For a lighter option, brush battered rings with oil and bake at 425°F (220°C) for 15–18 minutes, flipping halfway.
-
Make-ahead: Prepare the batter; refrigerate up to 4 hours before frying. Fry just before serving.
- Prep Time: 10 min
- Cook Time: 15 min


