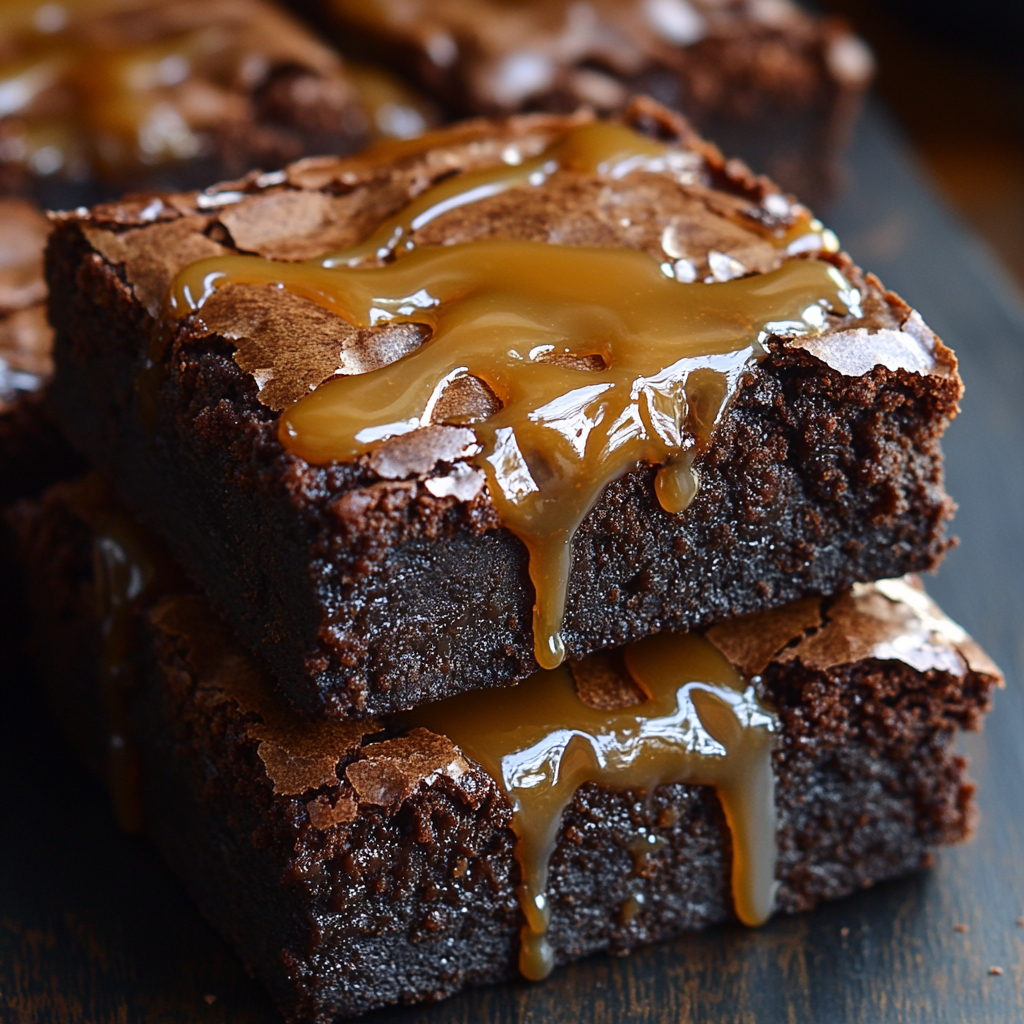
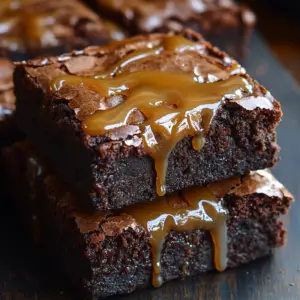
Biscoff Brownies are a rich, decadent treat that combines the fudgy texture of classic brownies with the uniquely spiced, caramel-like flavor of Biscoff cookie butter. These brownies have a layer of creamy Biscoff spread in the middle and crunchy Biscoff cookie pieces on top, making them a delightful fusion of flavors and textures.
Why Biscoff is the perfect ingredient for brownies
Biscoff cookie butter, made from caramelized Biscoff cookies, adds a warm, spiced undertone to brownies. The hint of cinnamon and the buttery sweetness perfectly complements the deep chocolate flavor, elevating the traditional brownie to something extraordinary.
Popularity of Biscoff-inspired desserts
In recent years, Biscoff desserts have gained immense popularity, from Biscoff cheesecakes to Biscoff milkshakes. The cookie butter’s versatility and its distinct, addictive flavor have made it a favorite in both home kitchens and bakeries worldwide.
Ingredients Overview
Each ingredient in Biscoff Brownies plays an essential role in achieving the perfect texture and taste. Here’s a breakdown of the key components:
- Biscoff Cookie Butter: The star ingredient that adds a warm, spiced sweetness and creamy texture.
- Brown Sugar and Granulated Sugar: Brown sugar provides moisture and a slight molasses flavor, while granulated sugar helps achieve the desired chewiness.
- Eggs and Egg Yolk: Eggs add structure and richness. The extra yolk provides more fat, ensuring a fudgy, dense texture.
- Vanilla Extract: Enhances the sweetness and rounds out the flavors.
- Unsalted Butter: Adds richness and moisture to the brownies.
- Semi-Sweet Chocolate Chips: These melt into the batter for a rich, chocolatey foundation.
- Dutch Cocoa Powder: Provides a deeper, more intense chocolate flavor.
- All-Purpose Flour: The structure of the brownies depends on flour; using the correct amount is crucial for the right texture.
- Espresso Powder: A small amount intensifies the chocolate flavor without making the brownies taste like coffee.
- Sea Salt: Enhances all the flavors, balancing the sweetness.
- Biscoff Cookies: Adds a crunchy, decorative topping, and extra cookie butter drizzle on top intensifies the Biscoff flavor.
Essential Equipment Needed
To ensure the best results when making Biscoff Brownies, having the right equipment is key:
- 8×8 Metal Baking Pan: This size ensures the perfect thickness for your brownies. Using metal allows for even heating and baking.
- Parchment Paper: Line your baking pan with parchment paper to make it easier to lift the brownies out of the pan without sticking.
- Pro tip: Make sure the parchment paper hangs over the edges of the pan to easily remove the brownies.
- Mixing Bowls: You’ll need separate bowls for mixing wet and dry ingredients.
- Whisk: A good whisk will help combine ingredients without overmixing.
- Wire Rack: To cool the brownies evenly and prevent overcooking from residual heat.
- Spatula: Useful for folding in ingredients and spreading the batter evenly in the pan.
Preparing the Cookie Butter Layer
The frozen cookie butter layer is what makes these brownies stand out. Freezing the cookie butter helps it hold its shape during baking, ensuring a distinct, creamy middle layer.
- Why freeze the cookie butter layer?
Freezing the Biscoff cookie butter allows it to remain a solid layer in the center of the brownies. Otherwise, it could blend into the batter and lose its impact. Freezing gives the cookie butter time to melt gently while the brownies bake, creating a gooey, luxurious middle layer. - Step-by-step guide to preparing the cookie butter layer:
- Spread the cookie butter evenly on parchment paper: Take ¾ cup of Biscoff cookie butter and spread it into an even layer on a piece of parchment paper that fits inside your 8×8 pan. This will ensure the layer is smooth and uniform when placed inside the brownie batter.
- Chill in the freezer: Place the parchment paper with the cookie butter into the freezer and allow it to firm up completely. This can take around 20-30 minutes, but you can leave it longer if needed.
- Ensure the layer is firm before baking: Before assembling the brownies, check to make sure the cookie butter layer is completely solid. This will make it easier to handle and place in the brownie batter without breaking or melting.
Preparing the Brownie Batter
Making the perfect brownie batter is all about balance and technique. Here’s how to get it right:
- Mixing the dry ingredients: In a medium bowl, sift together the flour, Dutch cocoa powder, espresso powder, and sea salt.
- Note: Sifting the cocoa powder prevents lumps in your batter, ensuring an even texture.
- Importance of measuring flour correctly: Measuring flour accurately is crucial for the right brownie texture. Use the “spoon and level” method—spoon the flour into your measuring cup, then level it off with a flat edge. Avoid scooping the flour directly from the bag, as it can pack the flour too tightly, leading to dense brownies.
- Whisking together sugars, eggs, and vanilla: In a separate, larger bowl, whisk together the brown sugar, granulated sugar, eggs, egg yolk, and vanilla extract until the mixture is smooth and pale. Whisking thoroughly at this stage helps create a crinkly top layer on the brownies.
- Melting butter and chocolate: In a heatproof bowl, melt the butter and semi-sweet chocolate chips together. You can do this using a double boiler or in short 20-second bursts in the microwave, stirring in between to avoid burning.
- Pro tip: Stir in the melted chocolate slowly into the egg mixture to avoid scrambling the eggs if the chocolate is too hot.
- Whisking in cocoa powder: Once the chocolate is melted and smooth, whisk in the Dutch cocoa powder. This step deepens the chocolate flavor of the brownies and adds a rich texture.
- Combining wet and dry ingredients: Fold the dry ingredients into the wet mixture using a spatula. Be careful not to overmix the batter; stop as soon as the dry ingredients are fully incorporated. Overmixing can lead to tough, dense brownies rather than the desired fudgy texture.
Assembling the Brownies
Now that the batter and cookie butter are prepared, it’s time to assemble the brownies.
- Layering the brownie batter and cookie butter:
- Pour the first layer of brownie batter: Pour half of the brownie batter into the prepared 8×8 baking pan, spreading it evenly to the edges.
- Carefully place the frozen cookie butter layer: Take the solidified cookie butter from the freezer and gently place it on top of the brownie batter. Peel off the parchment paper. Make sure the cookie butter layer is centered so it’s evenly distributed in the final product.
- Pouring the remaining brownie batter over the top:
Pour the remaining brownie batter over the frozen cookie butter layer. Use a spatula to spread the batter evenly, ensuring it covers the cookie butter completely. - Adding the finishing touches:
- Breaking up Biscoff cookies: Crumble 4-5 Biscoff cookies into pieces and sprinkle them evenly over the top of the brownie batter. This adds a crunchy texture and enhances the Biscoff flavor.
- Drizzling warmed cookie butter: Warm 2 tablespoons of Biscoff cookie butter in the microwave for about 15-20 seconds until it becomes runny. Drizzle the melted cookie butter over the top of the brownies in a zigzag pattern for an extra layer of flavor and a visually appealing finish.
Baking, Storing, and Serving Tips
Baking the Brownies to Perfection
The secret to perfectly baked Biscoff brownies lies in the right temperature and baking time.
- Optimal baking time and temperature:
Always preheat your oven to 350°F (180°C) to ensure even baking. Preheating ensures that the brownies start cooking at the right temperature as soon as they go in, which helps achieve the right texture. - Baking for 30-40 minutes: what to look for:
The brownies should bake for 30-40 minutes, depending on your oven. Start checking at 30 minutes by inserting a toothpick into the center of the brownies. If it comes out with a few moist crumbs, they are done. If the toothpick comes out covered in wet batter, they need more time. - How to know when brownies are done:
The toothpick test is essential: you want a few moist crumbs sticking to the toothpick for fudgy brownies. If the toothpick comes out clean, the brownies may be overbaked and too cakey. - Adjusting baking time for different preferences:
For gooey brownies, bake on the lower end of the range (30-35 minutes). If you prefer a more cakey texture, leave them in for closer to 40 minutes. Keep an eye on the top of the brownies—when they start to crack slightly, they are likely close to done.
Cooling and Cutting the Brownies
Proper cooling is crucial for the texture of your Biscoff brownies.
- Letting the brownies cool on a wire rack:
After removing the pan from the oven, allow the brownies to cool completely on a wire rack. Cooling them in the pan helps set their structure, ensuring they’re firm but still fudgy. - Why cooling is important for the final texture:
If you cut into brownies while they’re still warm, they can be too gooey and fall apart. Cooling allows the brownie layers to firm up and achieve the chewy texture you’re aiming for. - How to easily remove brownies using parchment paper:
Use the parchment paper “sling” to easily lift the brownies out of the pan once they’ve cooled. This will prevent them from sticking and breaking apart during removal. - Pro tips for clean cutting:
For neat slices, use a sharp knife, and wipe the blade clean between each cut. This prevents the fudgy center from sticking to the knife and ensures cleaner lines. - Suggested cutting size for servings:
Depending on your preference, cut the brownies into 9 large squares or 16 smaller squares for easier serving.
Storing and Freezing Instructions
To keep your brownies fresh and tasty, follow these storage tips:
- Best practices for storing at room temperature:
Store brownies in an airtight container at room temperature to maintain their chewy texture. They will stay fresh for 2-3 days if kept in a cool, dry place. - How long the brownies last:
When properly stored, the brownies will remain soft and flavorful for up to 3 days at room temperature. If you want to extend their shelf life, freezing is a great option. - How to freeze brownies for later enjoyment:
Wrap individual brownie squares tightly in plastic wrap or aluminum foil, then place them in an airtight container or freezer-safe bag. Brownies can be frozen for up to 1 month. - Proper method to freeze and thaw:
To thaw, simply transfer the brownies to the refrigerator or let them sit at room temperature for a few hours. Avoid microwaving them to thaw, as it can alter their texture. - Reheating suggestions for maintaining texture:
If you prefer your brownies warm, reheat them briefly in the microwave (10-15 seconds) after thawing to soften them and bring back their fudgy texture.
Customization Ideas
Looking to personalize your Biscoff brownies? Here are some tasty variations:
- Mix-ins and variations:
You can enhance the brownies by mixing in nuts like pecans or walnuts. They add a nice crunch and complement the rich flavors of the chocolate and Biscoff. - Swirling in Nutella or peanut butter:
Swirl a few tablespoons of Nutella or peanut butter into the brownie batter before baking for a decadent twist. The nutty or chocolaty spread will add extra creaminess and a unique flavor profile. - Alternative toppings:
Beyond Biscoff cookies, try topping the brownies with white chocolate drizzle or caramel sauce. Both provide a contrasting sweetness and richness that elevates the final product. - Other flavor variations:
You can experiment with adding a touch of spice, like a pinch of cinnamon or cayenne, to the batter for an unexpected kick. Another idea is to incorporate orange zest into the batter for a zesty contrast to the chocolate and Biscoff flavors.
FAQ Section
- What is Biscoff cookie butter, and where can I find it?
Biscoff cookie butter is a creamy spread made from crushed Biscoff cookies, known for their warm, spiced, caramel-like flavor. It is available in most grocery stores, often in the peanut butter or spreads aisle. - Can I use a different type of chocolate?
Yes, you can use milk chocolate or dark chocolate instead of semi-sweet chocolate chips. However, this will affect the sweetness and richness of the brownies, so adjust according to your taste. - What happens if I don’t have espresso powder?
Espresso powder is used to intensify the chocolate flavor. If you don’t have it, you can omit it without drastically altering the taste, but the chocolate flavor may be slightly less bold. - Can I substitute another type of cookie for Biscoff?
Yes, you can use other types of cookies like Oreo or gingerbread cookies for a different texture and flavor. However, it will change the characteristic Biscoff taste of the brownies. - How can I make these brownies gluten-free?
You can substitute gluten-free all-purpose flour in place of regular flour to make the recipe gluten-free. Ensure the Biscoff cookie butter and cookies you use are also certified gluten-free.
Conclusion
Biscoff brownies are the ultimate indulgence, combining the rich, fudgy texture of traditional brownies with the warm, spiced notes of Biscoff cookie butter. With layers of chocolate, a creamy Biscoff center, and a crunchy Biscoff cookie topping, these brownies are a delightful twist on a classic dessert.
Whether you’re baking for yourself, family, or a special occasion, these brownies are sure to impress. They are easy to store, customizable, and versatile enough to pair with a variety of treats like coffee, ice cream, or whipped cream.
Try this recipe today and savor the irresistible combination of chocolate and Biscoff, a perfect treat for any occasion! Share your creations with friends, and enjoy this rich, comforting dessert at its finest.
Print
Biscoff Brownies
Description
These Biscoff Brownies combine the rich, fudgy texture of classic chocolate brownies with the warm, spiced sweetness of Biscoff cookie butter. A creamy layer of frozen Biscoff cookie butter is baked into the center of the brownies, while crumbled Biscoff cookies and a drizzle of melted cookie butter on top add a delightful crunch and extra flavor. Perfect for chocolate and cookie butter lovers, these brownies offer an indulgent dessert experience that is sure to impress!
Ingredients
- ¾ cup Biscoff cookie butter (for the cookie butter layer)
- ½ cup light or dark brown sugar, packed
- ½ cup granulated sugar
- 2 large eggs
- 1 large egg yolk
- 1 tbsp vanilla extract
- 10 tbsp unsalted butter
- 2/3 cup + 1/4 cup semi-sweet chocolate chips
- ¼ cup unsweetened Dutch cocoa powder
- 2/3 cup + 1 tbsp all-purpose flour (measured by spooning and leveling)
- 1 tsp espresso powder (optional but recommended)
- ½ tsp fine sea salt
- 4–5 Biscoff cookies, crumbled, for the top
- Extra Biscoff cookie butter (2 tablespoons, warmed for drizzling)
Instructions
- Prepare the cookie butter layer:
Spread ¾ cup of Biscoff cookie butter onto a parchment-lined surface, shaping it into a square that fits your 8×8 baking pan. Place the parchment and cookie butter in the freezer and chill until firm (about 20-30 minutes). - Preheat the oven:
Line an 8×8 metal baking pan with parchment paper, leaving enough overhang on all sides for easy removal. Preheat your oven to 350°F (180°C). - Prepare the wet mixture:
In a large bowl, whisk together brown sugar, granulated sugar, eggs, egg yolk, and vanilla extract until well combined and slightly frothy. - Melt butter and chocolate:
In a separate heatproof bowl, melt butter and semi-sweet chocolate chips together, either using a microwave in 20-second bursts or over a double boiler. Once smooth, whisk in the Dutch cocoa powder. - Combine wet and dry ingredients:
Fold the melted chocolate mixture into the wet mixture, stirring until just combined. In a separate bowl, sift together the flour, espresso powder, and sea salt. Gradually fold the dry ingredients into the wet mixture, being careful not to overmix. - Assemble the brownies:
Pour half of the brownie batter into the prepared baking pan, spreading it evenly. Remove the frozen cookie butter from the freezer and place it over the first brownie layer. Pour the remaining brownie batter on top and smooth it to the edges. - Top the brownies:
Crumble 4-5 Biscoff cookies over the top of the batter. Warm 2 tablespoons of Biscoff cookie butter in the microwave for 15-20 seconds, then drizzle it over the surface of the brownies. - Bake:
Bake for 30-40 minutes, or until a toothpick inserted into the center comes out with a few moist crumbs. Remove from the oven and cool completely on a wire rack. - Cut and serve:
Once the brownies have cooled, lift them out of the pan using the parchment paper overhang. Drizzle extra cookie butter on top if desired, cut into squares, and enjoy!
Notes
- Measuring flour: For best results, spoon the flour into your measuring cup and level it off with a knife. Avoid scooping flour directly from the bag, as this can pack it too tightly, leading to dense brownies.
- Baking time: The baking time will vary slightly depending on your oven. Begin checking at 30 minutes; the toothpick should come out with a few moist crumbs for fudgy brownies. For more cakey brownies, bake closer to 40 minutes.
- Freezing cookie butter layer: Freezing the cookie butter helps it retain its shape during baking. If not frozen, the cookie butter may blend into the brownie batter, losing the distinct middle layer.
- Espresso powder: Espresso powder enhances the chocolate flavor without adding a noticeable coffee taste. You can omit it if you don’t have it on hand, but it is highly recommended for a deeper chocolate flavor.
- Storage: Store the brownies in an airtight container at room temperature for 2-3 days, or freeze them for up to 1 month. To freeze, wrap individual brownies in plastic wrap and place them in a freezer-safe bag or container.
- Customizations: You can add chopped nuts, swirl in Nutella or peanut butter, or top the brownies with caramel sauce for extra richness and texture.


