

1.Halloween Fudge Treats
Halloween desserts are a highlight of spooky season, where creativity and sweetness collide to form truly eye-catching treats. Among the most versatile and festive confections is fudge — rich, colorful, and remarkably easy to prepare. Whether you’re hosting a haunted house gathering, assembling a themed dessert board, or just want to whip up something indulgent and seasonal, fudge offers a perfect foundation.
In recent years, Halloween-inspired fudge has surged in popularity, with styles ranging from eerie green witch-themed pieces to deep red velvet and black chocolate swirls. The appeal lies not only in the taste but also in the visual effect — a perfect match for this dramatic and playful holiday. One standout is the Blood Moon Fudge, a visually stunning marbled combination of red and black fudge, inspired by the Blood Moon phenomenon and designed to mimic its eerie glow.
What makes fudge especially appealing is its ease of preparation. Unlike complicated baked goods, these confections require no oven time and can be made in under 30 minutes. This makes them ideal for last-minute party planning, Halloween movie nights, or even edible gift boxes. The basic ingredients — white chocolate chips, sweetened condensed milk, and gel food coloring — are easy to find, and the recipe is flexible enough to accommodate fun variations like pumpkin spice, cream cheese swirls, or edible glitter decorations.
Not only does this treat deliver in taste and appearance, but it also holds a prime spot on Halloween-themed dessert boards. Combined with candy eyes, gummy worms, and black-and-orange sprinkles, fudge can be styled to align with any Halloween aesthetic. For more visual inspiration, check out this Halloween dessert board idea on Pinterest, which shows how to arrange fudge and candies into an irresistible centerpiece.
Blood Moon Fudge isn’t just dessert — it’s a celebration of the spooky season. As we dive deeper into this article, you’ll find the exact recipe, ideas for variations, and tips to elevate your party dessert game using this rich and customizable sweet.
2. What is Blood Moon Fudge?
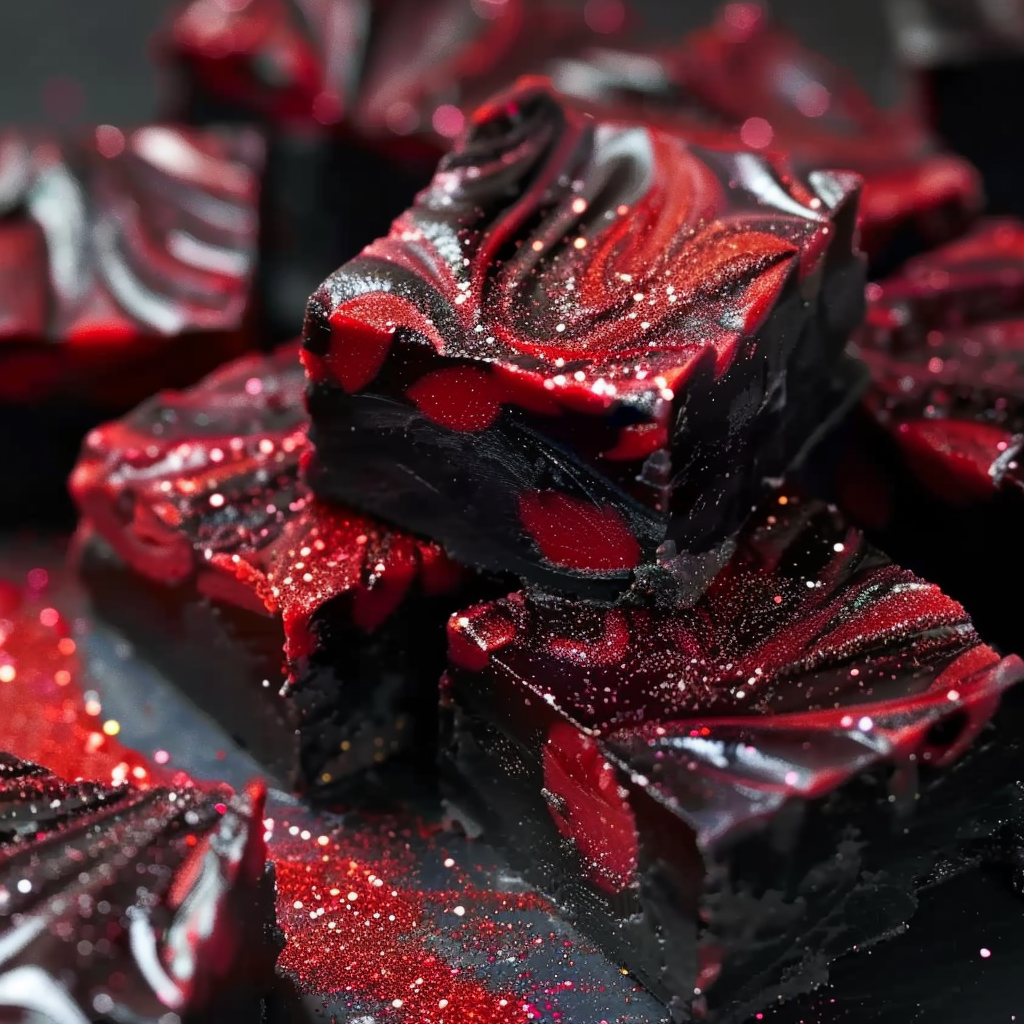
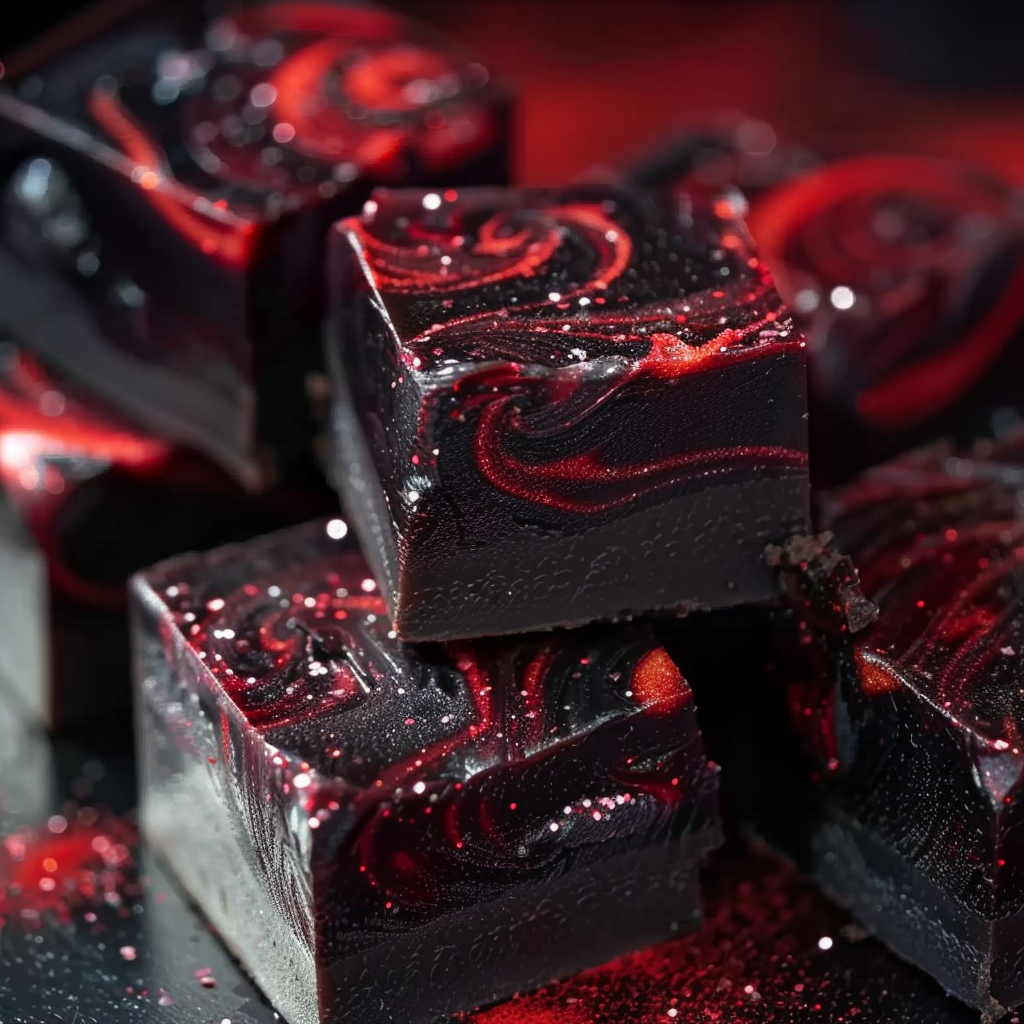
Blood Moon Fudge is a visually dramatic and richly flavored Halloween treat that takes inspiration from the natural lunar event known as the Blood Moon. During this phenomenon, the moon takes on a deep red hue due to the scattering of light in the Earth’s atmosphere, creating a mysterious and spooky visual — a perfect metaphor for the dark and indulgent swirl of red velvet and chocolate in this fudge.
In the culinary world, this fudge is characterized by its marbled pattern of deep red and black tones, typically achieved using high-quality gel food coloring. The base is made with white chocolate chips and sweetened condensed milk, two key ingredients that create a creamy texture and rich flavor. When tinted and swirled together, the result is a bold contrast that mimics the swirling shadows and fiery glow of a blood moon. You can further enhance the look with toppings like edible stars, glitter, or Halloween-themed candy decorations.
This dessert doesn’t just look impressive — it also delivers on taste. The red layer often incorporates red velvet flavor, adding subtle cocoa notes and a hint of tang, while the black portion can be infused with dark chocolate or black cocoa powder for depth. The result is a decadent, layered flavor that makes each bite feel indulgent and festive.
While traditional red velvet is usually associated with cakes, the flavor has successfully transitioned into other forms like cookies, cheesecake, and fudge. According to Wikipedia’s article on red velvet cake, this flavor profile has evolved significantly since its early 20th-century origins, often being combined with chocolate and cream cheese to achieve its signature taste.
One reason Blood Moon Fudge is so popular during Halloween is its versatility. You can make it in large batches, slice it into neat squares, and store it in the fridge until your event. It also travels well, making it a great option for potlucks, bake sales, and trick-or-treat party favors. On themed dessert boards, it serves as a bold centerpiece, drawing attention and enhancing the overall aesthetic.
This type of fudge is also easy to pair with other treats. You might complement it with Cookies and Cream Blackout Fudge, pumpkin truffles, or even classic Halloween cookies. And if you’re looking to add more visual elements to your dessert display, the Pinterest guide on spooky Halloween treats offers creative styling tips to elevate your presentation.
In essence, Blood Moon Fudge is the ultimate marriage of theme and flavor — a unique dessert that captures the spirit of Halloween while being simple enough for home cooks to master.
3. Base Recipe: Easy Blood Moon Red Velvet Fudge
Creating Blood Moon Fudge is a simple process that delivers stunning results. With just a few pantry staples, you can craft a visually striking dessert that’s perfect for Halloween parties, dessert boards, or spooky movie nights. Below is the step-by-step guide using the classic base recipe, designed for a marbled swirl of red velvet and black chocolate fudge.
Ingredients:
-
3 cups white chocolate chips
-
1 can (14 oz) sweetened condensed milk
-
1 teaspoon vanilla extract
-
Red gel food coloring
-
Black gel food coloring
-
Edible glitter, gold or silver stars (optional, for decoration)
You’ll find that using white chocolate is essential here, not just for the creamy texture, but also for allowing the food coloring to pop. According to Wikipedia’s page on white chocolate, it contains cocoa butter but no cocoa solids, giving it that signature ivory hue — perfect for customizing with bold Halloween colors.
Instructions:
-
Line an 8×8-inch square baking pan with parchment paper, letting the sides hang over slightly. This makes it easier to lift the fudge out once set.
-
In a medium saucepan over low heat, combine the white chocolate chips and sweetened condensed milk. Stir continuously until smooth and fully melted. Avoid high heat, which can scorch the mixture.
-
Remove from heat and stir in vanilla extract for flavor depth.
-
Divide the fudge mixture into two equal parts.
-
Tint one half with red gel food coloring until it resembles a deep blood red velvet tone.
-
Tint the other half with black gel food coloring for a jet-black appearance. For an even richer black, some bakers add a small amount of black cocoa powder.
-
-
Drop alternating spoonfuls of red and black fudge into the prepared pan, creating a scattered pattern.
-
Use a skewer or butter knife to gently swirl the colors together. Be careful not to overmix — you want a marbled look, not blended colors.
-
If desired, sprinkle the surface with edible glitter or stars while the fudge is still warm. This gives a shimmering “moonlit” effect.
-
Place the pan in the refrigerator and chill for at least 2 hours, or until firm to the touch.
-
Once fully set, lift the fudge out of the pan using the parchment paper and slice into small, even squares.
For extra inspiration on food styling, check out Pinterest’s food coloring tips, which help achieve vivid hues without altering taste. It’s also worth noting that gel food coloring is preferred over liquid because it gives intense color without thinning the fudge mixture.
To explore other uses of sweetened condensed milk, visit the Wikipedia entry, which highlights how this versatile ingredient enhances richness and texture in countless dessert recipes.
With this base recipe, you have a visually stunning and delicious treat that’s ready to become the centerpiece of your Halloween celebration. Next, we’ll explore why this recipe is especially effective for parties and gatherings.
4. Why This Recipe Works for Halloween Parties
Blood Moon Fudge is more than just visually stunning — it’s also a practical, party-friendly dessert that fits perfectly into the fast-paced atmosphere of Halloween celebrations. Its texture, flavor, and customizable design make it an ideal choice for entertaining guests of all ages.
Here’s why this recipe is a go-to for Halloween events:
-
No baking required: With no oven needed, this recipe saves time and reduces the stress of last-minute dessert prep. It’s easy to whip up while juggling other party details.
-
Foolproof ingredients: The combination of white chocolate chips and sweetened condensed milk results in a consistently smooth and creamy fudge that sets up beautifully. Even novice cooks will find success.
-
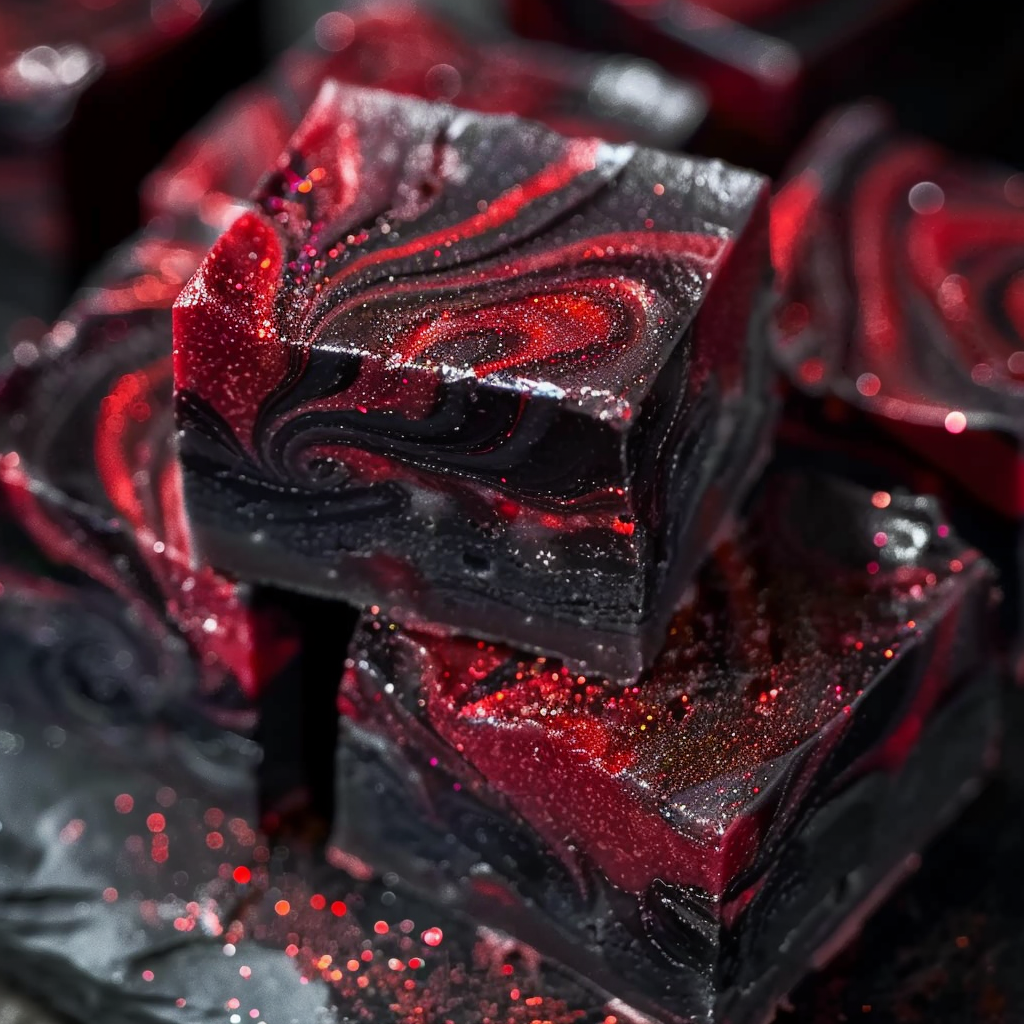
High visual impact: The dramatic swirl of red and black mimics the mysterious look of the Blood Moon, adding spooky flair to any table spread. When decorated with edible glitter or stars, the fudge takes on a galaxy-like finish that’s both eerie and elegant.
-
Easy to portion: Once set, the fudge cuts cleanly into neat squares, making it easy to serve and share. This is especially helpful when preparing dessert boards or assembling treat bags for kids.
-
Kid-friendly and customizable: Kids can help swirl the colors and sprinkle on decorations, making it a fun, family-friendly kitchen activity. You can also adjust the flavorings, add candy eyes, or swap colors to suit your party theme.
-
Pairs well with other Halloween treats: It complements items like cookies, popcorn balls, and themed beverages, allowing for a coordinated dessert spread. To see how it fits into a larger presentation, check out this Halloween dessert board on Pinterest.
Whether you’re serving guests indoors or handing out sweets from a decorated porch, Blood Moon Fudge offers the perfect mix of creativity, flavor, and convenience for Halloween night.
5. Flavor Variations to Try
One of the best things about Blood Moon Fudge is how versatile it is. The base recipe can be adapted with seasonal flavors, colors, and add-ins to create a wide variety of Halloween-ready treats. These creative variations will help you build a dessert board that’s as flavorful as it is festive, offering guests multiple textures and tastes while staying on theme.
Pumpkin Spice White Chocolate Fudge
This fall-forward twist is perfect for those who love the cozy flavor of pumpkin spice.
-
Replace the vanilla extract with ½ teaspoon of pumpkin spice blend.
-
Add orange gel food coloring to the fudge base for a festive look.
-
Optional: Top with mini marshmallows or pumpkin-shaped sprinkles.
The warm spice pairs beautifully with white chocolate, enhancing the seasonal vibe without overpowering the sweetness.
Cookies and Cream Blackout Fudge
This version adds a dramatic black hue with crunchy texture.
-
Add ½ cup of crushed chocolate sandwich cookies (like Oreos) to the black fudge portion before swirling.
-
Use black gel food coloring or black cocoa powder to deepen the base color.
-
For a more intense black flavor, consider blending in a small amount of activated charcoal or black cocoa (found in several Pinterest recipes).
This variation has visual drama and an irresistible crunch.
Vampire Bite Fudge
Create a spooky “bleeding” effect with this fruit-filled version.
-
Swirl in a few tablespoons of seedless raspberry or strawberry jam into the red layer before pouring it into the pan.
-
Add small jam-filled pockets throughout for a surprise “bite” in the center of each piece.
-
Consider finishing with candy fangs or red sugar crystals.
The sweet and tangy jam adds depth and makes this fudge stand out on any Halloween table.
Red Velvet Cream Cheese Fudge
Inspired by red velvet cake, this version introduces a creamy tang.
-
Mix 4 oz of softened cream cheese with ½ cup powdered sugar and 1 tsp vanilla extract to create a creamy swirl.
-
Gently swirl the cream cheese layer through the red fudge mixture.
-
This adds richness and flavor complexity, making the fudge taste like cheesecake brownies.
Red velvet and cream cheese is a classic combination, and this version of the fudge captures it perfectly.
Ghostly Marshmallow Swirl
Light, fluffy, and a hit with kids, this version adds playful texture.
-
Fold 1 cup of mini marshmallows into the fudge just before pouring into the pan.
-
You can also add a white marshmallow swirl to the black layer to mimic ghosts floating in a dark sky.
-
Decorate with candy eyeballs or silver star sprinkles for a fun finish.
This version is great for dessert boards where visual storytelling matters.
Each of these variations builds on the base recipe, keeping the preparation simple while letting you explore different Halloween aesthetics. For additional design and flavor inspiration, explore spooky Halloween treat ideas on Pinterest or browse through Halloween flavor trends on food blogs and seasonal recipe roundups.
These creative riffs not only diversify your dessert spread but also make your Halloween gathering feel curated and intentional — a feast for the eyes and the taste buds.
6. How to Build a Halloween Fudge Dessert Board
A well-crafted Halloween dessert board turns a collection of simple sweets into a striking centerpiece. Blood Moon Fudge fits beautifully into this setup, offering visual drama and rich flavor that balances well with other treats. Creating a cohesive and exciting board doesn’t require professional experience — just a few styling tricks and thoughtful variety.
Choose a Theme
Decide on a concept to guide your color and decor choices. Popular Halloween themes include:
-
Witch’s Apothecary (green, purple, black)
-
Haunted Graveyard (gray, black, deep red)
-
Moonlight Magic (silver, white, red, black)
-
Monster Mash (bright neons and classic candy)
Blood Moon Fudge works especially well with lunar, vampire, and night-themed boards thanks to its red and black marbling.
Mix Textures and Flavors
Balance the creamy texture of fudge with crunchy, chewy, and airy elements:
-
Hard candies (candy corn, suckers)
-
Chocolate-dipped pretzels
-
Mini caramel apples
-
Gummy worms or eyeballs
-
Popcorn balls or kettle corn
-
Shortbread cookies with Halloween designs
Include salty snacks like popcorn or pretzels to offset the sweetness.
Layering and Height
Create depth by layering treats on different levels:
-
Use cake stands, bowls, and plates in varying heights.
-
Stack cookies or fudge squares into small towers.
-
Use black or slate-colored boards for a moody effect.
Refer to Pinterest boards like this one for visual arrangement ideas and seasonal props.
Add Edible and Decorative Accents
Finish with themed accents:
-
Sprinkle edible glitter or gold stars on fudge and cookies.
-
Place plastic spiders, mini pumpkins, or cauldron-shaped bowls around the board.
-
Use parchment cutouts or black lace for lining.
This not only enhances presentation but also encourages guests to explore the entire board.
Keep it Practical
Use toothpicks or mini tongs for hygiene. Provide napkins and small plates. Label unique items like Vampire Bite Fudge or Ghost Swirl Squares with small tags or spooky names.
This setup becomes both a conversation piece and a functional snack station that guests can enjoy all night long.
7. Decorating Tips for Maximum Halloween Vibes
To fully embrace the spirit of Halloween, the way you decorate your fudge and dessert board matters just as much as the recipe itself. Here are simple yet effective decorating tips that will elevate your Blood Moon Fudge and surrounding treats.
-
Edible glitter and shimmer dust: Add a galactic or mystical feel by dusting the top of your fudge with edible gold, silver, or red shimmer. This brings out the marbled effect and gives the illusion of a moonlit glow.
-
Candy toppers: Use small candy eyeballs, gummy fangs, or bones to match your Halloween theme. These are especially fun for kids and can double as edible garnishes.
-
Themed sprinkles: Black, orange, red, and white sprinkles or sanding sugars can highlight the fudge’s colors and add a crunchy texture.
-
Shape cutters: Before the fudge sets completely, use small cookie cutters to make bats, moons, or coffin shapes.
-
Serve in style: Display fudge in black paper boxes, mini coffins, cauldrons, or on a tray lined with parchment printed with spiderwebs or blood splatters.
Take inspiration from this Pinterest board of edible Halloween glitter ideas to give your fudge that final haunting touch.
8. Storage and Make-Ahead Tips
One of the biggest advantages of making Blood Moon Fudge is its long shelf life and easy storage, making it an ideal make-ahead dessert for parties and events.
-
Refrigerator storage: Once set, store the fudge in an airtight container in the fridge. It stays fresh for up to two weeks.
-
Room temperature: In cooler climates, it can also be stored at room temperature for 3–5 days in a cool, dry spot away from direct sunlight.
-
Freezing: Fudge can be frozen for up to three months. Wrap it tightly in parchment, place in a zip-top freezer bag, and label it. Thaw in the refrigerator overnight before serving.
-
Batch preparation: Make multiple trays in advance, storing each in a labeled container by flavor. This is especially useful for large events or dessert tables.
-
Cutting and serving: Slice fudge just before serving to keep edges clean and colors fresh. For precise squares, use a sharp knife warmed under hot water, wiping clean between cuts.
These tips make it easy to manage your time while still impressing guests with homemade Halloween fudge.
9. Serving Suggestions for Halloween Parties
Presentation plays a huge role in how your Halloween treats are received. These serving suggestions will help showcase your Blood Moon Fudge in the most festive and crowd-pleasing way.
-
Serve as squares or bite-sized pieces: Cut into small squares and place them in black cupcake liners or parchment cups. This makes them easy to grab and keeps things clean.
-
Use themed props: Serve fudge on dark wooden boards, inside small cauldrons, or arrange on black tiered stands.
-
Pair with themed drinks: Serve alongside blood-red mocktails, pumpkin spice lattes, or hot cider for a warm pairing.
-
Create treat bags: Wrap individual fudge squares in wax paper and tie with orange and black ribbon. These work great for party favors or Halloween handouts.
-
Label creatively: Use spooky names like “Witch’s Brew Bites” or “Lunar Shadows” for your fudge varieties. Labeling adds intrigue and fun, especially for kids.
-
Integrate into dessert boards: Combine with other themed items like ghost cookies, bat truffles, or Cookies and Cream Fudge to complete your dessert vision.
This kind of thoughtful presentation ensures your Halloween dessert table looks just as good as it tastes.
10. FAQs – People Also Ask
Can you make Halloween fudge without a candy thermometer?
Yes. Blood Moon Fudge uses sweetened condensed milk and white chocolate chips, so there’s no need to track temperature. Just melt gently and stir constantly for a smooth finish.
How do you swirl fudge colors without mixing them too much?
Use separate spoons to dollop each color randomly into the pan. Then gently drag a skewer or knife through the mixture with slow, shallow movements. Avoid overmixing, which muddies the design. Refer to Pinterest food coloring swirl techniques for visual guidance.
What kind of food coloring works best for fudge?
Gel food coloring is the best choice. It’s highly pigmented and doesn’t alter the consistency of your fudge like liquid colorants can. Brands like AmeriColor or Wilton work well.
Can I use milk chocolate instead of white chocolate?
Yes, but it will affect both the flavor and color. White chocolate provides a neutral base that shows off the red and black colors better. Using milk or dark chocolate will mute the visual contrast.
How far in advance can I make fudge for a party?
You can make it up to two weeks in advance if stored in the refrigerator. For longer storage, freeze it and thaw the night before your event.
Is red velvet fudge just colored white chocolate?
Not entirely. While coloring plays a role, red velvet fudge often includes a bit of cocoa powder or chocolate flavoring to mimic the classic cake taste. The addition of vanilla or cream cheese can enhance authenticity.
What’s the best way to cut clean squares of fudge?
Use a sharp knife dipped in hot water and wiped clean between cuts. This creates smooth, clean lines and preserves the swirl pattern on top.

Blood Moon Fudge Red Velvet And Chocolate Ideas For Halloween
- Author: Naomi
Description
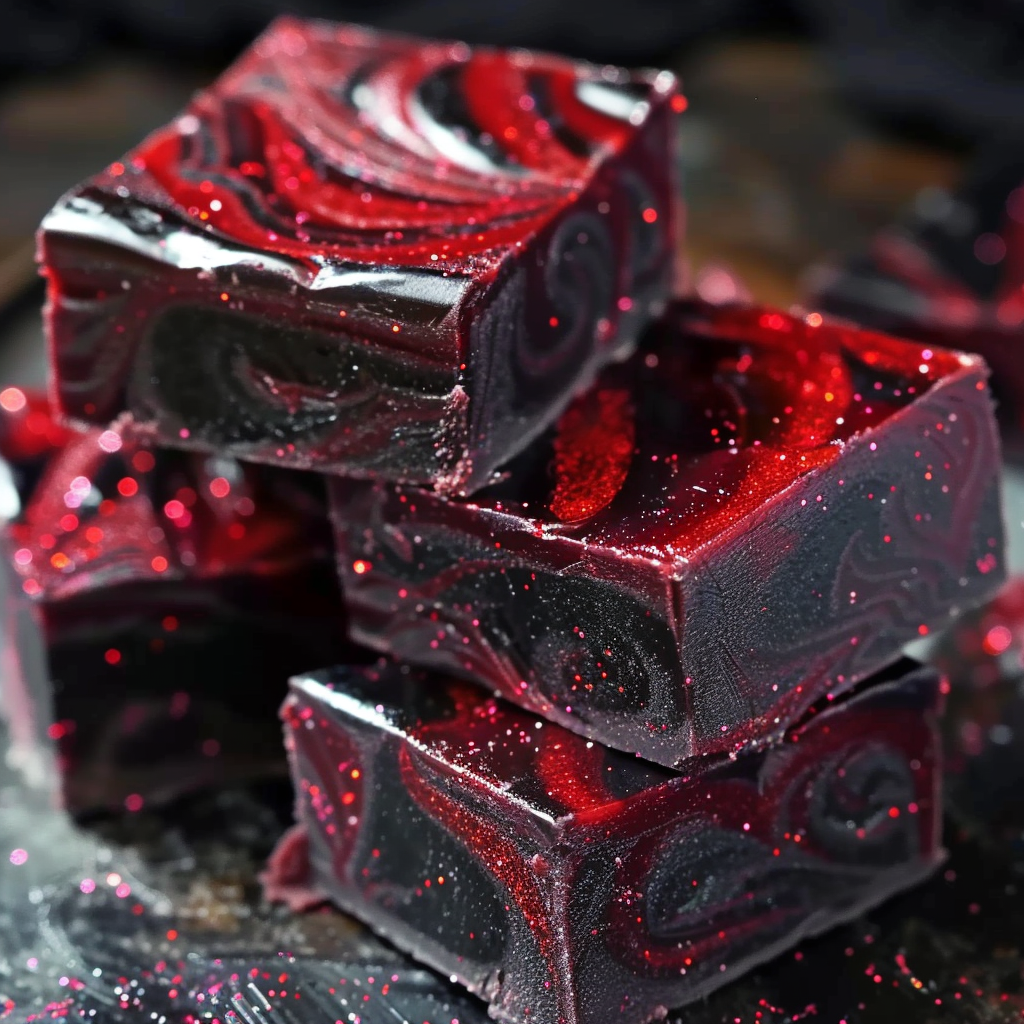
A hauntingly delicious twist on classic fudge, Blood Moon Fudge features marbled swirls of deep red velvet and jet-black chocolate, creating a dramatic treat inspired by lunar lore. Made with creamy white chocolate, sweetened condensed milk, and vivid gel food coloring, this no-bake dessert is easy to prepare and perfect for Halloween parties. Each square is rich, festive, and visually stunning — making it a must-have on any spooky dessert board or haunted house buffet.
Ingredients
- 3 cups white chocolate chips
- 1 can (14 oz) sweetened condensed milk
- 1 teaspoon vanilla extract
- Red gel food coloring
- Black gel food coloring
- Edible gold or silver stars or glitter (optional, for decoration)
Instructions
- Line an 8×8-inch square baking pan with parchment paper, leaving a slight overhang on the sides for easy removal.
- In a medium saucepan over low heat, combine white chocolate chips and sweetened condensed milk. Stir constantly until the mixture is fully melted and smooth.
- Remove from heat and stir in vanilla extract.
- Divide the mixture into two bowls. Tint one portion with red gel food coloring until deep red. Tint the other portion with black gel food coloring until jet black.
- Drop spoonfuls of the red and black fudge mixture randomly into the prepared pan to create a marbled effect.
- Use a knife or skewer to swirl the colors together slightly for a blood moon pattern. Be careful not to overmix.
- If using edible glitter or stars, sprinkle them over the top while the fudge is still warm.
- Refrigerate until set, about 2 hours or until firm to the touch.
- Once set, lift the fudge out using the parchment paper and cut into small squares to serve.
Notes
-
Coloring tips: Always use gel-based food coloring for best results. Liquid food dye can make the mixture too runny.
-
Swirling method: Swirl just enough to blend the edges. Overmixing will create a grayish tone.
-
Decoration: Edible glitter, candy eyes, and star sprinkles add a magical finishing touch.
-
Flavor boost: Add a touch of black cocoa powder or cream cheese to enhance richness.
-
Texture variation: Fold in mini marshmallows, cookie crumbs, or jam for added texture and flavor.
-
Storage: Keep refrigerated in an airtight container for up to 2 weeks, or freeze for up to 3 months.


