

The Buckeye Brownie Cookie is a delightful fusion of two beloved treats: brownies and Buckeye candies. Named after the Buckeye tree, which is the state tree of Ohio, Buckeye candies are small, round peanut butter balls dipped in chocolate, resembling the nut of the Buckeye tree. These candies are especially popular in Ohio and are a traditional treat, often enjoyed during holidays and celebrations. Buckeye Brownie Cookies take inspiration from these flavors but give them a new twist by turning them into a soft, chewy cookie with a rich brownie base and a creamy peanut butter filling.
These cookies are the perfect indulgence for dessert lovers who crave both chocolate and peanut butter. The rich, fudge-like brownie cookie base provides the perfect contrast to the smooth, creamy peanut butter filling, while a drizzle of melted chocolate on top completes the experience. The combination of textures and flavors makes this cookie an irresistible treat that is sure to satisfy any sweet tooth.
What sets this recipe apart from other cookies or brownies is the layered complexity of flavors and the ease of preparation. Using a boxed brownie mix as a base simplifies the process, making it accessible even for beginner bakers, while the addition of a peanut butter ball creates a sophisticated and nostalgic flavor. Whether you’re looking for a unique dessert to bring to a party or simply want to treat yourself at home, Buckeye Brownie Cookies are the ultimate comfort dessert.
Ingredients Breakdown
This recipe calls for a few simple ingredients, most of which are pantry staples, making it convenient for a quick dessert. Here’s a breakdown of what you’ll need:
- Brownie mix: The base of this cookie is made from a 19.5-ounce box of fudge brownie mix. Using a boxed mix not only cuts down on preparation time but also guarantees a fudgy, chewy texture that complements the other ingredients perfectly.
- Butter: Melted butter (1/4 cup) is added to the brownie mix to enhance its richness and help bind the dough together.
- Cream cheese: Four ounces of softened cream cheese add creaminess and moisture to the dough, creating a softer cookie.
- Egg: A single large egg helps to bind the ingredients and gives the cookies structure.
For the filling:
- Peanut butter: Creamy peanut butter (1 cup) is used for the filling, giving the cookies that classic Buckeye flavor.
- Powdered sugar: One cup of powdered sugar is combined with the peanut butter to create a sweet, smooth filling that holds its shape when baked.
For the topping:
- Semi-sweet chocolate chips: Four ounces of melted chocolate chips are drizzled over the top, adding a final layer of rich, chocolatey goodness.
Alternatives:
- You can swap out the fudge brownie mix for a homemade version or try different brownie mixes for varied results.
- Substituting butter with margarine or coconut oil can slightly change the flavor and texture but will still work well.
- Feel free to experiment with crunchy peanut butter or dark chocolate for different textures and flavors.
The Baking Tools You’ll Need
To make these Buckeye Brownie Cookies, you’ll need a few essential kitchen tools:
- Mixing bowls: You’ll need at least two bowls—one for the brownie cookie dough and one for the peanut butter filling.
- Electric mixer: While you can mix the dough by hand, an electric mixer makes the process faster and ensures a smooth, well-incorporated dough.
- Cookie sheet: An ungreased cookie sheet is essential for baking the cookies. A non-stick or parchment-lined sheet can help prevent sticking.
- Cookie scoop: A small cookie scoop helps portion out the dough evenly, making uniform cookies. If you don’t have a cookie scoop, a spoon or measuring tablespoon will work.
- Wire rack: After baking, the cookies need to cool on a wire rack to prevent them from becoming soggy underneath.
- Microwavable bowl: This is for melting the chocolate chips quickly and easily.
If you don’t have an electric mixer, you can mix the ingredients by hand with a whisk or wooden spoon. Similarly, if you lack a cookie scoop, use a spoon to form evenly sized dough portions.
Detailed Step-by-Step Recipe Instructions
Making the Brownie Cookie Base
To start, preheat your oven to 350°F (177°C) and gather your ingredients for the cookie base. In a medium-sized mixing bowl, combine the boxed fudge brownie mix, 1/4 cup of melted butter, 4 ounces of softened cream cheese, and 1 large egg. Using an electric mixer, beat the ingredients on medium speed until fully combined. The dough will be soft, sticky, and rich, which is exactly what you want for this recipe.
To ensure the dough has the correct texture, it should be slightly thick but still moist and pliable. If the dough feels too dry, you can add a tablespoon of water or milk to soften it. Be careful not to overmix the dough, as it can affect the texture of the cookies.
Now, it’s time to shape the cookies. Use a small cookie scoop or a tablespoon to portion out the dough onto an ungreased cookie sheet. This will help ensure that all cookies are of uniform size, which is important for even baking. If the dough sticks to your hands or the scoop, dampen your hands with water or lightly spray the scoop with non-stick spray for easier handling. Once the dough is portioned, gently smooth the edges of each cookie to form round shapes, ensuring they will bake evenly.

Preparing the Peanut Butter Filling
While the cookie dough is baking, it’s time to prepare the peanut butter filling. In a separate mixing bowl, combine 1 cup of creamy peanut butter with 1 cup of powdered sugar. Using a spoon or a mixer, stir until the mixture is smooth and fully combined. The powdered sugar helps to stiffen the peanut butter, creating a dough-like consistency that holds its shape during baking.
To form the peanut butter balls, take about 1 tablespoon of the mixture and roll it between your hands to form 1-inch round balls. It’s helpful to use a measuring spoon or small scoop to keep the sizes consistent, as this will ensure that each cookie gets an equal amount of filling. If the peanut butter mixture becomes too sticky to handle, chilling it in the fridge for a few minutes can make it easier to work with.
Make sure to create enough peanut butter balls to match the number of cookies you plan to bake. Once all the balls are formed, set them aside and wait for the cookies to finish baking.
Baking the Cookies: Timing and Temperature Tips
Baking the cookies at 350°F (177°C) is essential for achieving the perfect texture. This temperature ensures that the cookies bake evenly and develop a slightly crisp edge while remaining soft and chewy in the center.
Bake the cookie dough for about 12 minutes, but be sure to keep an eye on them. Every oven can vary slightly, and since these cookies are made with a brownie mix, you want to avoid overcooking them, which could make them dry. The cookies should appear set on the edges but still soft in the middle when removed from the oven. A good visual cue is when the tops of the cookies start to crack slightly.
If you’re using a convection oven, you may need to reduce the baking time by 1-2 minutes, as convection ovens cook more quickly. For bakers at high altitudes, it might be necessary to increase the baking temperature by 15°F and decrease the baking time slightly. Always use an oven thermometer if you’re unsure about your oven’s accuracy.
Remember, cookies will continue to cook for a minute or two after being removed from the oven due to residual heat, so it’s better to err on the side of slightly undercooked rather than overbaking.
Assembling the Buckeye Brownie Cookies
Once the cookies are out of the oven, immediately press a peanut butter ball into the center of each warm cookie. The warmth of the cookies will soften the peanut butter filling slightly, which is exactly what you want. Press gently but firmly enough so that the ball sits securely in the cookie without completely flattening it. The cookie will have a little give, but you want to avoid squishing it too much, as this can affect its appearance and texture.
It’s important to work quickly during this step, as the cookies are easiest to work with when they are still warm. If the cookies cool down too much before you press in the peanut butter balls, they might crack or become difficult to shape.
After inserting the peanut butter balls, allow the cookies to cool on the baking sheet for about 5 minutes. This short cooling period helps the cookies firm up slightly, making them easier to transfer to a wire cooling rack. After 5 minutes, carefully move the cookies to a wire rack to cool completely.
To prevent the peanut butter from melting too much or becoming too soft, make sure not to place the cookies in direct heat or sunlight while cooling. Allow them to cool completely before moving on to the final step, which involves adding the melted chocolate.
Melting the Chocolate for the Topping
To prepare the chocolate topping, place 4 ounces of semi-sweet chocolate chips in a microwavable bowl. Microwave the chocolate in 30-second intervals, stirring after each interval to ensure even melting. Depending on your microwave’s power, it should take about 1-2 minutes to fully melt the chocolate.
Be careful not to overheat the chocolate, as it can burn quickly in the microwave. If the chocolate appears thick or clumpy, you can add a small amount of butter or milk (about 1 teaspoon) to create a smoother, more pourable consistency. Stir well after each addition to incorporate the liquid evenly.
If you prefer a creamier or richer topping, consider using dark chocolate or adding a tablespoon of peanut butter to the melted chocolate for an extra layer of flavor.
Alternatively, you can melt the chocolate using the double boiler method by placing the chocolate in a heatproof bowl over a pot of simmering water. Stir continuously until melted, being careful not to allow water to splash into the chocolate.
Once the chocolate is melted and smooth, it’s ready for the final step: drizzling over the cookies.
Final Assembly: Adding the Melted Chocolate
Using a spoon, carefully drizzle about ½ tablespoon of melted chocolate over each cookie, ensuring it covers the peanut butter ball completely. The chocolate should flow easily, creating a smooth coating over the top of the peanut butter filling. If the chocolate is too thick to drizzle, gently reheat it in the microwave for a few seconds or add a bit more butter to thin it out.
Once all the cookies are topped with chocolate, allow them to sit at room temperature for about 30 minutes to let the chocolate set completely. If you’re in a hurry, you can place the cookies in the refrigerator for 10-15 minutes to speed up the process.
Once the chocolate has hardened, the cookies are ready to serve or store. To maintain the best texture and flavor, store the cookies in an airtight container at room temperature for up to 3 days, or refrigerate them for up to a week.
Flavor Variations and Substitutes
This recipe can be customized in many ways to suit your taste preferences. For example, if you enjoy a bit of crunch, try using crunchy peanut butter instead of creamy peanut butter for the filling. You can also substitute dark chocolate for the semi-sweet chocolate to give the cookies a richer, slightly bitter contrast to the sweet peanut butter.
For an elevated flavor profile, sprinkle a pinch of flaky sea salt or chopped nuts (like pecans or peanuts) over the melted chocolate before it sets. This adds texture and balances the sweetness of the cookie.
If you’re looking to make this recipe gluten-free, simply use a gluten-free brownie mix. Most other ingredients in the recipe are naturally gluten-free, making it easy to adapt for those with dietary restrictions.
You can also experiment with toppings like mini chocolate chips, coconut flakes, or even a drizzle of white chocolate for a decorative touch.
Storing and Serving Tips
To keep your Buckeye Brownie Cookies fresh, store them in an airtight container at room temperature. They will stay soft and delicious for up to 3 days. If you need to store them for longer, consider refrigerating them for up to a week. Just be sure to let the cookies come to room temperature before serving to allow the peanut butter and chocolate to soften slightly.
For longer storage, you can freeze these cookies for up to 2 months. Place them in a single layer in an airtight container or freezer bag, separating layers with parchment paper. To serve, thaw the cookies at room temperature for a few hours.
These cookies pair beautifully with a cold glass of milk, a scoop of vanilla ice cream, or a cup of coffee, making them a versatile and satisfying treat for any occasion.
FAQs Section
1. Can I use homemade brownie batter instead of boxed mix?
Yes, you can use homemade brownie batter, but it may affect the texture of your cookies. Boxed brownie mixes are formulated to have a specific balance of ingredients that result in a fudgy, chewy cookie base. Homemade brownie batter, depending on the recipe, might be more cakey or dense. If you decide to use a homemade recipe, ensure it’s one that produces a fudgier brownie to maintain the desired texture. The convenience of the boxed mix also saves time and reduces guesswork, but homemade batter can add a personalized touch to the cookies.
2. What can I use as a substitute for cream cheese?
If you don’t have cream cheese on hand, you can substitute it with Greek yogurt or mascarpone. Greek yogurt will provide a tangy flavor and slightly lighter texture, while mascarpone is richer and creamier, similar to cream cheese but with a milder taste. Keep in mind that using Greek yogurt may make the dough a bit wetter, so you might need to add a tablespoon or two of flour to compensate. Mascarpone will closely mimic the texture of cream cheese but add a more buttery flavor.
3. How do I prevent my cookies from spreading too much?
If your cookies are spreading too much during baking, it’s often because the dough is too warm. To prevent this, chill the dough for about 30 minutes before baking. Another tip is to ensure you’re not adding too much butter—using exact measurements is key. You can also slightly increase the amount of flour in the dough if you notice excessive spreading.
4. Can I freeze the cookie dough?
Yes, you can freeze the cookie dough. Shape the dough into cookies, place them on a baking sheet, and freeze them until solid. Once frozen, transfer the dough balls to an airtight container or freezer bag. When ready to bake, you can bake them directly from the freezer; just add 1-2 minutes to the baking time.
5. Why is my melted chocolate too thick?
If your melted chocolate is too thick, it could be overheating or seizing. To fix this, stir in a small amount of butter or vegetable oil to smooth it out. If using a microwave, melt the chocolate in short intervals (about 15-30 seconds) to avoid burning. Stirring frequently will help distribute the heat evenly and prevent clumping.

Buckeye Brownie Cookies
Description
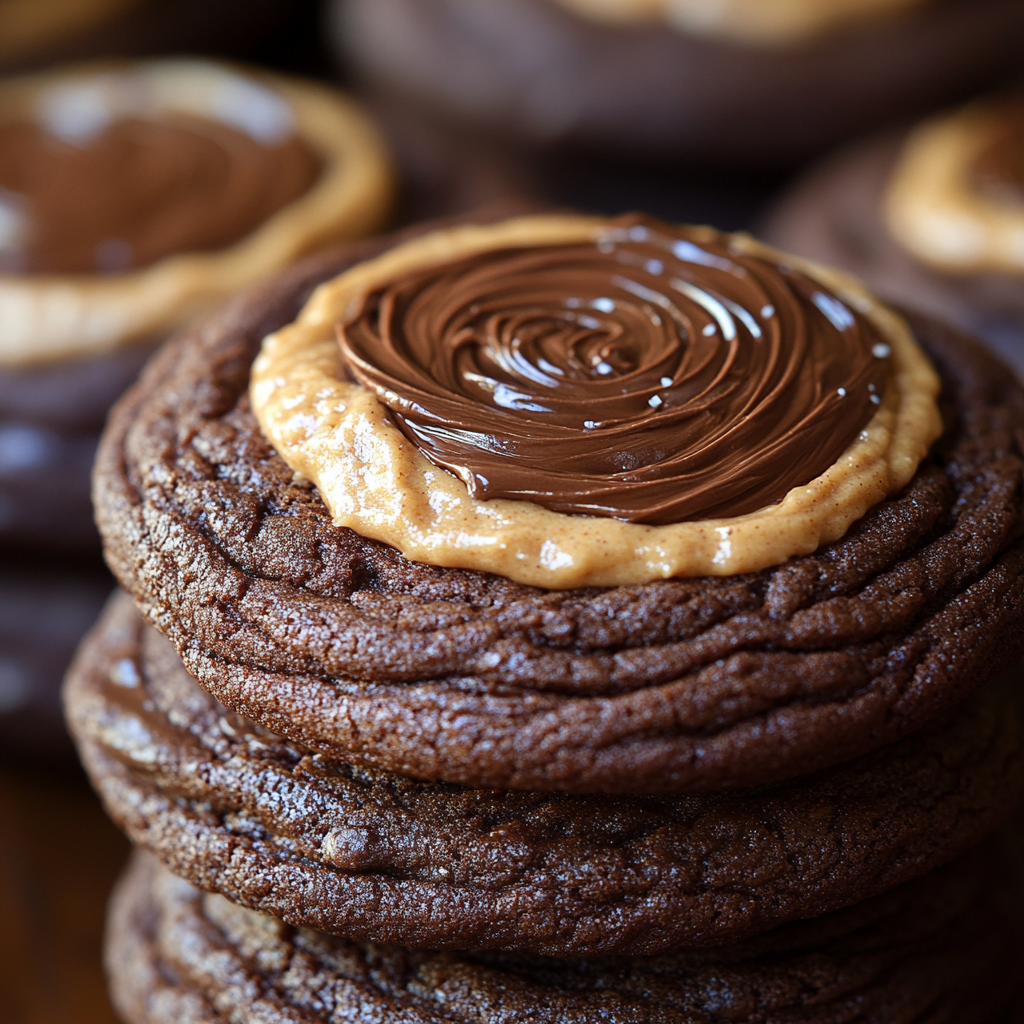
Buckeye Brownie Cookies are the ultimate treat for those who love the classic combination of chocolate and peanut butter. These decadent cookies start with a rich, fudgy brownie cookie base made from a boxed mix, which is then topped with a sweet peanut butter ball and finished with a smooth layer of melted chocolate. Inspired by the beloved Buckeye candies, these cookies offer layers of flavor and texture—crispy edges, a chewy center, creamy peanut butter, and rich chocolate—making them irresistible to dessert lovers.
Ingredients
- 1 box fudge brownie mix (19.5 ounce or family size)
- 1/4 cup butter melted
- 4 ounces cream cheese softened
- 1 large egg
- 1 cup powdered sugar
- 1 cup creamy peanut butter
- 4 ounces semi-sweet chocolate chips
Instructions
-
Heat oven to 350 degrees. In a medium bowl, beat the brownie mix, butter, cream cheese, and egg. The dough will be a little sticky. Scoop the dough onto an ungreased cookie sheet, making about 24 cookies. Smooth the edges of each to form a round cookie.
-
In a separate bowl, mix the powdered sugar and the peanut butter until it is completely combined. Form the mixture into about 1 inch balls. Make sure you have one ball for each cookie. Set aside.
-
Bake for the cookie dough 12 minutes, keeping an eye out to make sure the cookies doesn’t overcook or undercook.
-
As soon as the cookies come out of the oven, press a peanut butter ball lightly into the center of each cookie. The peanut butter mixture will soften slightly, but that is OK. Let the cookies cool for 5 minutes, then transfer them to a wire rack to cool completely.
-
Melt the 4 ounces of chocolate in a microwavable bowl for 30 seconds. Stir the chocolate and melt for additional 15 seconds or until the chocolate is completely melted. Spoon about ½ a tablespoon of melted chocolate on top of each cookie so it covers the peanut butter ball. Let the chocolate set. Store in an airtight container.
Notes
- Make-Ahead Tip: You can prepare the peanut butter balls and cookie dough ahead of time and store them separately in the refrigerator for up to 24 hours before baking. This makes the baking process quicker and easier when you’re ready to assemble and bake the cookies.
- Peanut Butter Variations: If you prefer a crunchier texture, use crunchy peanut butter instead of creamy. You can also substitute the peanut butter with almond butter or another nut butter for a different flavor profile.
- Chocolate Choices: While semi-sweet chocolate is recommended, feel free to use milk or dark chocolate for a milder or richer taste. You can also experiment by adding a dash of vanilla extract or sea salt to the melted chocolate for extra flavor.
- Baking Tip: If your cookies are spreading too much during baking, chill the dough for about 30 minutes before baking to ensure they hold their shape.
- Storage: These cookies store well in an airtight container at room temperature for up to 3 days. For longer storage, freeze them for up to 2 months and thaw at room temperature before serving.


Are these cookies stackable after putting the frosting on? How would you transport these? TIA
★★★★★