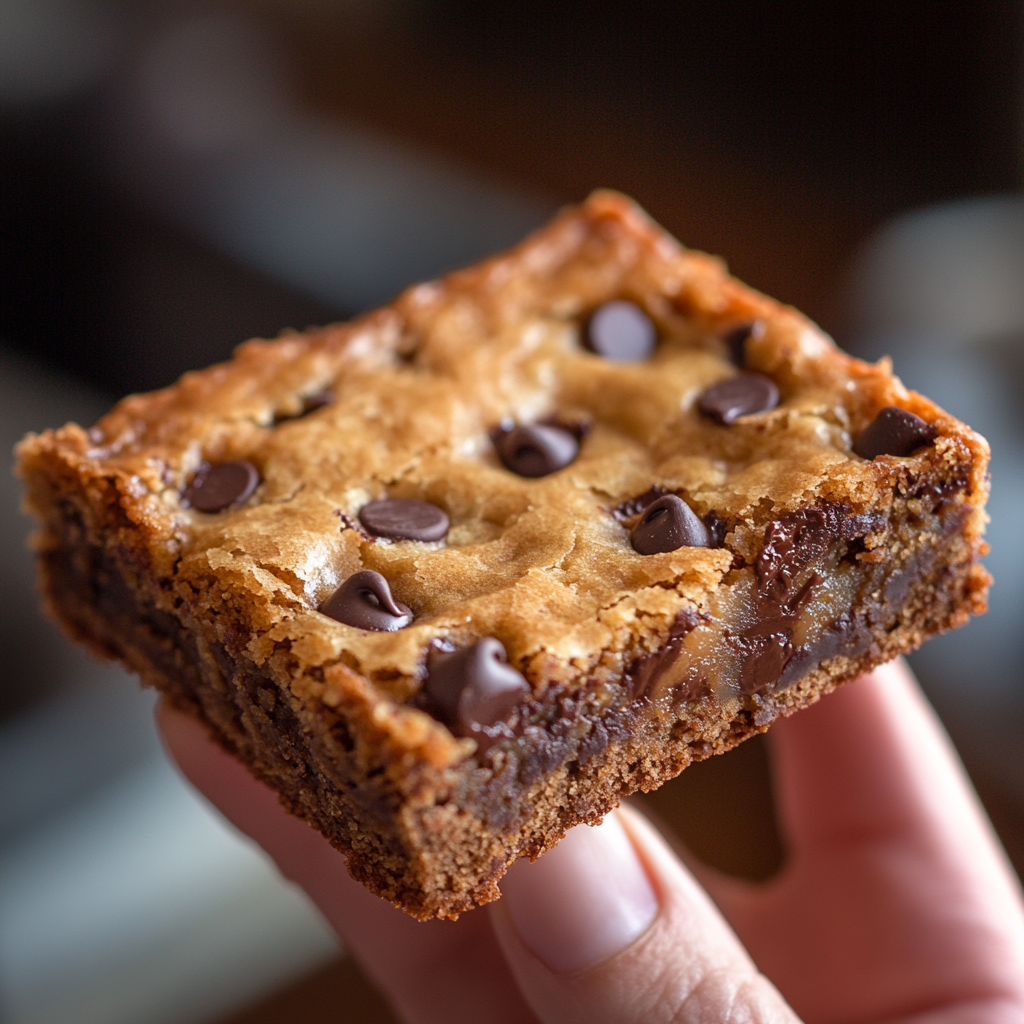
Bananas and chocolate chips are a match made in dessert heaven. The natural sweetness of overripe bananas, paired with the rich, creamy texture of melted chocolate, creates an irresistible combination that delights both kids and adults alike. Whether you’re looking for a sweet snack to enjoy with your morning coffee or a quick dessert for family gatherings, Banana Chocolate Chip Bars are the perfect solution.
Not only are these bars incredibly easy to make, but they also require just a handful of simple ingredients that you likely already have in your kitchen. With just a few minutes of preparation and under 40 minutes of baking time, you can create a batch of moist, flavorful bars that will have everyone reaching for seconds. Plus, the recipe is forgiving and versatile, allowing you to tweak it with add-ins like nuts or different types of chocolate.
If you’re craving a dessert that’s rich, satisfying, and quick to whip up, this recipe is a must-try. Follow along for step-by-step instructions and expert tips to ensure your Banana Chocolate Chip Bars turn out perfectly every time!
Why You’ll Love Banana Chocolate Chip Bars
The delightful combination of sweet, ripe bananas and rich chocolate chips makes these bars an irresistible treat for any occasion. The natural sweetness of the bananas enhances the depth of the chocolate, creating a balanced flavor that’s both comforting and indulgent. Whether you love the creamy richness of chocolate or the fruity sweetness of bananas, these bars deliver the best of both worlds in every bite.
In addition to their delicious flavor, the texture of Banana Chocolate Chip Bars is what sets them apart. With a moist, cake-like consistency, they’re soft yet sturdy, perfect for serving as a snack or a dessert. Their versatility means they can be dressed up with a drizzle of chocolate or kept simple for a quick, grab-and-go treat.
These bars are also perfect for a variety of occasions. They’re an easy crowd-pleaser for family gatherings, bake sales, or even as an afternoon treat. Whether you’re hosting a party or just looking for a way to use up overripe bananas, these bars are sure to satisfy any sweet tooth!
Ingredients Breakdown
Unsalted Butter: Using unsalted butter at room temperature is essential for properly creaming it with sugar. Room temperature butter is soft enough to trap air when beaten, creating a light and fluffy base for the bars. This helps ensure a tender, moist texture. Unsalted butter also gives you control over the salt content in the recipe, preventing the bars from becoming overly salty.
Brown Sugar: Brown sugar provides more than just sweetness; it adds moisture and a deeper flavor thanks to its molasses content. Light brown sugar gives a subtle caramel-like flavor, while dark brown sugar intensifies the richness. Depending on which you choose, you can slightly adjust the flavor profile of the bars.
Egg: The egg in this recipe acts as a binder, holding the ingredients together while also contributing to the moisture and tenderness of the bars. The egg’s protein structure helps the bars maintain their shape and stability while baking.
Vanilla Extract: Vanilla extract enhances the overall flavor of the bars, adding a subtle sweetness and warm undertone. It complements both the bananas and the chocolate, tying the flavors together for a well-rounded taste.
Fine Salt: A small amount of salt is crucial for balancing the sweetness in the bars. It heightens the flavor of the chocolate and bananas, preventing the dessert from tasting too sweet.
All-Purpose Flour: Flour is the building block of the bars, providing structure and giving the bars their tender, cake-like consistency. It helps the bars hold their shape without becoming too dense.
Overripe Bananas: Overripe bananas are essential for this recipe as their sweetness intensifies, adding natural sugars that enhance the flavor. They also lend moisture, ensuring the bars are soft and tender.
Chocolate Chips: You can use regular, mini, or chopped chocolate chips depending on your preference. Mini chocolate chips spread more evenly throughout the bars, offering a bit of chocolate in every bite, while chopped or regular chips give larger pockets of melted chocolate.
Step-by-Step Instructions
Step 1: Preheat the Oven and Prepare the Baking Dish
Start by preheating your oven to 350°F (175°C). Preheating is crucial to ensure that your bars bake evenly, as putting them into a fully heated oven helps the ingredients set and rise properly from the beginning. While the oven heats up, prepare your 8×8-inch baking dish. Line the dish with parchment paper, leaving extra over the edges for easy lifting once the bars are done. Lightly spray the parchment with non-stick spray to further prevent sticking. This will make removing and cutting the bars much easier, ensuring that they come out cleanly without breaking.
Step 2: Cream the Butter and Sugar
In a large mixing bowl or the bowl of a stand mixer, cream together ½ cup of unsalted butter and 1 cup of brown sugar. Creaming is a critical step because it incorporates air into the butter, giving your bars a light, tender texture. For best results, use room-temperature butter so it blends smoothly with the sugar. If you’re using a hand mixer, beat the mixture on medium-high speed for about 2 minutes until it becomes lighter in color and fluffy in texture. You can also do this by hand with a whisk, but it will require some extra effort, and your butter needs to be especially soft.
Step 3: Add Wet Ingredients
Once the butter and sugar are creamed, it’s time to add 1 large egg, 1½ teaspoons of vanilla extract, and ½ teaspoon of fine salt. It’s important to add these ingredients slowly and mix them on a medium-low speed to avoid overworking the batter. Over-mixing can incorporate too much air, making the bars tough rather than soft and tender. Scrape down the sides and bottom of the bowl as needed to ensure all ingredients are evenly combined. Mix until just incorporated.
Step 4: Incorporate the Dry Ingredients
Next, add 1 cup of all-purpose flour to the wet mixture. If you prefer, you can sift the flour before adding it to the bowl to remove any lumps and ensure a lighter texture. Mix the flour into the wet ingredients on low speed, or gently by hand, until just combined. Avoid over-mixing at this stage to prevent the gluten in the flour from developing too much, which can make the bars dense and chewy instead of soft and moist.
Step 5: Add Mashed Bananas
Now, it’s time to add 1 cup of mashed overripe bananas. Use bananas that are very soft and speckled brown for the best flavor and texture. Mash them well with a fork or potato masher to ensure they incorporate smoothly into the batter. Add the mashed bananas to the batter and fold them in until they are fully integrated. Properly incorporating the bananas is essential for ensuring the moisture and flavor are evenly distributed throughout the bars.
Step 6: Fold in Chocolate Chips
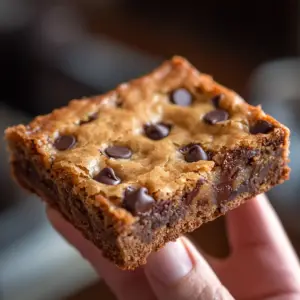
Gently fold in ¾ cup of chocolate chips, leaving some aside to sprinkle on top before baking. Folding, rather than vigorously stirring, helps maintain the airiness of the batter and prevents over-mixing, which can affect the bars’ texture. This technique also ensures that the chocolate chips are evenly distributed throughout the batter. You can use mini chips, regular-sized chips, or chopped chocolate depending on your preference.
Step 7: Pour and Bake
Pour the batter into your prepared baking dish, using a spatula to spread it evenly across the pan. Make sure the batter is level so that it bakes evenly. Sprinkle the reserved chocolate chips on top to create a visually appealing and extra chocolatey surface. Place the dish in the preheated oven and bake for 33-37 minutes, or until the edges are golden brown and the center is set. To check for doneness, insert a toothpick into the center of the bars. It should come out mostly clean with just a few moist crumbs. Rotate the pan halfway through baking for even cooking.
Step 8: Cool and Cut
Once baked, remove the pan from the oven and allow the bars to cool completely in the pan on a wire rack. This step is crucial because cutting the bars while they’re still warm can cause them to crumble. Once the bars are fully cool, use the parchment paper overhang to gently lift them out of the pan. To achieve clean, sharp edges when cutting, use a warm knife (run it under hot water and wipe dry) and clean the blade between each cut. Cut the bars into 16 squares, and they’re ready to serve.
Properly cooling the bars ensures the texture firms up for easy slicing, and using a warm knife guarantees neat, presentable pieces perfect for serving or storing. Enjoy your freshly baked Banana Chocolate Chip Bars!
Baking Tips and Tricks
Ensure Bananas Are Ripe Enough
One of the key elements to making delicious Banana Chocolate Chip Bars is using overripe bananas. The browner and softer the bananas, the better the flavor will be. Overripe bananas are packed with natural sugars, which enhance the sweetness and moisture of the bars. Their soft texture also ensures they blend smoothly into the batter, creating a tender crumb. If your bananas aren’t ripe enough, the bars may not be as moist or flavorful, so it’s worth waiting for them to ripen before baking.
Baking Times May Vary
Every oven can vary slightly in temperature, which means your bars may bake faster or slower than the recipe suggests. It’s always a good idea to check your Banana Chocolate Chip Bars a few minutes before the lower end of the suggested baking time (33 minutes in this case). To test if the bars are done, insert a toothpick into the center. If it comes out mostly clean with just a few moist crumbs, the bars are ready. If the edges are browning too quickly, but the center is still underdone, you can cover the pan loosely with aluminum foil to prevent over-browning.
Using a Different Pan Size
The recipe calls for an 8×8-inch baking dish, but you can use other pan sizes if needed. For example, using a 9×9-inch pan will result in thinner bars, and they will likely bake faster, so check them around the 25-30 minute mark. On the other hand, using a smaller or deeper pan will result in thicker bars and may require more baking time. Always keep an eye on the bars and adjust the time accordingly, as changing the pan size can affect how evenly they bake.
Cooling Is Key
Cooling the bars completely in the pan is essential for achieving the best texture and ensuring clean cuts. If you cut into the bars while they’re still warm, they might crumble or fall apart. Cooling allows the bars to set properly, giving them structure. Be patient and wait for the bars to cool before lifting them out of the pan and slicing them with a warm, clean knife for neat, professional-looking squares.
Variations and Add-Ons
Add Nuts
For an extra layer of texture, consider folding in ½ cup of chopped walnuts or pecans into the batter. Nuts add a satisfying crunch that contrasts beautifully with the soft, moist texture of the bars. Walnuts provide a slightly bitter, earthy flavor that complements the sweetness of the bananas and chocolate, while pecans offer a milder, buttery taste. Both options add not only texture but also a boost of healthy fats and nutrients, making the bars even more filling and flavorful.
Try Different Chips
While classic chocolate chips are a go-to choice, you can easily switch things up by using other types of chips. White chocolate chips add a creamy sweetness that pairs wonderfully with the bananas. Peanut butter chips can give the bars a nutty, salty twist, creating a peanut butter and banana flavor combination that’s hard to resist. For a more adventurous option, try dark chocolate chips or even butterscotch chips to bring unique flavors to your bars.
Add Cinnamon
To give your Banana Chocolate Chip Bars a warm, spiced twist, add ½ teaspoon of cinnamon to the dry ingredients. Cinnamon complements the sweetness of the bananas and chocolate while adding a cozy, autumnal flavor. This simple addition can transform the bars into a spiced dessert perfect for cooler months.
Frosting Option
If you’re looking to make the bars even more decadent, top them with a simple cream cheese frosting. Mix 4 oz of softened cream cheese, 2 tablespoons of unsalted butter, 1 cup of powdered sugar, and 1 teaspoon of vanilla extract until smooth. Spread the frosting over the cooled bars for an indulgent finish that pairs perfectly with the banana and chocolate flavors.
Gluten-Free Version
To make the bars gluten-free, substitute the all-purpose flour with a 1:1 gluten-free baking flour blend. Most of these blends contain xanthan gum, which helps provide structure and prevent the bars from becoming too crumbly. Be sure to avoid over-mixing the batter to maintain a soft, tender texture.
How to Store and Freeze Banana Chocolate Chip Bars
Room Temperature Storage
Banana Chocolate Chip Bars can be stored at room temperature for up to 3 days. To keep them fresh, place the bars in an airtight container. This helps prevent them from drying out and maintains their soft, moist texture. Make sure the container is sealed properly to lock in moisture, especially since the bars are made with bananas, which can dry out if exposed to air for too long. For best results, keep the container in a cool, dry place away from direct sunlight.
Refrigeration
If you want the bars to last longer, store them in the refrigerator. When stored properly in an airtight container, they can stay fresh for up to a week. The cooler temperature helps extend their shelf life while keeping the texture intact. Before serving, let the bars sit at room temperature for 10-15 minutes to soften up and restore their original texture. If you prefer a firmer, chilled bar, you can serve them straight from the fridge.
Freezing
Banana Chocolate Chip Bars freeze well, making them a convenient make-ahead treat. To freeze, first cut the bars into individual portions. Wrap each bar tightly in plastic wrap, then place them in a freezer-safe bag or airtight container to prevent freezer burn. You can store the bars in the freezer for up to 3 months. When ready to enjoy, simply thaw the bars at room temperature or warm them slightly in the microwave for a soft, fresh-from-the-oven texture.
Conclusion
Banana Chocolate Chip Bars are a simple yet incredibly delicious treat that brings together the rich flavor of chocolate and the natural sweetness of ripe bananas. With just a handful of basic ingredients, you can easily whip up a batch of these moist, cake-like bars in under an hour.
Don’t be afraid to get creative with this recipe! Experiment with add-ins like nuts, different types of chocolate chips, or even a touch of cinnamon to make the bars your own. You can also try the gluten-free or vegan variations to suit your dietary preferences.
We’d love to hear how your Banana Chocolate Chip Bars turn out! Share your results and any unique twists you added to the recipe, and don’t forget to snap a photo to show off your baking success. Happy baking!
Print
Chocolate Chip Banana Bars
Description
These Banana Chocolate Chip Bars are the perfect blend of moist, banana-flavored goodness and rich, chocolatey indulgence. With just a few simple ingredients, these bars come together quickly and bake into a soft, cake-like texture that is sure to satisfy any sweet tooth. They are great for an afternoon snack, dessert, or even as a quick grab-and-go treat.
Ingredients
- ½ cup unsalted butter, room temperature (113g)
- 1 cup packed light or dark brown sugar (200g)
- 1 large egg, room temperature (56g)
- 1½ tsp vanilla extract (6g)
- ½ tsp fine salt (3g)
- 1 cup all-purpose flour (125g)
- 1 cup mashed overripe bananas (about 2 large bananas, 250g)
- ¾ cup chocolate chips or chopped chocolate (125g)
Instructions
Step 1: Preheat the Oven and Prepare the Baking Dish
Preheat your oven to 350°F (175°C). Line an 8×8-inch baking dish with parchment paper, leaving an overhang for easy removal. Lightly spray with non-stick cooking spray to ensure the bars don’t stick to the sides.
Step 2: Cream the Butter and Sugar
In a large bowl, cream together ½ cup of room-temperature unsalted butter and 1 cup of packed brown sugar until the mixture is light and fluffy, about 2 minutes. You can use a stand mixer, hand mixer, or whisk if the butter is soft enough. Properly creamed butter and sugar create a lighter texture in the bars.
Step 3: Add Wet Ingredients
Add 1 large egg, 1½ teaspoons of vanilla extract, and ½ teaspoon of fine salt to the creamed mixture. Mix slowly on low to medium speed until just combined. Scrape the sides of the bowl to ensure everything is mixed evenly.
Step 4: Incorporate the Dry Ingredients
Add 1 cup of all-purpose flour to the wet ingredients. Stir on low speed or by hand, mixing just until the flour is incorporated. Be careful not to over-mix the batter, as this can result in dense bars.
Step 5: Add Mashed Bananas
Fold in 1 cup of mashed overripe bananas until fully combined. The bananas add moisture and sweetness, making the bars tender and flavorful.
Step 6: Fold in Chocolate Chips
Gently fold ¾ cup of chocolate chips into the batter. Reserve a few chips to sprinkle on top for a decorative touch. Folding ensures the chips are evenly distributed without overworking the batter.
Step 7: Pour and Bake
Spread the batter evenly into the prepared baking dish and sprinkle the reserved chocolate chips on top. Bake for 33-37 minutes, or until a toothpick inserted into the center comes out clean with a few moist crumbs. Rotate the pan halfway through for even baking.
Step 8: Cool and Cut
Let the bars cool completely in the pan on a wire rack. Once cooled, use the parchment paper overhang to lift the bars out of the pan. Cut into 16 squares using a warm, clean knife for sharp edges.
Notes
- Banana Ripeness: For best results, use bananas that are heavily spotted or completely brown. Overripe bananas contribute more sweetness and moisture to the bars.
- Baking Variations: If using a different pan size, such as a 9×9-inch pan, the bars may bake faster. Check for doneness a few minutes early to avoid over-baking.
- Storage: Store the bars at room temperature in an airtight container for up to 3 days. For longer storage, refrigerate them for up to a week or freeze them for up to 3 months.
- Add-Ins: Feel free to experiment with nuts, spices like cinnamon, or even a cream cheese frosting for a richer, more decadent version of these bars.


