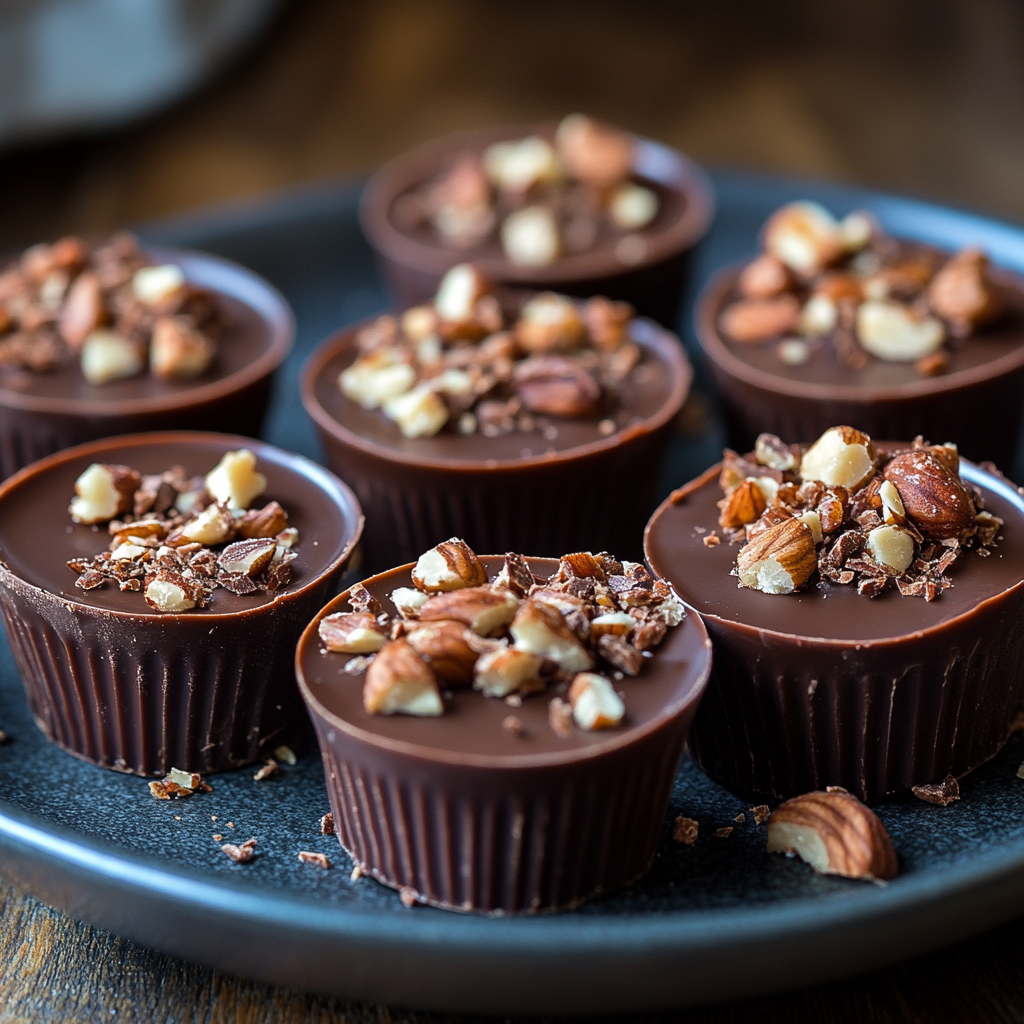
Chocolate Peanut Butter Rice Krispie Cups are a delightful no-bake treat that brings together the irresistible flavors of rich chocolate, creamy peanut butter, and crispy rice cereal. This simple yet indulgent recipe offers a perfect blend of sweetness and crunch, making it a favorite for kids and adults alike.
The combination of smooth, melted chocolate and the nutty, slightly salty peanut butter layer creates a satisfying contrast of flavors. The addition of crunchy Rice Krispies gives the cups a light, airy texture, balancing the richness of the chocolate and peanut butter. It’s this harmony of tastes and textures that makes these cups so hard to resist.
Beyond their deliciousness, these cups are incredibly easy to make, requiring only a few ingredients and no oven time. They come together in minutes, making them an ideal option for a quick snack, a last-minute party treat, or a lunchbox surprise. Their versatility allows you to customize the recipe to suit different dietary preferences or special occasions, making them a go-to for busy days or festive celebrations alike.
Ingredients Overview
The ingredients for Chocolate Peanut Butter Rice Krispie Cups are simple yet come together to create a delicious and satisfying treat. Each component plays a key role in delivering the right balance of flavors and textures.
Main Ingredients Breakdown:
- Rice Krispies cereal: The foundation of this recipe, Rice Krispies provide the signature crispy, light texture that contrasts perfectly with the smooth peanut butter and rich chocolate. Their neutral flavor also makes them the ideal base for the other ingredients to shine.
- Chocolate chips: The melted chocolate adds richness and sweetness to the top layer of the cups. Vegan chocolate chips can easily be used for those with dietary restrictions, and dark chocolate offers a more intense, bittersweet flavor that pairs well with the peanut butter.
- Chunky peanut butter: This gives the cups their creamy, nutty flavor and a slight crunch from the peanut pieces. Peanut butter also acts as a binding agent for the Rice Krispies, holding everything together. For a smoother texture, creamy peanut butter can be substituted.
- Honey: A natural sweetener, honey also serves to bind the ingredients. It adds a subtle floral sweetness and helps to create the chewy, gooey consistency that keeps the cups firm yet soft.
- Salt: Just a pinch of salt enhances the overall flavor, balancing the sweetness and highlighting the richness of the chocolate and peanut butter.
Alternative Ingredients for Dietary Restrictions:
- Gluten-free cereal alternatives: If gluten is a concern, opt for a certified gluten-free crispy rice cereal. Many brands now offer gluten-free versions that still deliver the same crunchy texture.
- Maple syrup or agave nectar: For a vegan alternative to honey, both maple syrup and agave nectar work well. They provide a similar sweetness and help bind the ingredients without compromising flavor.
- Almond or cashew butter: For a different flavor twist, try substituting almond or cashew butter in place of peanut butter. These alternatives add a subtle, nutty flavor variation while keeping the creamy texture and binding properties. This option also works for those with peanut allergies.
Step-by-Step Instructions
Step 1: Prepare the Muffin Tin
To ensure easy removal of your Chocolate Peanut Butter Rice Krispie Cups, it’s essential to line your muffin tin with paper or silicone liners. This prevents the mixture from sticking to the pan and makes it easy to pop the cups out once they’re set. Silicone liners are reusable and provide a non-stick surface, while paper liners are disposable and convenient. If you don’t have liners, a light coating of non-stick spray will work, but liners give a more polished finish and easier handling.
Step 2: Melting the Peanut Butter Mixture
Melting peanut butter and honey together requires gentle heat to prevent burning or scorching. Use a medium saucepan over low heat, and stir continuously to ensure even melting. This helps the mixture become smooth and well-combined in about 3-5 minutes. Stirring constantly also prevents any sticking at the bottom of the pan. If the mixture is too thick, add a tablespoon of honey or a splash of milk to loosen it up. If it’s too runny, let it cook for a bit longer to thicken, but be careful not to overheat or burn the mixture.
Step 3: Mixing with Rice Krispies
Once the peanut butter mixture is melted, remove it from the heat and immediately stir in the Rice Krispies. It’s important to mix quickly and thoroughly so that every piece of cereal is coated with the peanut butter and honey mixture. This ensures the cups hold together well and have an even texture. If you’d like to add more texture, you can mix in chopped nuts, seeds, or dried fruit at this stage. These add-ins provide additional crunch and flavor without disrupting the basic structure of the cups.
Step 4: Forming the Cups
Spoon the peanut butter and Rice Krispies mixture into the prepared muffin tin, dividing it evenly among the cups. Press the mixture down firmly into each mold to create compact, well-formed cups. You can use the back of a spoon or your fingers (dipped in water to prevent sticking) to press the mixture into shape. Ensuring the mixture is tightly packed helps the cups hold together once they’re set. If you want to get creative, try using different molds or silicone shapes for fun, kid-friendly designs, such as stars or hearts.
Step 5: Melting and Pouring the Chocolate
To melt the chocolate chips, you can choose between two methods. On the stovetop, use a double boiler or a heatproof bowl placed over a pot of simmering water. Stir the chocolate constantly to prevent burning. Alternatively, melt the chocolate in the microwave by heating it in 30-second intervals, stirring between each interval until smooth. To avoid seizing, ensure no water comes into contact with the chocolate. For a smooth, glossy finish, stir the chocolate slowly and consistently. Once melted, spoon the chocolate over the Rice Krispie base in each muffin tin, filling to the top. For an extra flair, sprinkle on toppings like drizzled caramel, chopped nuts, or colorful sprinkles.
Step 6: Chilling and Setting the Cups
Chilling is crucial for firming up the Chocolate Peanut Butter Rice Krispie Cups. Place the muffin tin in the refrigerator for at least 1 hour, or if you’re short on time, pop it into the freezer for about 30 minutes. The cold helps the chocolate harden and the peanut butter mixture to set, ensuring the cups hold their shape. Once firm, they’re ready to serve. Proper storage involves keeping the cups in an airtight container in the refrigerator, where they’ll last for up to a week. You can also freeze them for longer storage, but allow them to sit at room temperature for a few minutes before serving to regain their soft texture.
Flavor Variations
One of the great things about Chocolate Peanut Butter Rice Krispie Cups is how easily you can customize them to suit your taste preferences or dietary needs. Here are some fun and creative ways to put a unique spin on this classic recipe:
Adding Flavors to the Chocolate
Elevate the flavor of the chocolate layer by adding extracts or zest to the melted chocolate before pouring it over the Rice Krispie base. A few drops of mint extract can give the cups a refreshing twist, making them taste like a cool, minty treat. Adding coffee (a small amount of finely ground espresso or instant coffee) to the chocolate intensifies its richness, creating a mocha-flavored delight. For a bright, citrusy contrast, try adding orange zest to the melted chocolate. The combination of chocolate and orange is a classic flavor pairing that brings a sophisticated edge to these simple cups.
Swapping Peanut Butter with Other Nut Butters
For a different taste or to cater to those with peanut allergies, swap out peanut butter with other nut or seed butters. Almond butter offers a more subtle, sweet nuttiness, while cashew butter provides a creamy, mild flavor that blends smoothly with the other ingredients. For a nut-free option, sunflower butter is an excellent choice. It has a similar texture to peanut butter but offers a slightly earthy flavor, making it both allergy-friendly and delicious.
Toppings
Add texture and visual appeal by sprinkling toppings over the melted chocolate before it sets. Flaky sea salt is a popular option that enhances the sweetness and gives a gourmet touch. For a salty-sweet combination, try sprinkling crushed pretzels on top. If you prefer something more tropical, coconut flakes offer a delightful crunch and a hint of sweetness. These toppings not only enhance the flavor but also add a layer of texture that contrasts with the creamy and crispy elements of the cups.
Healthier Alternatives
If you’re looking to make these treats a bit healthier, you can make simple ingredient swaps. Using dark chocolate instead of milk chocolate provides a richer flavor and higher antioxidant content. Opt for sugar-free chocolate chips for a lower-sugar version, which is ideal for those watching their sugar intake. Additionally, replacing regular peanut butter with natural peanut butter (which contains no added sugars or oils) reduces processed ingredients without sacrificing flavor.
Customizing for Special Occasions
These cups are easy to dress up for holidays or special events. You can use colored sprinkles to match the theme of your celebration, such as red and green for Christmas, pastels for Easter, or black and orange for Halloween. For birthday parties or themed events, consider adding themed toppings like edible glitter, candy eyes, or festive sugar decorations. This makes the cups not only delicious but also visually appealing, perfect for a fun party treat.
These flavor variations allow you to experiment with new ingredients and customize this simple recipe to fit your taste or the occasion, making it endlessly versatile.
Nutritional Information
Each Chocolate Peanut Butter Rice Krispie Cup contains an estimated 200-250 calories, depending on portion size and ingredient choices. Each serving typically provides about 12-15 grams of fat, 20-25 grams of carbohydrates, and 4-6 grams of protein. The majority of the fats come from the peanut butter, while the carbs are mainly from the honey and Rice Krispies, with a smaller portion from the chocolate.
For a healthier version, using natural peanut butter (which contains no added sugars or hydrogenated oils) can reduce the intake of processed ingredients. Natural peanut butter is rich in healthy fats and provides more nutritional benefits than conventional peanut butter. Similarly, swapping regular chocolate for dark chocolate increases the antioxidant content and reduces sugar levels, making the treat slightly more heart-healthy.
To further lower sugar content, consider using stevia-sweetened chocolate or sugar-free syrups like agave or maple-flavored syrup alternatives. These options allow you to maintain the sweetness without adding unnecessary refined sugars, making this snack a more health-conscious indulgence.
Storage and Shelf Life
To maintain the freshness of your Chocolate Peanut Butter Rice Krispie Cups, store them in an airtight container in the refrigerator. This keeps the cups firm and ensures they maintain their shape. They can be stored in the fridge for up to 1 week, making them a convenient make-ahead treat. If you want to extend their shelf life, place them in the freezer, where they can last for up to 2 months.
Before serving, you can let the cups sit at room temperature for about 10-15 minutes to soften slightly, allowing the flavors to fully develop and the texture to become more enjoyable. If frozen, allow a bit more time to thaw, but there’s no need to reheat, as these no-bake treats are best enjoyed chilled or at room temperature.
Serving Suggestions
Chocolate Peanut Butter Rice Krispie Cups can be served in a variety of fun and creative ways. For parties, arrange them on a decorative platter with different toppings like sprinkles, crushed nuts, or coconut flakes for variety and visual appeal. They also make perfect lunchbox treats, individually wrapped for convenience. For a more elegant touch, use the cups as a dessert topper on ice cream, adding a crunchy, chocolatey element to the dish.
Pair these treats with beverages like coffee or tea for a delightful afternoon snack, or serve them alongside vanilla ice cream for a rich, indulgent dessert. For extra flair, garnish each cup with a drizzle of caramel, melted peanut butter, or a sprinkle of flaky sea salt. These additions enhance both the flavor and presentation, making the cups even more tempting and visually appealing.
Frequently Asked Questions (FAQs)
1. Can I make these cups without peanut butter?
Yes, you can easily swap out peanut butter for alternative nut butters like almond or cashew butter. For a nut-free option, sunflower butter or soy nut butter works well, offering a similar creamy consistency and flavor without peanuts.
2. Can I make these Chocolate Peanut Butter Rice Krispie Cups vegan?
Absolutely! Simply use vegan chocolate chips and replace honey with a plant-based sweetener like agave nectar or maple syrup. These alternatives will maintain the sweetness and texture while keeping the recipe entirely vegan-friendly.
3. How do I prevent the chocolate from seizing when melting it?
To avoid chocolate from seizing, melt it slowly over low heat on the stovetop or in the microwave using 30-second intervals, stirring between each interval. Make sure no water comes into contact with the chocolate, as moisture can cause it to seize.
4. Can I add other ingredients to the mixture?
Yes! You can customize the cups by adding dried fruit, seeds, or chopped nuts to the Rice Krispies mixture for added texture and flavor. This flexibility allows for a personalized twist on the classic recipe.
5. How long do these cups last?
Stored in an airtight container in the fridge, these cups will last for up to a week. You can also freeze them for longer storage, where they will keep for up to two months.
Conclusion
Chocolate Peanut Butter Rice Krispie Cups are a simple yet delicious no-bake treat that combines rich chocolate, creamy peanut butter, and crispy Rice Krispies into a satisfying dessert or snack. Their ease of preparation and the use of common pantry ingredients make them a go-to option for busy days.
The versatility of this recipe allows for endless variations, whether you’re catering to dietary preferences, such as vegan or gluten-free, or customizing the flavor for special occasions. With the ability to swap ingredients and add toppings, these cups can be tailored to suit any taste or event.
So whether you’re looking for a quick snack, a party-ready dessert, or a fun activity with the family, give these Chocolate Peanut Butter Rice Krispie Cups a try. Get creative with your own variations and enjoy the delightful crunch and creamy sweetness!
Print
Chocolate Peanut Butter Rice Krispie Cups
Description
These Chocolate Peanut Butter Rice Krispie Cups are the perfect combination of crispy, creamy, and chocolatey goodness. With only a handful of simple ingredients like Rice Krispies, peanut butter, and chocolate chips, this no-bake treat is quick and easy to make. Whether you need a fun snack, a last-minute dessert, or a sweet treat for special occasions, these cups are sure to satisfy. Plus, they’re highly customizable to accommodate dietary preferences, making them a versatile and crowd-pleasing recipe.
Ingredients
- 3 cups Rice Krispies cereal
- 1 ½ cups chocolate chips (vegan chocolate chips can be used)
- 1 cup chunky peanut butter
- 6 tablespoons honey
- ⅛ teaspoon salt
Instructions
- Prepare the Muffin Tin:
Line a muffin tin with paper or silicone liners for easy removal. - Melt the Peanut Butter Mixture:
In a medium saucepan over low heat, melt 1 cup of chunky peanut butter, 6 tablespoons of honey, and ⅛ teaspoon of salt. Stir continuously until smooth and well combined, about 3-5 minutes. - Combine with Rice Krispies:
Remove the saucepan from heat and stir in 3 cups of Rice Krispies cereal. Mix thoroughly until all the cereal is coated with the peanut butter mixture. - Form the Cups:
Spoon the peanut butter and Rice Krispies mixture into the prepared muffin tin, pressing down gently to form cup shapes. Ensure the mixture is packed firmly to hold its shape. - Melt the Chocolate:
In a separate saucepan, melt 1 ½ cups of chocolate chips over low heat, stirring continuously until smooth. Alternatively, you can melt the chocolate in the microwave in 30-second intervals, stirring between each interval. - Fill the Cups with Chocolate:
Spoon the melted chocolate over each Rice Krispie base in the muffin tin, filling them to the top. - Chill to Set:
Place the muffin tin in the refrigerator and chill for at least 1 hour, or in the freezer for 30 minutes, until the chocolate is set and the cups are firm. - Serve and Enjoy:
Once set, remove the cups from the muffin tin and peel off the liners. Store any leftovers in an airtight container in the refrigerator.
Notes
- For a vegan version, use vegan chocolate chips and replace honey with agave nectar or maple syrup.
- You can substitute peanut butter with almond, cashew, or sunflower butter for an allergy-friendly option.
- Add toppings like flaky sea salt, crushed pretzels, or coconut flakes for extra texture and flavor.
- These cups can be stored in the fridge for up to 1 week or frozen for up to 2 months. Allow them to come to room temperature before serving for the best texture.


