

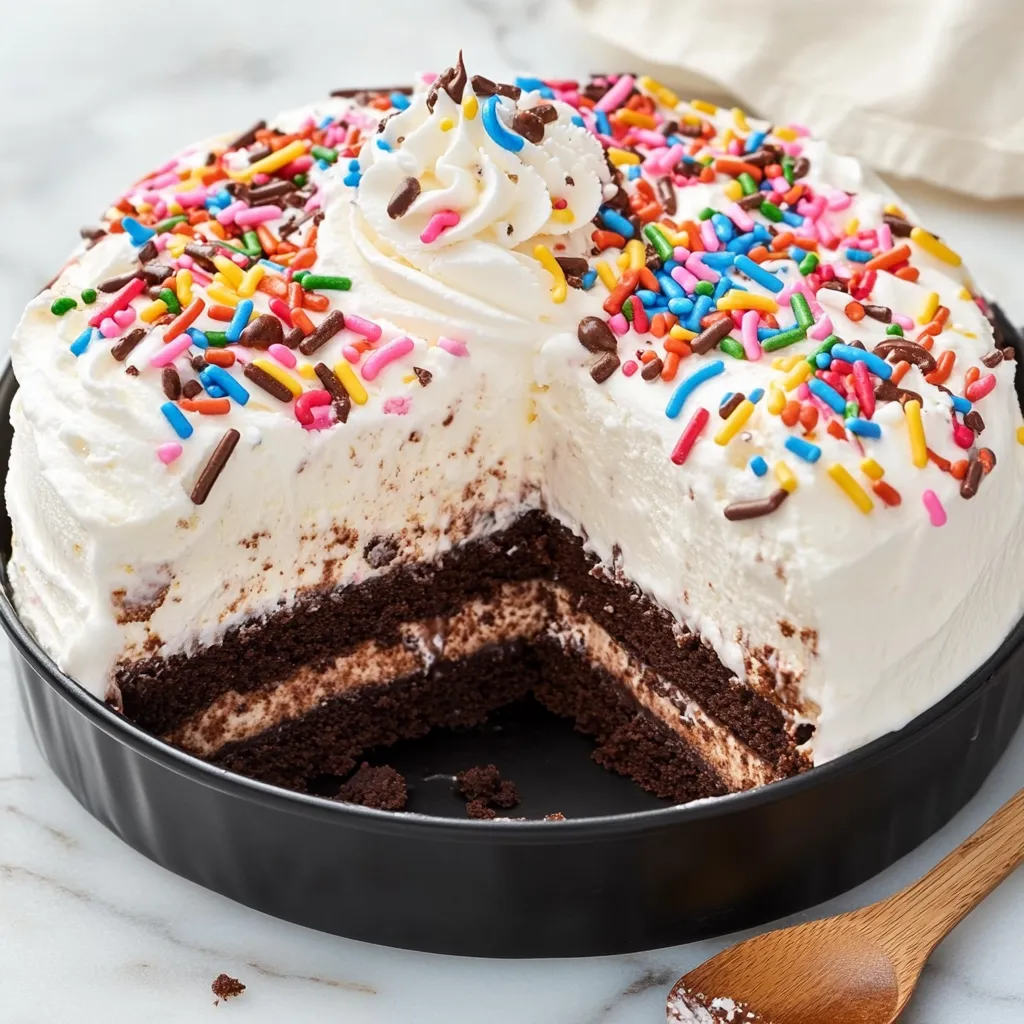
Who doesn’t love a good ice cream cake? Whether it’s for a special occasion or just because you’re craving something deliciously indulgent, this Dairy Queen-inspired Ice Cream Cake with Fudge and Oreos is the perfect treat. Imagine biting into a rich, chocolate cake base topped with layers of smooth vanilla and chocolate ice cream, all drizzled with gooey fudge sauce, and finished with a crunchy Oreo topping. It’s the ultimate dessert that combines the best of both worlds—cake and ice cream—into one irresistible creation.
What’s even better? This recipe is a breeze to put together. With a few simple ingredients and a little time in the freezer, you can create a stunning dessert that’s sure to wow your guests. If you’ve ever wondered how to recreate that classic Dairy Queen ice cream cake at home, look no further. In this first part, we’ll walk through the basics of baking the cake and preparing the ice cream layers, so you’re off to a great start. Let’s get baking!
Why You’ll Love This Homemade Ice Cream Cake
- Perfect for All Occasions: Whether it’s a birthday, a celebration, or just a weekend treat, this cake is a crowd-pleaser.
- Customizable Layers: With chocolate and vanilla ice cream, a fudge layer, and the optional addition of Oreos, you can adjust the layers to suit your tastes.
- Made with Love: Unlike store-bought cakes, this homemade version lets you control the ingredients and flavors, ensuring you get exactly what you want.
Step 1: Bake the Cake
The foundation of this ice cream cake is a rich chocolate cake. Here’s how to get that perfect, moist base.
- Preheat the Oven: Start by preheating your oven to 350°F (175°C).
- Prepare the Cake Mix: In a large bowl, prepare the chocolate cake mix according to the package instructions. Typically, this involves adding 1 cup of water, ⅓ cup of vegetable oil, and 3 large eggs to the dry cake mix. Stir until well combined.
- Bake the Cake: Divide the cake batter evenly into two 8-inch round cake pans. Place the pans in the preheated oven and bake for 25-30 minutes. Check for doneness by inserting a toothpick into the center of the cake—if it comes out clean, your cake is ready.
- Let the Cakes Cool: Once baked, remove the cakes from the oven and let them cool completely in the pans. It’s essential to let the cakes cool fully so that the ice cream doesn’t melt when it’s spread on top.
While your cakes are cooling, you can prepare the ice cream layers. This way, everything will be ready when the cake is done!

Step 2: Prepare the Ice Cream Layers
Now, let’s focus on the ice cream layers. The key to a great ice cream cake is having perfectly set ice cream that doesn’t melt when layered.
- Soften the Ice Cream: While the cakes are cooling, take the vanilla and chocolate ice cream out of the freezer to soften slightly. This will make it easier to spread on the cake layers. Don’t leave them out too long—just enough to soften slightly so they can be spread evenly.
- Layer the Ice Cream: Once softened, take the vanilla ice cream and spread an even layer over the top of one of the cooled cakes. Then, take the chocolate ice cream and spread it over the second cake. Be sure to smooth the ice cream to the edges of the cake for an even layer.
- Freeze the Ice Cream Layers: Place both cakes in the freezer for 1-2 hours, or until the ice cream layers are firm. This is an important step, as you want the ice cream to stay in place when stacking the layers.

Assembling the Ice Cream Cake & Adding the Finishing Touches
Now that the cake layers and ice cream are prepped and ready, it’s time to assemble your delicious Dairy Queen-inspired Ice Cream Cake. In this part, we’ll walk through the process of layering the cake, adding the fudge sauce, and finishing it off with a smooth whipped topping and a sprinkle of crushed Oreos for the perfect finishing touch.
Step 3: Assemble the Cake
Once your ice cream layers are firm and your cakes are cooled, it’s time to start assembling the cake. This is where all the magic comes together.
- Place the First Layer: Start by placing the chocolate ice cream-covered cake layer on a serving platter. This will be the bottom of your ice cream cake.
- Drizzle with Hot Fudge Sauce: Drizzle a generous amount of hot fudge sauce over the top of the chocolate ice cream layer. The fudge adds a rich, indulgent flavor that complements both the cake and the ice cream perfectly. You can use store-bought hot fudge sauce, or even make your own for an extra homemade touch.

Step 4: Stack the Layers
Next, we’ll add the second layer of ice cream to complete the two-layer ice cream center.
- Add the Vanilla Ice Cream Layer: Gently place the vanilla ice cream-covered cake layer on top of the chocolate ice cream layer, making sure it’s centered. This creates the signature two-layer ice cream filling that makes this cake so special.
- Press Down Gently: Once the layers are stacked, press down gently to make sure everything stays in place. The ice cream should be nice and firm by now, but pressing it down ensures the layers stick together.
Step 5: Add the Cake Topping
Now that the cake is assembled, it’s time to add the whipped topping and give it that smooth, creamy finish.
- Spread Whipped Topping: Take 1 cup of whipped topping (like Cool Whip) and spread it evenly over the top and sides of the cake. The whipped topping will add a light, fluffy texture that contrasts beautifully with the rich, dense layers of cake and ice cream.
- Smooth the Edges: Use a spatula or the back of a spoon to smooth the whipped topping so it covers the cake evenly, giving it a neat, polished look.
Step 6: Decorate the Cake
Now for the fun part—decorating the cake! This is where you can really get creative and add those finishing touches that make the cake extra special.
- Sprinkle with Crushed Oreos: Evenly sprinkle ¼ cup of crushed Oreos over the whipped topping. The crunch from the Oreos adds texture and flavor that pairs wonderfully with the creaminess of the whipped topping and ice cream layers.
- Drizzle with Chocolate Syrup: For an extra burst of sweetness, drizzle some chocolate syrup over the top. This gives the cake a glossy finish and enhances the fudgy flavor.
Step 7: Freeze and Serve
With the cake assembled and decorated, it’s time to let it firm up in the freezer.
- Freeze the Cake: Place the cake back in the freezer for at least 2 hours before serving. This ensures that all the layers hold their shape and the cake is perfectly chilled when ready to serve.
- Serve: When ready to serve, slice the cake with a sharp knife that’s been run under hot water (this helps make clean slices). Serve the cake frozen for the best texture.
Chef’s Tips for Perfecting Your Ice Cream Cake
- Don’t Rush the Freezing: Make sure the ice cream layers are fully frozen before assembling the cake, and give the finished cake enough time to freeze before serving. This ensures clean layers and easy slicing.
- Customize Your Ice Cream Flavors: Feel free to get creative with your ice cream layers. Swap in your favorite flavors like strawberry, cookies and cream, or even mint chocolate chip to make the cake uniquely yours.
- Add Extra Toppings: If you love a little extra crunch, try adding chopped nuts, chocolate chips, or even mini marshmallows to the top of your cake before freezing.

Frequently Asked Questions
1. Can I use different flavors of ice cream for this cake?
Absolutely! This cake is incredibly versatile when it comes to flavor. While the combination of vanilla and chocolate ice cream is classic, you can swap these out for any ice cream flavors you love. Try cookies and cream, mint chocolate chip, or even strawberry for a fun twist on the traditional flavor profile.
2. How can I store leftover ice cream cake?
To store leftover ice cream cake, cover it tightly with plastic wrap or place it in an airtight container to prevent freezer burn. It can stay in the freezer for up to 1-2 weeks. Just make sure to slice the cake before storing it to make serving easier.
3. Can I make this cake ahead of time?
Yes, this cake is perfect for making ahead! You can prepare the entire cake up to 2 days in advance. Just make sure to store it in the freezer, and when you’re ready to serve, let it sit for a few minutes before slicing to make cutting easier.
4. How do I make sure the cake layers don’t stick to the pan?
To ensure the cake layers come out easily, grease and flour your cake pans before adding the batter. Alternatively, you can line the pans with parchment paper to prevent sticking. Allow the cakes to cool completely before removing them from the pans to maintain their shape.
5. Can I make this cake without the fudge layer?
While the fudge layer adds a rich, indulgent flavor, you can skip it if you prefer a simpler cake. The layers of ice cream and cake will still be delicious, especially with the whipped topping and crushed Oreos. You can even drizzle some extra chocolate syrup on top for a little sweetness in place of the fudge.
6. Can I use homemade whipped cream instead of Cool Whip?
Yes, homemade whipped cream can easily replace the store-bought whipped topping. For best results, make sure your heavy cream is well-chilled, and whip it until soft peaks form. You can sweeten it with powdered sugar to match the sweetness of Cool Whip.
Conclusion
This homemade Dairy Queen-inspired Ice Cream Cake with Fudge and Oreos is the perfect combination of cake, ice cream, and chocolate goodness. It’s a crowd-pleasing dessert that’s both fun and easy to make, and it’s sure to be a hit for any occasion. The layers of chocolate cake, rich ice cream, gooey fudge, and crunchy Oreos come together in the most delicious way, making each slice a special treat.
Whether you’re celebrating a birthday, hosting a party, or just craving something sweet, this ice cream cake is a great go-to recipe. You can customize it to your liking, experiment with different ice cream flavors, and add your favorite toppings to make it your own.
I hope this recipe brings some extra sweetness to your day! Don’t forget to share your own versions of the cake or any tips you might have in the comments. Enjoy your homemade ice cream cake, and happy baking!
Print
DQ Ice Cream Cake: The Ultimate Birthday Treat
- Total Time: 3½ hours (mostly hands-off)
Description
Recreate the iconic Blizzard® Cake experience at home with layers of rich chocolate cake (or brownie), silky vanilla ice cream, fudge swirl, and crunchy chocolate pearls—all finished with fluffy whipped frosting and colorful sprinkles!
Ingredients
For the Chocolate Base
-
1 box (15.25 oz) chocolate cake mix (plus ingredients called for on the box)
-
OR 1 batch (about 9×9″) fudgy brownies, baked and cooled
For the Ice Cream Layers
-
1½ quarts good-quality vanilla ice cream, slightly softened
-
½ cup hot fudge sauce, warmed
For the “Crunch” Layer
-
⅔ cup mini chocolate pearls (e.g. crisp pearls or mini chocolate chips)
For the Whipped Frosting
-
1 cup (240 ml) heavy whipping cream, cold
-
3 tbsp powdered sugar
-
1 tsp pure vanilla extract
For Garnish
-
2–3 tbsp hot fudge sauce, warmed
-
Rainbow sprinkles or chocolate jimmies
Instructions
1️⃣ Prepare the pan & base
: Line a 9×9″ (or 8×8″ for thicker layers) square pan with parchment, leaving an overhang on two sides to lift out the cake later. Bake the cake mix or brownies according to package or recipe directions. Cool completely in the pan.
2️⃣ First ice cream layer
: Let the softened ice cream sit at room temperature for 5–10 minutes until spreadable. Spoon half of the ice cream over the cooled cake base, smoothing into an even layer. Freeze for 20 minutes to firm up.
3️⃣ Add fudge swirl & crunch
: Drizzle the warmed hot fudge sauce evenly over the first ice cream layer. Sprinkle the mini chocolate pearls on top. Press gently with an offset spatula to embed them. Return to the freezer for another 15 minutes.
4️⃣ Second ice cream layer
: Spread the remaining ice cream over the fudge-crunch layer, smoothing the top. Freeze for at least 1 hour (or up to overnight) until fully firm.
5️⃣ Make the whipped frosting
: In a chilled mixing bowl, beat the cold heavy cream with powdered sugar and vanilla on medium-high speed until stiff peaks form. Handle gently to keep it light and airy.
6️⃣ Frost the cake
: Lift the frozen cake out using the parchment handles and place on a serving platter. Use the whipped frosting to ice the top and sides (or just the top) of the cake, creating swirls or stars.
7️⃣ Decorate & finish
: Drizzle additional hot fudge in a decorative pattern over the frosting. Immediately sprinkle with rainbow sprinkles or jimmies. Freeze the finished cake for at least 30 minutes before slicing.
8️⃣ Slice & serve
: Run a sharp knife under hot water, wipe dry, and slice into squares. Return to the freezer between cuts if the cake begins to soften.
Notes
-
Flavor twists: Swap the vanilla ice cream for chocolate, mint-chip, or strawberry.
-
Cookie base: Use chocolate sandwich cookies (crushed) mixed with melted butter pressed into the pan instead of cake or brownies.
-
Caramel drizzle: Replace or complement the hot fudge with caramel sauce for a “Butterfinger” twist.
-
Peanut butter lovers: Swirl in warmed peanut butter sauce between layers.
-
Make-ahead: Cake can be assembled up to 3 days in advance and kept frozen, well wrapped to prevent freezer burn.
- Prep Time: 20 minutes
- Cook Time: hours (including firm-ups)


