Peanut Butter Balls are one of those recipes that just scream comfort and nostalgia. When I think about making these little bites of joy, I can’t help but smile and remember the first time I attempted them. Picture this: a tiny kitchen, a half-empty jar of peanut butter, and a desire for something sweet but healthy. I was determined to create a no-bake treat that I could whip up between my busy work schedule, and boy, did I hit the jackpot with these!
So, here’s the deal. Peanut Butter Balls are incredibly easy to make, and they don’t require any fancy equipment or skills. If you’ve ever had a moment where you just needed a quick snack that satisfies that sweet tooth without derailing your healthy eating goals, this is it. They’re perfect for a midday pick-me-up or a post-workout treat. Plus, they store well in the fridge, making them an ideal go-to for busy people like us.
Let’s dive into this recipe. I remember the first time I made these Peanut Butter Balls. I was a bit skeptical about how they’d turn out, but after a few tweaks and a couple of batches, I found the rhythm. And the best part? They were a hit with my friends! So, if you’re looking for something that works for everyone—from kids to adults—this one’s for you.
Why You’ll Love This Recipe
- **Quick and Easy**: You can whip these up in about 10 minutes (plus chilling time), which is perfect for those hectic days.
- **No-Bake**: Seriously, if you’re like me and don’t want to deal with turning on the oven, this recipe is a lifesaver.
- **Healthy Snacking**: Packed with protein and healthy fats from the peanut butter, these balls are a guilt-free treat.
- **Customizable**: You can throw in extras like oats, chopped nuts, or even a sprinkle of sea salt for a flavor kick.
- **Budget-Friendly**: Minimal ingredients mean less stress on your wallet!
Honestly, you don’t need to be a master chef to nail this recipe. If you can stir and roll, you’re good to go!
Ingredients You’ll Need
- 2 cups powdered sugar: This gives the Peanut Butter Balls their sweetness and helps create that thick, fudgy texture.
- 1 cup peanut butter: The star of the show! It adds a rich, nutty flavor and healthy fats.
- 6 tablespoons butter, melted: This helps bind everything together and adds a lovely richness.
- 1 teaspoon vanilla extract: A splash of vanilla elevates the flavor profile, making these even more delicious.
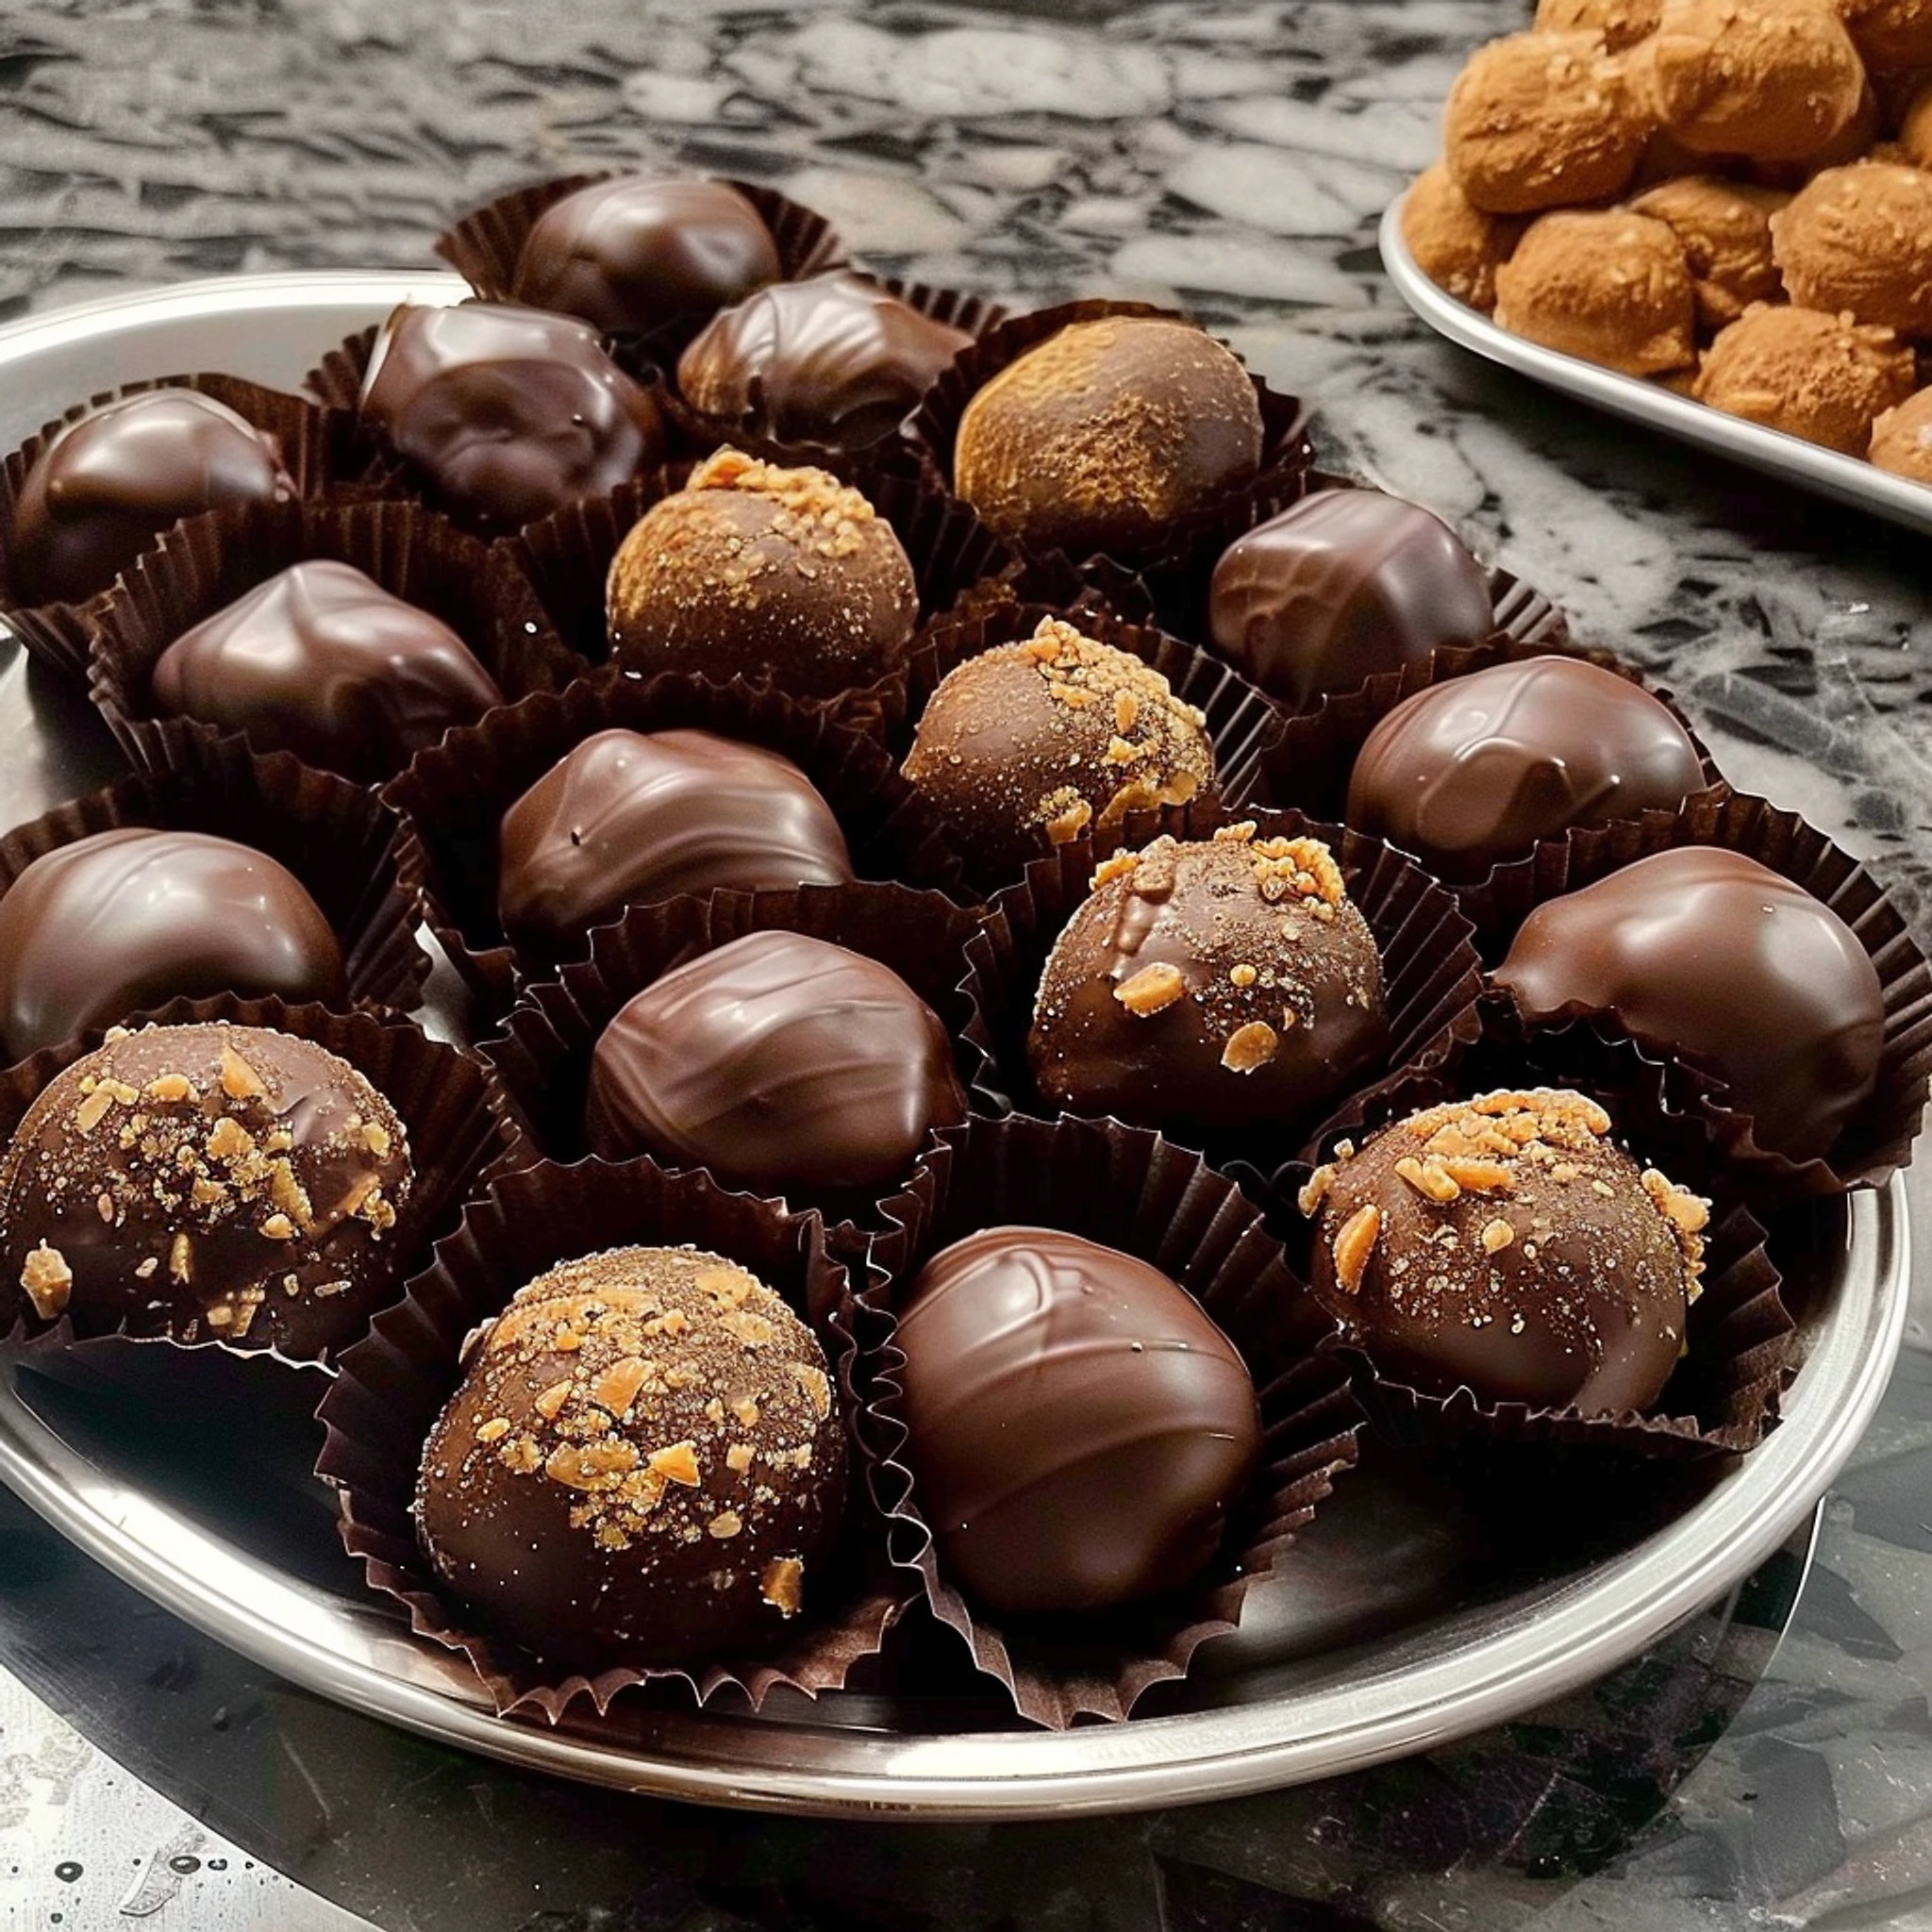
- Dipping chocolate of choice: This is where you can get creative! Use dark chocolate, milk chocolate, or even white chocolate for dipping.
Now, if you’re wondering about the cost, let me tell you that peanut butter and powdered sugar are usually pretty affordable. If you want to mix it up, you can easily substitute the chocolate with something like yogurt coating or even just skip it altogether if you’re feeling like keeping it simple.
Let’s Get Started
Step 1: Mix the Base
In a mixing bowl, combine the melted butter and vanilla extract. It’s important to melt the butter first; it helps everything blend together smoothly. Then, add the peanut butter. Seriously, the smell of warm peanut butter is heavenly! Stir until well mixed—don’t worry if it looks a bit lumpy at first; it’ll come together.
Step 2: Add the Sweetness
Gradually add the powdered sugar. I recommend doing this in batches so you don’t end up with a sugar cloud all over your tiny kitchen! Mix until a smooth, thick dough forms. At this point, you might think your arm is going to fall off from stirring, but keep going! The dough should be thick enough to hold its shape when you roll it into balls.
Step 3: Roll ‘Em Up
Now comes the fun part! Roll the mixture into small balls—about one inch in diameter is perfect. Place them on a baking sheet lined with parchment paper. If you’re finding the mixture sticky, you can lightly grease your hands with butter or a bit of cooking spray. Trust me, it makes a world of difference!
Step 4: Chill Out
Pop the baking sheet into the freezer for about 30 minutes. This step is crucial because it helps the balls firm up, making them easier to dip in chocolate later. While you’re waiting, you can do a little dance around your kitchen or scroll through your favorite playlists. Just don’t forget about them!
Time to Dip!
Step 5: Melt the Chocolate
After 30 minutes, it’s showtime! Melt your choice of dipping chocolate in a microwave-safe bowl. Heat it in short bursts (about 30 seconds at a time), stirring in between until it’s completely melted and smooth. Look for that glossy finish; it means it’s ready for dipping!
Step 6: Coat the Balls
Dip each peanut butter ball in the melted chocolate, making sure to coat it evenly. You can use a fork or just your fingers—whatever feels good! Let the excess chocolate drip off before placing them back on the baking sheet to set. If you’re feeling fancy, you can drizzle some extra chocolate on top for a nice finishing touch.
Tips for the Best Peanut Butter Balls
- **Use a Good Quality Peanut Butter**: Natural peanut butter without added sugars or oils gives the best flavor.
- **Experiment with Chocolate**: Different chocolates bring different flavors. Try mixing dark and milk chocolate for a rich contrast.
- **Add-ins Are Your Friend**: Feel free to mix in some oats or chopped nuts for added texture. I’ve thrown in mini chocolate chips before, and wow, that was a game changer!
- **Make It Ahead**: These can be made a few days in advance, which is perfect for meal prep.
Storage Tips
Storing these Peanut Butter Balls is super easy! Just keep them in an airtight container in the fridge, and they’ll last about a week. If you want to stretch that a bit, they can also be frozen for up to a month. Just make sure to separate layers with parchment paper to prevent sticking. Trust me, you’ll thank yourself later when you find a hidden stash in the freezer!
Frequently Asked Questions About Peanut Butter Balls
Can I use almond butter instead of peanut butter?
Absolutely! Almond butter works just as well, and it gives a unique flavor twist.
What if I don’t have powdered sugar?
You can blend granulated sugar in a blender or food processor until it’s fine. It’s not exactly the same, but it will work in a pinch!
Can I make them vegan?
Yes! Use a vegan butter substitute and dark chocolate that’s dairy-free. They’ll be just as delicious!
How can I make these healthier?
You can reduce the powdered sugar slightly and add some ground oats to the mixture for extra fiber.
What kind of chocolate should I use for dipping?
It depends on your taste! Dark chocolate gives a rich flavor, while milk chocolate is sweeter. You could also try white chocolate for a fun twist!
Can I add protein powder to this recipe?
Definitely! Just reduce the amount of powdered sugar to balance it out. A scoop of protein powder can make these even more filling!
Final Thoughts
And there you have it—Peanut Butter Balls that are easy, delicious, and perfect for snacking. I love making these when I need a quick energy boost or when I want to indulge without the guilt. Plus, they’re always a crowd-pleaser, whether I’m sharing them with friends or just treating myself.
Honestly, I can’t wait to hear how yours turn out! These little bites are sure to become a staple in your kitchen. So, what are you waiting for? Grab those ingredients and get rolling! Happy cooking!

Peanut Butter Bliss Balls
Ingredients
- 2 cups powdered sugar
- 1 cup peanut butter
- 6 tablespoons butter, melted
- 1 teaspoon vanilla extract
- Dipping chocolate of choice
Instructions
- In a mixing bowl, combine the melted butter and vanilla, then add the peanut butter. Stir until well mixed.
- Gradually add the powdered sugar, mixing until a smooth, thick dough forms.
- Roll the mixture into small balls and place them on a baking sheet.
- Freeze the balls for 30 minutes to firm up.
- Melt your choice of dipping chocolate.
- Dip each peanut butter ball in the melted chocolate to coat, then place back on the baking sheet to set.