INGREDIENTS YOU’LL NEED:
Here’s the best part: this recipe is incredibly simple, and it uses just six pantry-friendly ingredients. There’s no fancy equipment or baking involved, just a bowl and a spoon.- 1 cup plain Greek yogurt – The base of the bites. It’s tangy, creamy, and full of protein. You can use full-fat or low-fat depending on your preference.
- ½ cup natural peanut butter – Smooth or crunchy, both work. Just make sure it’s the kind without added sugar or oils for the healthiest option.
- 2 tablespoons honey or maple syrup – Adds just enough natural sweetness. Feel free to adjust to taste.
- 1 teaspoon vanilla extract – For that classic dessert flavor.
- ¼ cup mini chocolate chips – These add a little indulgence without overpowering the healthy vibe. Mini chips distribute more evenly than regular ones, but use what you have.
STEP 1: MIX IT ALL TOGETHER
In a medium mixing bowl, combine the Greek yogurt, peanut butter, honey (or maple syrup), and vanilla extract. Stir it all together until the mixture is smooth and fully blended. This step might take a minute or two, especially if your peanut butter is a little thick, but keep going—the creamy texture is worth it. You’ll know it’s ready when it looks like a thick, silky batter that smells faintly of peanut butter cookie dough. At this point, you could probably just eat it with a spoon, but trust me, it’s even better once frozen.STEP 2: FOLD IN THE MINI CHOCOLATE CHIPS
Once your base mixture is smooth, gently fold in the mini chocolate chips. This adds a bit of texture and sweetness to each bite, making them feel like a treat without going overboard. Try not to over-mix—just stir until the chips are evenly distributed throughout the batter. You want each bite to have a little chocolatey surprise, not a swirl of melted chips.
STEP 3: PORTION ONTO A TRAY
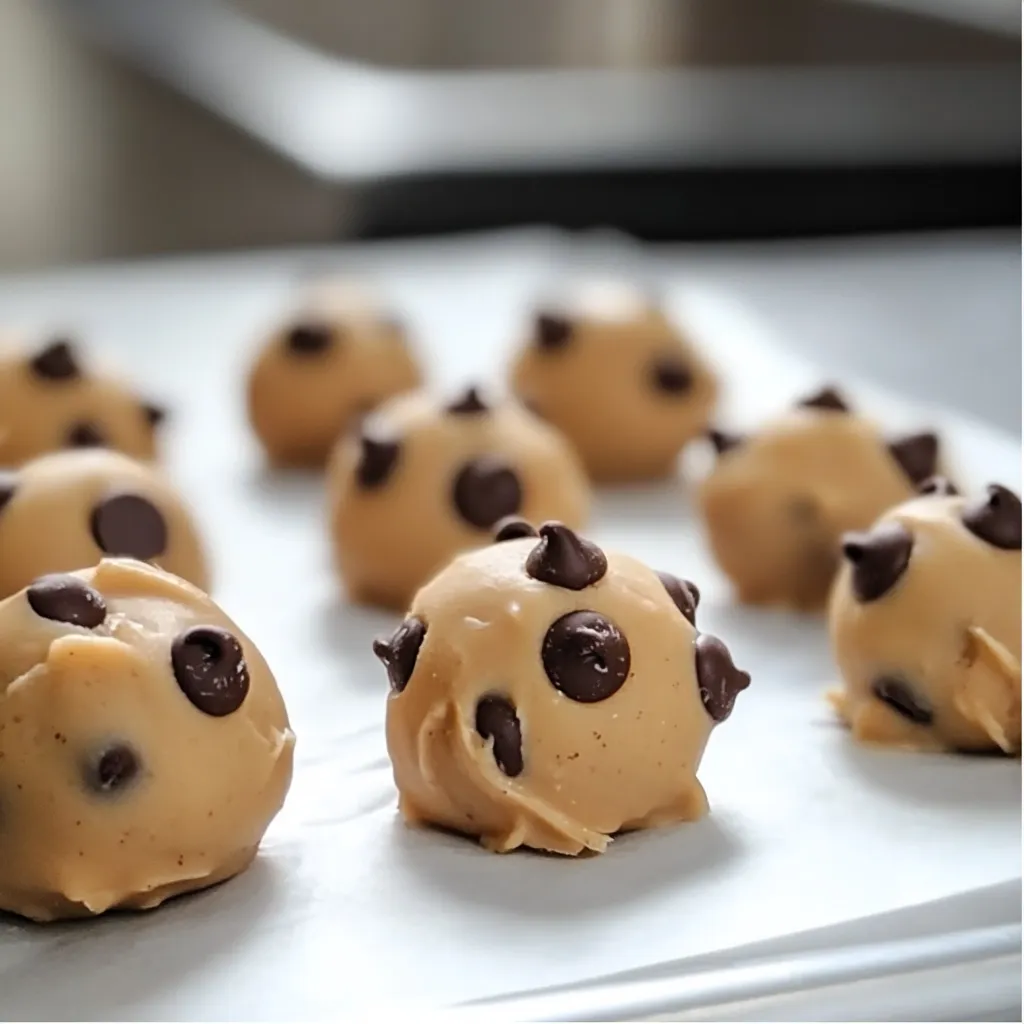
Next, line a baking sheet or tray with parchment paper. This helps the bites release easily once frozen. Using a small spoon or cookie scoop, drop small, bite-sized portions of the mixture onto the parchment-lined tray. You can shape them into neat little mounds or leave them a bit rustic—it’s totally up to you. Aim for about a tablespoon per bite. This size makes them easy to grab from the freezer and eat in one or two bites, no mess or utensils required.
FREEZE, STORE, AND CUSTOMIZE – MAKING SNACKING SIMPLE
So now that you’ve got your Greek yogurt peanut butter mixture portioned out onto your tray, it’s time to let the freezer do the rest of the work. This part of the process is where everything comes together—literally. After a few hours, you’ll have a batch of frozen bites that are creamy, chewy, just the right amount of sweet, and ready whenever you need a quick snack. I love keeping a batch of these in the freezer for those moments when hunger strikes but I don’t want to reach for something processed. They satisfy a sweet tooth, give you a nice little protein boost, and are totally portable. Let’s finish up the recipe and then go over a few ways to make it your own.STEP 4: FREEZE UNTIL FIRM
Once all your yogurt-peanut butter bites are on the parchment-lined tray, place the tray flat in the freezer. Let them freeze for 2 to 3 hours, or until they’re completely firm to the touch. You want them frozen solid so they hold their shape when stored. If you’re in a rush, try placing the tray in the coldest part of your freezer (usually toward the back). Just don’t rush the process too much—if they’re not frozen all the way through, they’ll stick together in storage.
STEP 5: STORE FOR EASY SNACKING
When the bites are frozen through, transfer them into an airtight container or a resealable freezer bag. This helps prevent freezer burn and keeps them fresh-tasting for longer. If you’re stacking them, consider placing a small piece of parchment paper between layers to keep them from sticking. These will keep well in the freezer for up to 1 month, though I’ve never had a batch last that long—someone always sneaks one every time they walk by the freezer.STEP 6: SERVE WITH A LITTLE PATIENCE
Right before serving, let the bites sit at room temperature for 2 to 3 minutes. This softens them just enough to bring out the creamy texture and makes them easier to bite into. Straight out of the freezer, they can be a bit too firm, especially if you’ve made them on the thicker side. They’re meant to be a frozen snack, but not rock solid. Giving them that short rest time brings out the best texture—cool, creamy, and just slightly chewy.TIPS AND VARIATIONS TO SWITCH THINGS UP:
The base recipe is simple, which makes it perfect for customizing based on your cravings or what you have in the pantry. Here are a few favorite variations and tips to play around with.SWITCH UP THE NUT BUTTER
While natural peanut butter is a classic, you can easily substitute:- Almond butter for a lighter, nuttier flavor
- Cashew butter for extra creaminess
- Sunflower seed butter for a nut-free version
ADD TEXTURE AND CRUNCH
If you want more texture, try adding:- Chopped nuts like almonds, walnuts, or pecans
- Toasted coconut flakes
- Crushed pretzels for a salty-sweet combo
- Rolled oats for a granola-inspired twist
MAKE IT VEGAN OR DAIRY-FREE
To make this recipe fully vegan, just use:- A plant-based Greek-style yogurt
- Maple syrup instead of honey
- Dairy-free chocolate chips
FLAVOR BOOSTS AND ADD-INS
Looking for a little something extra? Try stirring in:- A dash of cinnamon or nutmeg
- A few drops of almond extract
- A spoonful of protein powder for an added boost
- Some crushed freeze-dried berries for fruity flavor and color

FREQUENTLY ASKED QUESTIONS & FINAL THOUGHTS ON FROZEN GREEK YOGURT PEANUT BUTTER BITES:
These little bites may be simple, but they’ve earned a spot in the regular rotation in my kitchen. Whether you need a post-gym protein fix, a school lunchbox treat, or just something to help you dodge that mid-afternoon slump, these Frozen Greek Yogurt Peanut Butter Bites hit the mark every time. Still, there are always a few questions that pop up when people make them for the first time—so let’s go ahead and cover the most common ones to make sure you get perfect results every time.1. Can I use flavored Greek yogurt instead of plain?
Yes, you can. Flavored yogurts will add sweetness and additional flavor, but keep in mind that they often contain added sugars. If you go that route, you may want to reduce or skip the honey or maple syrup to keep things balanced.2. Do I have to use natural peanut butter?
Natural peanut butter is recommended because it mixes smoothly with the yogurt and doesn’t contain added oils or sugars. That said, regular peanut butter will still work—it just might make the mixture a bit thicker and sweeter.3. How long do these last in the freezer?
These bites can be stored in an airtight container or freezer bag for up to 1 month. For best flavor and texture, try to enjoy them within the first couple of weeks.4. Can I make these without chocolate chips?
Definitely. The chocolate chips are totally optional. You can leave them out or replace them with other mix-ins like chopped nuts, dried fruit, or a sprinkle of cinnamon for added flavor.5. Can I use a different sweetener?
Yes. Both honey and maple syrup work well, but you can also use agave syrup or a few drops of liquid stevia if you prefer a lower-sugar option. Adjust to taste based on how sweet you want the bites to be.6. Do these need to stay frozen, or can I keep them in the fridge?
They’re meant to be a frozen snack and will soften too much in the fridge. For the best texture, keep them stored in the freezer and let them sit out for a couple of minutes before eating.7. Are these kid-friendly?
Very much so. Kids love the creamy, peanut buttery flavor, and the chocolate chips make them feel like a treat. Just be sure to adjust the size to suit smaller appetites, and skip the mix-ins with hard textures if you’re making them for toddlers.FINAL THOUGHTS: SNACK SMART WITHOUT SACRIFICING FLAVOR
It’s not always easy to find snacks that check all the boxes—healthy, satisfying, easy to make, and totally delicious—but these Frozen Greek Yogurt Peanut Butter Bites manage to do just that. They’re one of those rare recipes that feels like a treat but also fuels your day with real ingredients and no added junk. The best part? They’re endlessly customizable. Once you’ve made them once, it’s easy to tweak the flavors to fit your cravings or dietary preferences. Whether you’re going for dairy-free, adding a touch of crunch, or sneaking in a bit of protein powder, this base recipe gives you the flexibility to make it your own. So next time you’re staring into the fridge looking for something quick and satisfying, reach for one of these bites instead. They’re everything a good snack should be: wholesome, tasty, and ready when you are. If you try this recipe, I’d love to hear what you think. Leave a comment with your favorite variations or tell me how you’re using them—school snack, post-workout fuel, late-night treat? However you enjoy them, I hope they become as much of a freezer staple in your home as they have in mine. Here’s to smart snacking and sweet, simple wins in the kitchen. Print
Healthy Frozen Greek Yogurt Peanut Butter Bites
- Total Time: 3 hrs includes freeze time
Description
These no-bake frozen treats are the perfect healthy snack or dessert. Packed with protein from Greek yogurt and natural peanut butter, they’re lightly sweetened and dotted with mini chocolate chips for just the right touch of indulgence. Great for kids and adults alike!
Ingredients
- 1 cup plain Greek yogurt
- ½ cup natural peanut butter (smooth or crunchy)
- 2 tablespoons honey or maple syrup
- 1 teaspoon vanilla extract
- ¼ cup mini chocolate chips
Instructions
1️⃣ Mix ingredients: In a mixing bowl, combine the Greek yogurt, peanut butter, honey (or maple syrup), and vanilla extract. Stir until smooth and fully incorporated.
2️⃣ Add chocolate chips: Gently fold in the mini chocolate chips until evenly distributed.
3️⃣ Prepare tray: Line a baking sheet or tray with parchment paper to prevent sticking.
4️⃣ Scoop bites: Using a small spoon or cookie scoop, drop bite-sized portions of the mixture onto the parchment-lined tray.
5️⃣ Freeze: Place the tray in the freezer for 2–3 hours, or until the bites are completely frozen.
6️⃣ Store: Once frozen, transfer the bites to a sealed container or freezer bag for longer storage.
7️⃣ Serve: Allow to sit at room temperature for 2–3 minutes before enjoying for the best texture.
Notes
-
High-protein snack – Great for post-workout or midday energy.
-
Natural sweeteners – Use honey or maple syrup for a refined sugar-free option.
-
Customizable – Swap chocolate chips for chopped nuts, dried fruit, or cacao nibs.
-
Storage – Keeps in the freezer for up to 1 month.
-
Quick prep – Just 10 minutes of mixing before freezing.
- Prep Time: 10 min