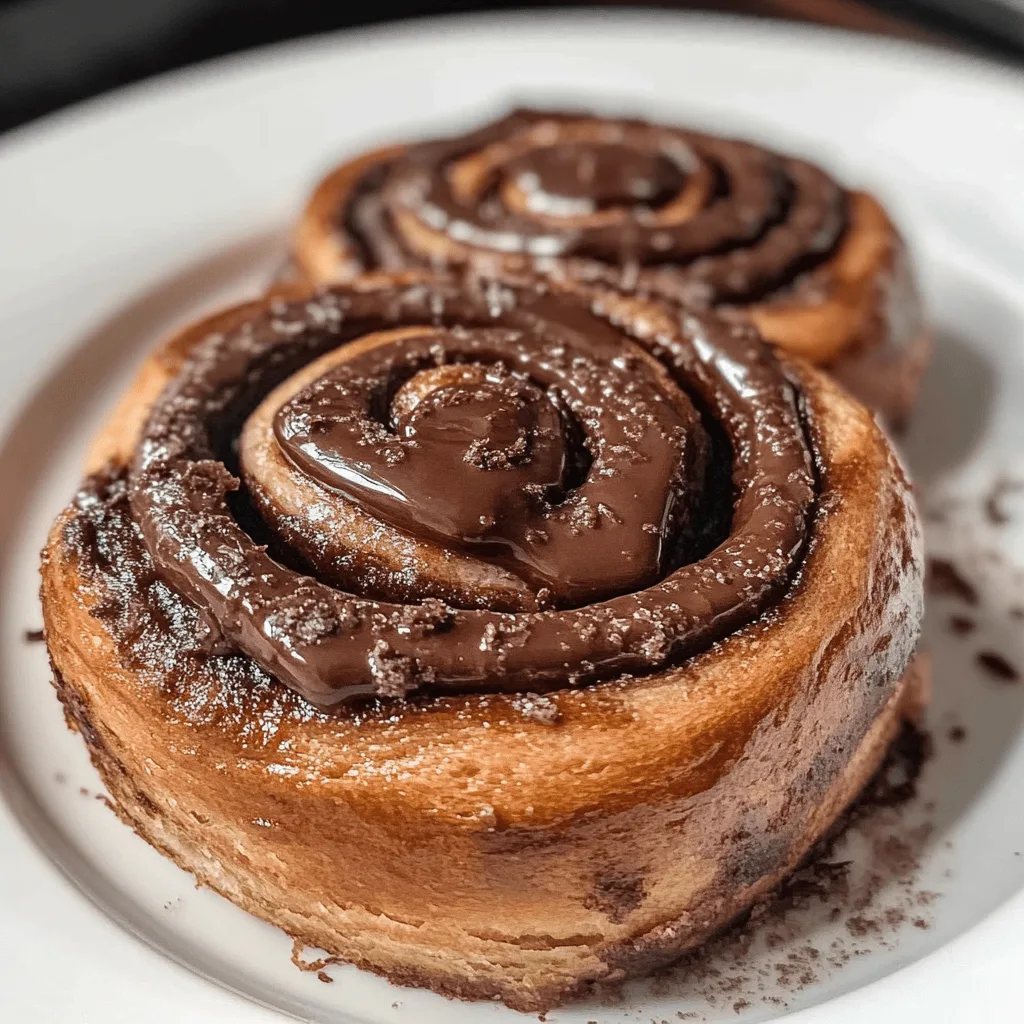
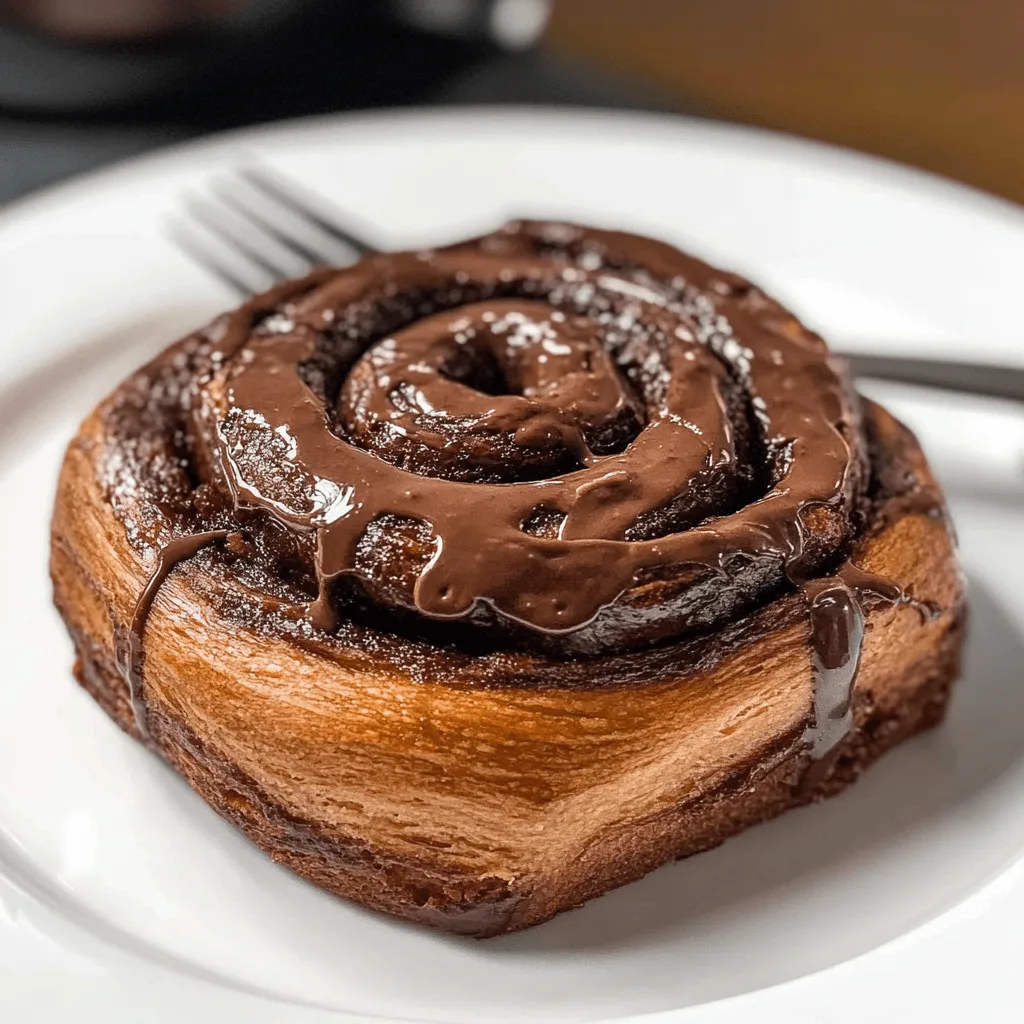
Picture sinking your teeth into a chocolate lover’s dream – a chocolate cinnamon roll with triple the intensity. This treat combines rich chocolate dough with dark chocolate filling and a decadent chocolate ganache frosting on top.
These indulgent chocolate cinnamon rolls might seem daunting at first. The process takes about 3 hours, with 1.5 hours dedicated to proofing time. Your journey to chocolate bliss starts with simple ingredients – lukewarm whole milk, instant yeast, and a perfect blend of cocoa and cinnamon. The result? Nine servings of the most delectable rolls you’ll ever make.
Our step-by-step guide covers everything from yeast proofing to creating that perfect spiral shape. These buttery-soft rolls will become your new favorite breakfast treat. The most delicious chocolate experience you’ve tasted awaits. Time to roll up those sleeves and begin!
Understanding the Dough: Cocoa, Yeast, and Enrichment
The perfect chocolate cinnamon roll recipe comes down to understanding the science behind what makes them work. Once you become skilled at working with these elements, your baking will go from good to exceptional.
How cocoa powder affects dough texture
Adding cocoa to your chocolate cinnamon rolls does more than just add flavor – it changes your dough’s basic structure. Cocoa powder fights with flour to get the available water in your recipe. It soaks up to 100% of its weight in liquid. This is a big deal as it means that it absorbs more than double what flour does, which only takes in 40% of its weight.
The type of cocoa you pick makes a huge difference in your dough. Dutch-processed cocoa changes how stretchy your dough is, and it won’t expand or trap air as well. You’ll get the best texture in your chocolate cinnamon rolls if you stick to using cocoa at about 10% of your flour weight. If you use more than this, you’ll need to carefully adjust the liquid to keep your rolls from turning out dense and dry.
Your cocoa powder’s acidity also affects how the yeast works. Natural cocoa sits at a pH of 5-6, while Dutch-processed types are higher at 7-8. Yeast works best when the pH is between 4.5-6, so your choice of cocoa directly affects how well your dough rises.
On top of that, the fat in cocoa powder coats flour proteins and gets in the way of gluten forming. This gives you softer, more tender chocolate cinnamon rolls, but too much cocoa can make your dough tough to work with.
Choosing between active dry and instant yeast
Your choice of yeast substantially affects both how you make your rolls and how they turn out. Instant yeast has several advantages over active dry:
- Convenience: You can mix instant yeast right in with dry ingredients without proofing
- Reliability: Instant yeast is always 100% active, unlike active dry which might not work as well even before it expires
- Efficiency: Your dough rises about 15 minutes faster with instant yeast
You can swap active dry yeast for instant yeast at a 1:1 ratio by weight or volume. But if you use active dry yeast, remember to:
- Mix it with warm water and a bit of sugar first
- Give it about 15-20 extra minutes to rise
- Look for signs that it’s proofing right
Many bakers reach for instant yeast (like SAF Red or Gold for sweet doughs) to make chocolate cinnamon rolls because it works well even with cocoa and rich ingredients.
Why enriched doughs need longer kneading
Our chocolate cinnamon roll dough is what we call an “enriched dough” – it’s got more than just flour, water, yeast, and salt. These extra ingredients (butter, eggs, milk, sugar) make things tricky during prep.
You need to knead enriched doughs longer because fats get in the way of gluten forming. The butter and other fats in chocolate cinnamon rolls coat the flour proteins, which stops them from joining up to create that stretchy gluten network that gives your rolls structure.
Sugar also messes with gluten by grabbing onto water molecules before the flour proteins can get to them. The mix of cocoa powder, butter, and sugar in chocolate cinnamon rolls creates three separate roadblocks for gluten development.
A trick I use is to knead the flour and water together first, then add the rich ingredients. This lets the gluten network get going before anything can interfere. Plan to knead your chocolate cinnamon roll dough much longer than plain bread dough – usually 8-10 minutes with a stand mixer or up to 15 minutes by hand.
These challenges are worth working through because proper kneading gives you chocolate cinnamon rolls with just the right balance of structure and tenderness. Your dough should end up smooth and stretchy, though it will stay a bit sticky because of all the rich ingredients.
Making the Chocolate Dough Step-by-Step
Let’s dive into making chocolate cinnamon rolls now that we understand the science. The process might look challenging at first, but you’ll get impressive results by paying attention to each step.
Blooming the yeast properly
Blooming yeast serves as your safety net against wasting time with dead yeast. Here’s how to bloom yeast successfully:
- Heat milk to 105-115°F (40-46°C), with 110°F (43°C) being perfect
- Mix warm milk, instant yeast, and a small amount of sugar in a bowl
- Give it a gentle stir and let it sit for 5-10 minutes until the mixture becomes foamy and bubbly
Your yeast might not foam because the liquid was too hot (killing it), too cold (not enough activation), or the yeast has expired. Active dry yeast needs 10-15 minutes to activate compared to instant yeast’s 5 minutes.
Mixing and kneading the dough
The real work begins when your yeast mixture starts bubbling. Here’s how to create the chocolate dough:
Start by whisking an egg and oil into your activated yeast mixture. Add this liquid to a mixing bowl that has the remaining ingredients—flour, cocoa powder, salt, and sugar. Some bakers add a teaspoon of instant coffee to enhance the chocolate flavor.
Kneading plays a vital part in developing proper structure. A stand mixer with a dough hook attachment works best for 8-10 minutes of kneading. This extended kneading creates fluffy, soft chocolate cinnamon rolls by developing the right gluten structure.
The dough should feel smooth and elastic but slightly tacky. Well-kneaded dough won’t stick to the bowl’s sides but feels sticky when touched. New bakers can try the “windowpane test”—stretch a small piece of dough thin enough to let light pass through without tearing.
First proof: how to know when it’s ready
Place your kneaded dough in a lightly oiled bowl and turn it once to coat all sides. Cover it with a damp towel or plastic wrap to keep moisture in. The dough needs a warm, draft-free spot to proof effectively.
The dough proofs best at 72-80°F (22-27°C). You can place the covered dough in an oven with just the light on or near a warm appliance if your kitchen runs cold.
First proofing takes 60-90 minutes for most chocolate cinnamon roll recipes, but temperature and humidity affect this timing. Watch for these signs instead of the clock to know your dough has proofed properly:
- Double in size
- Air bubbles visible through a clear bowl
- Light, jiggly texture when shaken gently
- Passes the “poke test”—a floured finger indent slowly bounces back within 10 seconds
Under-proofed dough bounces back fast when poked, while over-proofed dough stays indented. These visual and touch cues matter more than strict timing, especially on very warm or cold days.

Filling and Rolling: Getting the Layers Right
The magic of chocolate cinnamon rolls happens when your dough meets its perfect match – the filling. Beautiful spiral layers need the right technique, attention to detail, and a few baker’s secrets.
Making a smooth chocolate cinnamon filling
A well-made filling sits at the heart of every chocolate cinnamon roll. Softened butter works best as your starting point – not melted. This difference keeps the filling from soaking into the dough or leaking during rolling. The butter should be at room temperature to spread smoothly without damaging your delicate dough.
Mix these ingredients for a rich chocolate cinnamon filling:
- Softened butter as your base
- Brown sugar (light or dark based on how much molasses flavor you want)
- Cocoa powder (black cocoa gives you that Oreo-like taste)
- Ground cinnamon
- Optional: chocolate chips or chunks to add texture
You can mix everything into a spreadable paste or spread the butter first and sprinkle the dry ingredients on top. Both methods work great. Just remember to leave a ½-inch border on one edge to seal the roll properly.
Rolling and slicing without squishing
After spreading your filling evenly, you’re ready to roll. Start from the long edge without the border and roll the dough horizontally into a tight log. The roll should be snug but not too tight. Excessive tightness pushes out the filling and makes the centers pop up while baking, leaving you with cone-shaped rolls instead of perfect spirals.
Here’s how to cut without squishing:
- Let the rolled log chill briefly to firm up
- Use unflavored dental floss for clean cuts – slide it under, cross the ends on top, and pull outward
- A sharp serrated knife works too – use gentle sawing motions instead of pressing down
Tips for even spacing in the pan
The way you space your rolls in the pan makes a big difference in how they rise and bake. Put the rolls in a greased baking pan with 1-2 inches between them. This gap lets them expand during their final rise and baking.
Your kitchen’s temperature affects the final proof time. A warm kitchen needs about 45 minutes, while a cooler space might take just over an hour. Look for rolls that have doubled in size and look puffy before baking.
Toothpicks help create a plastic wrap tent during rising. This simple trick stops the wrap from touching your dough and deflating those beautiful spirals.
Baking and Topping Options Explained
Raw dough transforms into a fragrant, indulgent treat right in your oven. Your chocolate cinnamon rolls are just two steps away from perfection: baking them right and selecting the perfect topping.
How to know when rolls are fully baked
The rolls should look puffed with slightly golden edges. Temperature testing gives you absolute certainty – they’re ready at 88°C–93°C (190°F–200°F) in the center. A golden-brown color on the darker side indicates doneness if you don’t have a thermometer.
Many people love gooey centers in their chocolate cinnamon rolls. The center rolls should reach 82°C (180°F). This slight underbaking creates that irresistible melt-in-your-mouth texture.
Chocolate ganache vs. cream cheese vs. espresso glaze
The topping you choose shapes the roll’s final flavor profile:
- Chocolate Ganache – Traditional ganache combines warm cream and chocolate until smooth. True chocolate lovers will appreciate this intense chocolate experience.
- Cream Cheese Frosting – Cream cheese’s tanginess balances the roll’s sweetness perfectly. Mix room-temperature cream cheese, confectioners’ sugar, cocoa powder, and whipping cream to create a chocolate cream cheese frosting. This balanced flavor profile makes it my favorite choice.
- Espresso Glaze – Espresso powder adds bitter notes that offset the roll’s sweetness. This sophisticated option blends warm cream, espresso powder, confectioners’ sugar, and vanilla extract.
A light dusting of confectioners’ sugar works beautifully for minimalist presentation.
When to frost: warm vs. cooled rolls
The timing of your frosting application is a vital factor. Let rolls cool completely before adding cream cheese frosting. Hot rolls will cause the frosting to melt and drip everywhere.
Glazes work best on warm rolls. Let them rest 10-20 minutes after coming out of the oven. This timing allows the glaze to melt perfectly over your chocolate cinnamon rolls. Warm chocolate ganache creates a beautiful, drippy effect.
Store your frosted rolls in an airtight container right away to keep them fresh. Room temperature storage keeps them good for 2-5 days depending on the topping.
Troubleshooting and Customization Tips
Chocolate cinnamon rolls can challenge even the most skilled bakers. Here are some solutions to common problems and creative ideas that will help you perfect your recipe.
What to do if your dough is too sticky
Sticky dough ranks among the most common problems with chocolate cinnamon rolls. Your dough might feel more like batter than actual dough.
Add flour gradually in small amounts—a few tablespoons at a time—while you knead until you get a soft, slightly tacky dough. Note that chocolate roll dough should stay a bit stickier than regular bread dough. This extra moisture creates softer rolls.
The environment plays a vital role too. Your dough needs different amounts of flour based on temperature and humidity. You might need more flour on humid days.
Stand mixer users should watch out for overworking the dough. A mixer can overwork dough more easily than hand kneading and results in dense, tough rolls. Just knead enough to form a smooth ball that bounces back when you press it.
How to adjust sweetness or chocolate intensity
You can try these adjustments to get a deeper chocolate flavor:
Different cocoa types give different results. Natural process cocoa gives you a lighter chocolate flavor, while Dutch process cocoa delivers an intense dark chocolate experience. True chocolate enthusiasts can add an extra quarter cup of cocoa powder to both the filling and caramel sauce.
Your choice of chocolate makes a difference. Dark or semi-sweet chocolate works best in fillings. Milk or white chocolate can make your rolls too sweet. A splash of espresso powder can boost the chocolate flavor without extra sweetness.
Flavor add-ins: nuts, coffee, orange zest
These delicious add-ins will make your chocolate cinnamon rolls special:
- Citrus elements: Orange zest in the dough and fresh orange juice drizzled over rolls creates amazing flavors. Bright citrus balances rich chocolate perfectly.
- Nuts and fruits: Crushed walnuts add great texture and flavor depth. Add them to your filling for extra crunch.
- Coffee accents: A teaspoon of instant espresso powder in your chocolate dough makes chocolate taste richer without any coffee flavor.
- Spice variations: Cardamom works well as an alternative to or with cinnamon to create complex flavors.
You can prepare the dough at night and keep it in the fridge. Let it sit at room temperature for about an hour before rolling and filling the next morning.

FAQs
Q1. How long does it take to make chocolate cinnamon rolls? The entire process of making chocolate cinnamon rolls takes about 3 hours, including 1.5 hours of proofing time. This allows for proper dough development and rising, resulting in soft and fluffy rolls.
Q2. Can I use active dry yeast instead of instant yeast for chocolate cinnamon rolls? Yes, you can substitute active dry yeast for instant yeast at a 1:1 ratio. However, when using active dry yeast, you’ll need to dissolve it in warm water with a bit of sugar first and allow for about 15-20 minutes of additional rising time.
Q3. What’s the secret to getting the perfect chocolate flavor in cinnamon rolls? To achieve an intense chocolate flavor, use a combination of cocoa powder in the dough and filling. For even more depth, consider adding a teaspoon of instant espresso powder to enhance the chocolate taste without making it taste like coffee.
Q4. How do I know when my chocolate cinnamon rolls are fully baked? Properly baked chocolate cinnamon rolls should appear puffed and slightly golden around the edges. For absolute certainty, use a thermometer to check that the center of the rolls reaches 190°F–200°F (88°C–93°C). If you prefer gooey centers, aim for 180°F (82°C).
Q5. What are some creative ways to customize chocolate cinnamon rolls? You can customize your chocolate cinnamon rolls by adding orange zest to the dough, incorporating crushed walnuts in the filling for extra crunch, or using cardamom instead of or alongside cinnamon for a more complex flavor profile. You can also experiment with different toppings like chocolate ganache, cream cheese frosting, or espresso glaze.
Print
How to Make Chocolate Cinnamon Rolls: A Foolproof Guide for Perfect Results
Description
These Soft Chocolate Cinnamon Rolls melt in your mouth and are a dream to make. Perfect for cozy mornings or a sweet brunch centerpiece.
Ingredients
Chocolate Sweet Dough
180 ml (3/4 cup) Full Cream / Whole Milk, lukewarm
9 gr (2 teaspoons) Instant (dry) Yeast
2 Eggs, at room temperature
75 gr (1/3 cup) Unsalted Butter, melted
80 gr (1/3 cup) Caster Sugar, or fine white granulated sugar
400 gr (2 2/3 cups) Plain / All-Purpose Flour
30 gr (3 tablespoons) Unsweetened Cocoa Powder
1 teaspoon Ground Cinnamon
1/2 teaspoon Fine Salt
Chocolate Cinnamon Filling
90 gr (6 tablespoons) Unsalted Butter, soft
100 gr (1/2 cup) Brown Sugar
20 gr (2 tablespoons) Unsweetened Cocoa Powder
2 teaspoons Ground Cinnamon
100 gr (3 oz) Dark Chocolate, finely chopped
Chocolate Sauce
50 gr (1,5 oz) Dark Cooking Chocolate
120 ml (1/2 cup) Milk
Instructions
Chocolate Sweet Dough
Mix the lukewarm Milk and the Instant Yeast in the bowl of your Stand Mixer. Leave for 10 minutes or until small bubbles/froth appears on the surface (see note 1). Mix in the Eggs and cooled down melted Butter.
Add the Sugar, Flour, Cocoa Powder, Cinnamon and Salt. Fit the Dough Hook Attachment on your mixer and knead on medium to high speed for 18 to 20 minutes, or until very soft and strechy (see note 2).
With the Kendwood Cooking Chef XL Stand Mixer, select the preset “dough kneading” function and set it up for 20 minutes.
Cover the bowl with a tea towel and leave to proof in a warm spot for 1h30 to 2 hours, or in the fridge overnight (8 to 12 hours).
With the Kendwood Cooking Chef XL Stand Mixer, select the preset “dough proofing” function and set it up for 1,5 hour or until the dough has doubled in size. Optionally, place the dough in the fridge for 30 minutes once proofed; a colder dough will be easier to roll.
Chocolate Cinnamon Filling
Place the very soft Butter in a medium size mixing bowl and mix in the Brown Sugar, Cinnamon and sifted Cocoa Powder with a spatula to get a thick paste (see note 3). Finely chop the Dark Chocolate and set aside.
Assembling the Chocolate Cinnamon Rolls
Punch the air out of the proofed dough and transfer over a lightly floured surface. With a rolling pin (lightly floured if needed), roll the dough into a large rectangle, about 30 x 40 cm (12 x 15 inch).
Spread the cocoa cinnamon filling over the dough using a small offset spatula, then sprinkle the finely chopped chocolate chunks over it.
Roll the dough on its longest side to get a log shape. Using a serrated knife or unflavoured dental floss, cut out 9 even rolls (see note 4). Place the rolls in a greased square pan – about 25 to 30 cm wide (10 to 12 inches). Cover with a tea towel and leave to proof again for 30 to 45 minutes or until doubled in size. Optionally, brush with an Egg Wash for a nice shine.
Preheat your oven on 180’C/350’F then bake the rolls for 20 to 25 minutes. Let them cool down completely.
Chocolate Sauce
Finely chop the Chocolate and place in a heat-proof bowl. Bring the Milk to a simmer, then pour half of it over the chocolate. Let it sit for a few minutes, stir to combine then add the rest of the hot milk. Mix with a spatula until all the chocolate has melted and the sauce is smooth.
With the Kenwood Cooking Chef XL, place the Cream and Chocolate in the bowl of the mixer and fit it with the Creaming Beater, Splashguard and Heat Shield. Select the “chocolate melting” preset function and mix until you get a smooth chocolate sauce.
Pour the sauce over the chocolate cinnamon rolls while still warm.