

There’s something about cream puffs that just feels special. That light, airy pastry filled with luscious cream and topped with chocolate is pure dessert magic. But let’s be honest—making traditional cream puffs can be time-consuming and tricky. That’s where this Cream Puff Dessert comes in. It gives you all the incredible flavors of a classic cream puff but in a simple, no-fuss dessert form.
This recipe features a buttery, golden-brown crust, a rich and creamy vanilla pudding filling, and a light whipped topping with a drizzle of chocolate syrup to tie everything together. It’s easy to make, perfect for gatherings, and guaranteed to be a crowd-pleaser. Whether you’re looking for a sweet treat for a holiday, a potluck, or just because—you’re going to love this one!
Let’s get started with the first (and most important) step: making that perfect, flaky cream puff crust.
HOW TO MAKE THE PERFECT CREAM PUFF CRUST
The base of this dessert is made using choux pastry—the same dough used for traditional cream puffs and eclairs. While it might sound fancy, it’s actually very simple. You don’t need any special equipment, just a saucepan, a mixing spoon, and a little bit of arm strength!
INGREDIENTS FOR THE CRUST
- 1 cup water
- ½ cup unsalted butter
- 1 cup all-purpose flour
- 4 large eggs
STEP 1: PREPPING YOUR OVEN AND PAN
Start by preheating your oven to 400°F (200°C). Grease a 9×13-inch baking dish with butter or non-stick spray to prevent the crust from sticking.

STEP 2: MAKING THE DOUGH
Now, let’s make the dough. This process happens quickly, so have your ingredients measured and ready to go.
- Heat the Butter and Water
- In a medium saucepan over medium heat, bring 1 cup of water and ½ cup of unsalted butter to a rolling boil. Stir occasionally to make sure the butter melts evenly.

- Add the Flour
- As soon as the butter melts and the water is boiling, remove the saucepan from the heat.
- Add 1 cup of all-purpose flour all at once and stir vigorously with a wooden spoon. The mixture will come together quickly and form a smooth, slightly sticky ball.

- Let It Cool Slightly
- Set the saucepan aside for 5 minutes to cool. You don’t want to add the eggs while the dough is too hot, or they’ll start to cook.
- Add the Eggs One at a Time
- Once the dough has cooled slightly, add 4 large eggs, one at a time.
- After each egg, stir vigorously until fully incorporated before adding the next.
- At first, the mixture will look lumpy and separated, but keep stirring! Eventually, it will become smooth, thick, and glossy.

STEP 3: BAKING THE CRUST
- Spread the dough evenly into your greased 9×13-inch baking dish.
- Place it in the preheated oven and bake for 25-30 minutes, or until golden brown.
- As it bakes, the dough will puff up in different spots. This is totally normal! Once it cools, it will settle down and create the perfect flaky base.
Once the crust is beautifully golden brown, remove it from the oven and let it cool completely before moving on to the filling.
Now that the crust is ready, it’s time for the best part—making the creamy, dreamy filling! But before we dive into that, let’s go over some key tips to ensure your crust turns out perfect every time.

TIPS FOR THE BEST CREAM PUFF CRUST
- Don’t Skip the Cooling Step: Letting the dough cool slightly before adding eggs is crucial. If the eggs are added too soon, they may scramble, and the dough won’t come together properly.
- Use Room Temperature Eggs: Cold eggs can make the dough harder to mix. For best results, let them sit out for a few minutes before using.
- Expect Some Puffing: The dough will rise unevenly in the oven, creating little peaks and valleys. This is normal! The filling will cover any imperfections, so don’t worry about making it perfectly smooth.
- Cool Completely Before Adding the Filling: If the crust is still warm, the filling won’t set properly, and you’ll end up with a runny dessert.
CREAMY FILLING AND DELICIOUS TOPPING
Now that the golden, flaky crust is ready and cooling, it’s time to make the smooth, velvety filling that makes this dessert so irresistible. The combination of cream cheese and vanilla pudding creates a rich yet light texture, and when topped with fluffy whipped cream and a drizzle of chocolate syrup, it’s pure perfection.
This filling comes together in just a few minutes, but there are a few key tips to ensure it turns out perfectly creamy and lump-free. Let’s get started!
HOW TO MAKE THE CREAMY VANILLA FILLING
INGREDIENTS FOR THE FILLING
- 8 oz cream cheese, softened
- 3 cups cold milk
- 2 packages (3.4 oz each) instant vanilla pudding mix
STEP 1: BEAT THE CREAM CHEESE
- In a large mixing bowl, beat the 8 oz of softened cream cheese with an electric mixer until completely smooth. This step is crucial because any lumps in the cream cheese will be hard to get rid of later.
- TIP: If your cream cheese is too cold, it won’t mix smoothly. Let it sit at room temperature for 15-20 minutes before using.

STEP 2: ADD THE MILK GRADUALLY
- Slowly add the 3 cups of cold milk, about ½ cup at a time, while continuing to beat the mixture. This prevents lumps from forming and helps the milk incorporate smoothly.
- TIP: Don’t rush this step! Adding the milk too quickly can make the filling clumpy.

STEP 3: MIX IN THE VANILLA PUDDING
- Once the milk is fully mixed in, add the 2 packages of instant vanilla pudding mix and continue to beat for 1-2 minutes, or until the mixture thickens.
- The pudding will set quickly, creating a smooth, creamy texture that will hold up beautifully on top of the crust.

ASSEMBLING THE DESSERT
STEP 4: SPREAD THE FILLING OVER THE COOLED CRUST
- Once the crust is completely cool, spread the pudding mixture evenly over the top. Use a spatula to smooth it out so that every bite has a perfect layer of creamy filling.
- TIP: If the crust is still warm, the filling may become runny. Make sure to give the crust enough time to cool before adding the filling.
THE FINAL TOUCH: WHIPPED TOPPING AND CHOCOLATE DRIZZLE
INGREDIENTS FOR THE TOPPING
- 1 cup whipped topping or whipped cream
- ¼ cup chocolate syrup
STEP 5: ADD THE WHIPPED TOPPING
- Gently spread 1 cup of whipped topping (or freshly whipped cream) over the pudding layer. This gives the dessert a light, fluffy finish that balances out the richness of the filling.
STEP 6: DRIZZLE WITH CHOCOLATE SYRUP
- The final touch is a generous drizzle of chocolate syrup over the top. You can drizzle it in a zig-zag pattern, swirl it in circles, or simply let it flow naturally—however you like!
CHILLING AND SERVING
- For the best results, refrigerate the dessert for at least 1 hour before slicing and serving. This allows the layers to set properly and makes it easier to cut clean slices.
- Once chilled, slice into squares and serve immediately. This dessert is best enjoyed cold and fresh, making it the perfect make-ahead treat for gatherings.

FAQ AND FINAL THOUGHTS
Your Cream Puff Dessert is now fully assembled, chilled, and ready to serve! With its flaky pastry crust, velvety vanilla filling, fluffy whipped topping, and rich chocolate drizzle, this dessert is guaranteed to impress.
Before we wrap up, let’s go over some frequently asked questions about this recipe, including tips for storage, ingredient swaps, and troubleshooting.
1. CAN I USE HOMEMADE WHIPPED CREAM INSTEAD OF WHIPPED TOPPING?
Yes! If you prefer homemade whipped cream, simply beat 1 cup of heavy cream with 2 tablespoons of powdered sugar until soft peaks form. It will have a fresher taste and a softer texture compared to store-bought whipped topping.
2. CAN I MAKE THIS DESSERT AHEAD OF TIME?
Absolutely! This dessert actually tastes even better after chilling for a few hours. You can make it up to 24 hours in advance and store it in the refrigerator until ready to serve. Just wait to drizzle the chocolate syrup until right before serving for the best presentation.
3. HOW DO I STORE LEFTOVERS?
Cover the baking dish tightly with plastic wrap or foil and store leftovers in the refrigerator for up to 3 days. The crust may soften slightly over time, but the flavors will still be delicious.
4. CAN I FREEZE THIS CREAM PUFF DESSERT?
Freezing is not recommended, as the pudding and whipped topping can separate once thawed. However, if you do freeze it, let it thaw in the refrigerator for a few hours before serving.
5. CAN I USE A DIFFERENT PUDDING FLAVOR?
Yes! While vanilla pudding keeps it classic, you can try chocolate, butterscotch, or even cheesecake-flavored pudding for a fun twist. Just make sure to use instant pudding mix for the best texture.
6. WHAT IF MY CREAM CHEESE MIXTURE IS LUMPY?
Lumpy filling usually happens when the cream cheese is too cold. To fix it, try microwaving the mixture for 10-15 seconds and whisking again until smooth. A hand mixer also helps break up any lumps.
7. CAN I ADD OTHER TOPPINGS?
Of course! Some great additions include toasted almonds, crushed graham crackers, mini chocolate chips, or caramel drizzle for extra flavor and texture.
FINAL THOUGHTS
This Cream Puff Dessert is the ultimate combination of light, airy choux pastry, creamy vanilla filling, and decadent chocolate topping—all in an easy, no-fuss format. It’s perfect for parties, potlucks, holidays, or just because you’re craving something sweet.
If you give this recipe a try, let us know how it turned out! Did you stick with the classic version, or did you try a fun variation? Share your thoughts in the comments and enjoy every delicious bite!
Print
Irresistible Cream Puff Dessert Recipe: A Sweet Treat You’ll Love
- Total Time: 50 min
Description
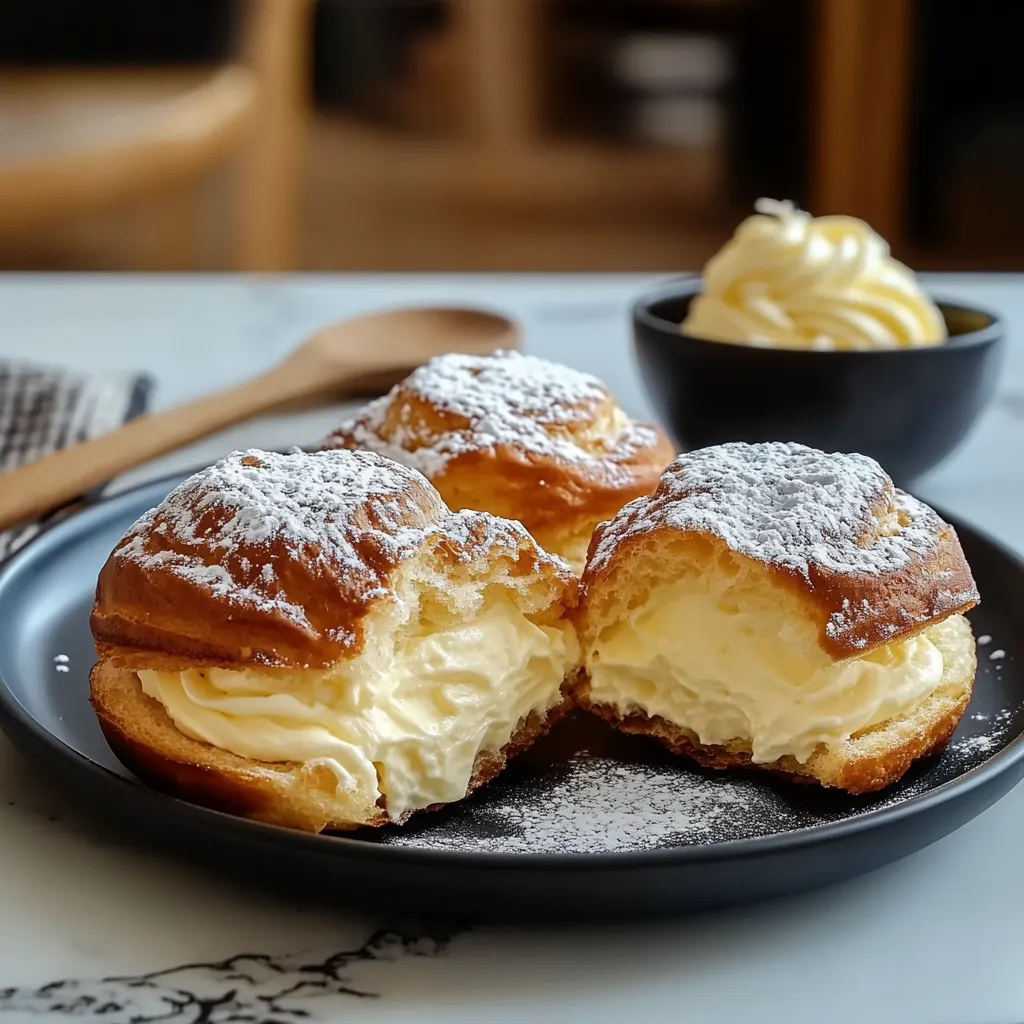
Classic French cream puffs—golden, crisp choux pastry shells piped into perfect rounds—are filled with a rich vanilla pastry cream and lightly dusted with powdered sugar. Delightfully delicate yet impressively indulgent, they make an elegant dessert for dinner parties or a special homemade treat.
Ingredients
For the Choux Pastry (Pâte à Choux)
-
½ cup (120 ml) water
-
½ cup (120 ml) whole milk
-
½ cup (115 g) unsalted butter, cut into pieces
-
1 tsp granulated sugar
-
¼ tsp fine salt
-
1 cup (125 g) all-purpose flour, sifted
-
4 large eggs, at room temperature
For the Vanilla Pastry Cream
-
2 cups (480 ml) whole milk
-
⅓ cup (65 g) granulated sugar
-
¼ cup (30 g) cornstarch
-
¼ tsp fine salt
-
4 large egg yolks
-
2 tbsp (30 g) unsalted butter
-
1 tsp pure vanilla extract
For Assembly & Garnish
-
2 tbsp powdered sugar, for dusting
-
Optional: melted chocolate or caramel drizzle
Instructions
1️⃣ Prep & preheat:
Preheat oven to 425 °F (220 °C). Line two baking sheets with parchment paper. Fit a pastry bag with a large plain or star tip.
2️⃣ Make the choux pastry:
In a medium saucepan over medium heat, combine water, milk, butter, sugar, and salt. Bring just to a boil, then remove from heat. Add all the flour at once, stirring vigorously with a wooden spoon until the mixture forms a smooth ball and pulls away from the pan.
3️⃣ Incorporate the eggs:
Transfer the dough to a mixing bowl. Beat in eggs one at a time (by hand or with a mixer), fully incorporating each before adding the next. The dough should be glossy and just stiff enough to hold its shape.
4️⃣ Pipe & bake puffs:
Pipe 1½″–2″ mounds onto prepared sheets, spacing 2″ apart. Smooth any peaks with a damp finger. Bake 10 min at 425 °F, then reduce oven temp to 350 °F (175 °C) and bake 15 min more, until puffed and deeply golden. Do not open the oven door during baking. Remove to a wire rack and cool completely.
5️⃣ Make the pastry cream:
In a saucepan, heat milk until steaming. Meanwhile, in a bowl whisk sugar, cornstarch, salt, and yolks until pale. Gradually whisk hot milk into the yolk mixture to temper, then return all to the pan. Cook over medium heat, whisking constantly, until thick and bubbling. Remove from heat; whisk in butter and vanilla. Transfer to a clean bowl, cover surface with plastic wrap, and chill until set, at least 2 hours.
6️⃣ Fill the puffs:
Once pastry and cream are cool, fit a clean pastry bag with a small plain tip. Transfer pastry cream into the bag. Poke a hole in the bottom of each puff and pipe in cream until lightly firm. Alternatively, slice puffs in half and spoon or pipe cream into the cavity.
7️⃣ Garnish & serve:
Dust generously with powdered sugar. For extra flair, drizzle with melted chocolate or warm caramel. Serve immediately.
Notes
-
Flavor Twists: Fold lemon or coffee extract into the pastry cream.
-
Chocolate Puffs: Stir 2 tbsp cocoa powder into the choux dough.
-
Storage: Fill puffs just before serving. Store baked shells at room temperature in an airtight container up to 2 days; refrigerate filled puffs up to 4 hours.
-
Gluten-Free: Use a 1:1 gluten-free flour blend and ensure it’s fine enough for choux.
- Prep Time: 25 min
- Cook Time: 25 min


