

If you’re looking for a showstopping dessert that’s both rich and refreshing — and incredibly easy to make — this Layered Cherry Cheesecake Lush is everything you want and more. It’s cool, creamy, chocolatey, fruity, and absolutely perfect for holidays, potlucks, or any time you want a no-bake treat that looks as good as it tastes.
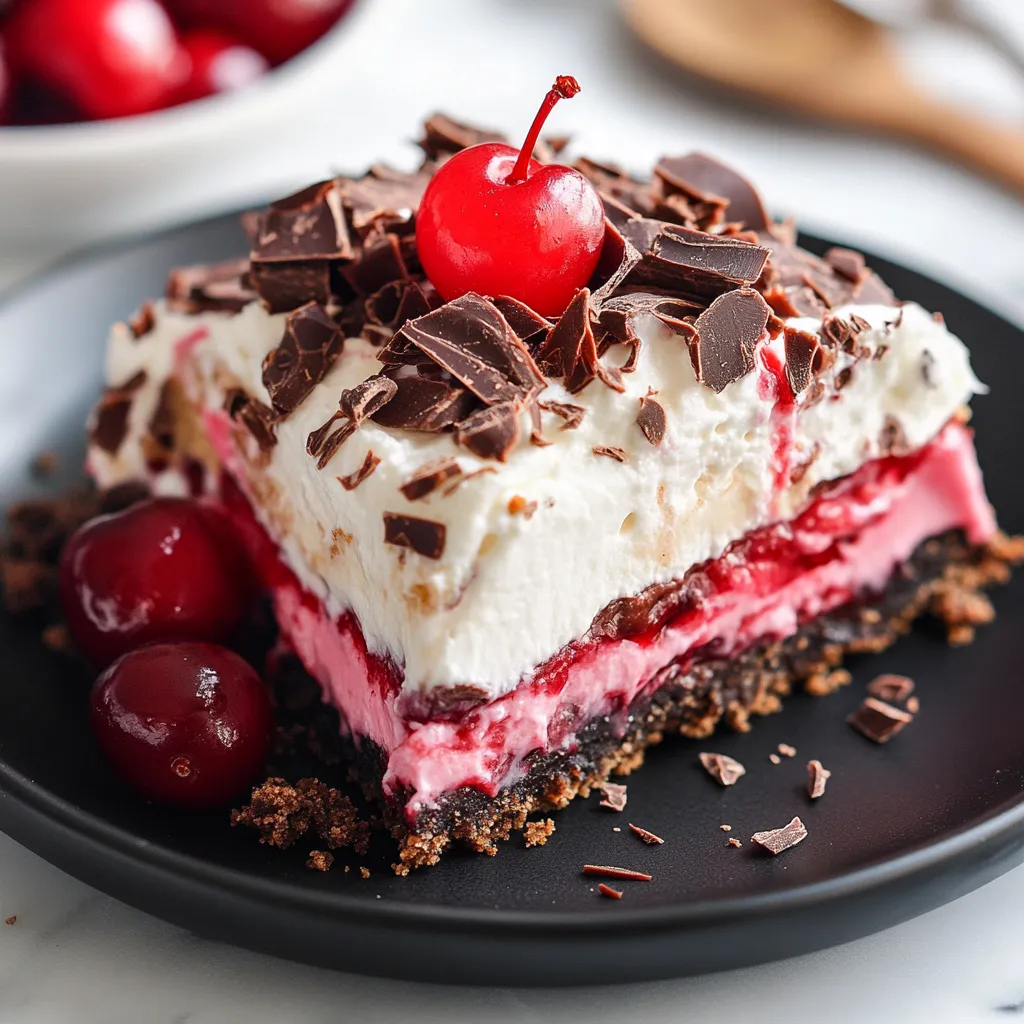
This dessert is made up of four indulgent layers: a buttery chocolate cookie crust, a fluffy cheesecake center, sweet cherry pie filling, and silky chocolate pudding — all topped off with a cloud of whipped topping and your choice of garnish. Every bite is full of different textures and flavors, and it’s one of those recipes that disappears fast whenever it’s served.
The best part? It comes together with minimal effort and no oven time required. Let’s walk through how to make the crust and that smooth cheesecake layer.
Ingredients for Layered Cherry Cheesecake Lush
For the Crust:
- 2 cups chocolate graham cracker or Oreo crumbs
- ½ cup melted butter
For the Cream Cheese Layer:
- 8 oz cream cheese, softened
- 1 cup powdered sugar
- 1½ cups whipped topping (like Cool Whip)
For the Cherry Layer:
- 1 can (21 oz) cherry pie filling
For the Chocolate Pudding Layer:
- 1 package (3.9 oz) instant chocolate pudding mix
- 1½ cups cold milk
Topping:
- 1½ cups whipped topping
- Optional: chocolate shavings, mini chocolate chips, or extra cherries
STEPS: Make the Crust and Cream Cheese Layer
Step 1: Prepare the Crust
In a medium bowl, mix the chocolate cookie crumbs and melted butter until the mixture resembles wet sand. Press the mixture firmly into the bottom of a 9×13-inch baking dish to form an even crust. Place in the refrigerator and chill for 10–15 minutes to set.
Step 2: Make the Cream Cheese Layer
In a separate bowl, beat the softened cream cheese and powdered sugar until smooth and creamy. Gently fold in the whipped topping until well combined. Spread this mixture evenly over the chilled crust, making sure to cover edge to edge for a solid base.

Add the Cherry and Chocolate Layers to Your Cheesecake Lush
Now that your crust is set and your cream cheese layer is smooth and fluffy, it’s time to take this dessert to the next level. This part is where that “lush” magic really happens — the sweet cherry filling and chocolate pudding add bold flavor and beautiful contrast that makes this dish a standout on any dessert table.
Layering each element gently is key here. You want to preserve those defined layers for a gorgeous presentation, especially once it’s sliced and served. Don’t worry — it’s easier than it looks, and the end result is so worth it.
STEPS: Layer the Fruit and Pudding
Step 3: Add the Cherry Pie Filling
Carefully spoon the cherry pie filling over the cream cheese layer. Use the back of the spoon to gently spread it across the surface. Take your time and go slow — this helps prevent the layers from mixing and keeps your dessert looking picture-perfect.

Step 4: Mix and Spread the Chocolate Pudding Layer
In a clean bowl, whisk together the chocolate pudding mix and cold milk for about 2 minutes, or until thickened. Let it sit for a minute or two if it needs to firm up a bit more. Once it’s ready, spread it evenly over the cherry layer. This pudding brings a rich, silky finish that perfectly balances the fruity sweetness.
STEPS: Top It Off and Chill
Step 5: Add the Final Layer of Whipped Topping
Spread the remaining 1½ cups of whipped topping evenly over the pudding. This soft, creamy finish ties all the layers together and gives the dessert that signature lush look.

Step 6: Garnish (Optional but Recommended)
If you want to take it up a notch, add some chocolate shavings, mini chocolate chips, or a few extra cherries on top for that extra pop of flavor and style.

Layered Cherry Cheesecake Lush FAQ and Serving Tips
By now, your Layered Cherry Cheesecake Lush is fully assembled, and you’re just a few hours away from slicing into the perfect creamy, fruity, chocolatey dessert. But before you dive in, let’s cover a few quick tips and common questions to help you get clean slices, store leftovers, and even make this dessert ahead for any occasion.
1. How long should I chill it before serving?
For the best results, chill the dessert for at least 4 hours, or overnight if possible. This helps all the layers set properly, especially the cheesecake and pudding layers.
2. Can I make this dessert ahead of time?
Yes! This is a great make-ahead dessert. You can assemble it up to 24 hours in advance, and it actually tastes better after chilling overnight.
3. How do I get clean slices?
Use a sharp knife and wipe it clean between each cut. For even cleaner slices, pop the dessert in the freezer for 15–20 minutes before slicing to firm up the layers just a bit.
4. Can I use homemade whipped cream instead of store-bought?
Absolutely. Just be sure it’s whipped to stiff peaks and sweetened to your liking. Keep in mind that homemade whipped cream may not hold its shape as long as whipped topping, especially if you’re making this a day ahead.
5. What other fruit fillings work well?
Blueberry, strawberry, or even mixed berry pie filling are all delicious alternatives. You can swap out the cherry layer for your favorite fruit — just keep the quantity about the same.
Conclusion: A Lush Dessert That Never Fails to Impress
Layered Cherry Cheesecake Lush is everything you want in a no-bake dessert: creamy, cool, rich, and bursting with flavor. It’s a perfect mix of textures — from the chocolatey crunch of the crust to the velvety cheesecake and smooth pudding, all topped with bright cherries and fluffy whipped cream.
Whether you’re serving this at a summer BBQ, a holiday table, or just because, it’s a guaranteed crowd-pleaser. And if you try a fun variation — different pie fillings, flavored puddings, or even a cookie crust twist — I’d love to hear how it turned out.
This one’s a keeper. Slice it cold, serve it proud, and enjoy every creamy, fruity bite.
Print
Layered Cherry Cheesecake Lush Dessert Recipe
- Total Time: 4 HRS 20 MIN
Description
This Layered Cherry Cheesecake Lush Dessert is a dreamy, no-bake treat that’s as stunning as it is simple. With a buttery graham cracker crust, creamy cheesecake filling, smooth vanilla pudding, and a luscious cherry topping, each bite is a burst of flavor and texture. Perfect for potlucks, holidays, or an easy make-ahead dessert for family dinners.
Ingredients
For the crust:
-
2 cups graham cracker crumbs
-
½ cup unsalted butter, melted
-
2 tbsp granulated sugar
For the cheesecake layer:
-
2 (8 oz) packages cream cheese, softened
-
1 cup powdered sugar
-
1 tsp vanilla extract
-
1 ½ cups whipped topping (like Cool Whip)
For the pudding layer:
-
1 (3.4 oz) package instant vanilla pudding mix
-
1 ½ cups cold milk
For the topping:
-
1 ½ cups whipped topping (Cool Whip)
-
1 (21 oz) can cherry pie filling
Instructions
1️⃣ Prepare the crust: In a bowl, mix graham cracker crumbs, sugar, and melted butter until well combined. Press the mixture into the bottom of a 9×13-inch pan. Chill in the fridge while you prepare the layers.
2️⃣ Make the cheesecake layer: Beat the softened cream cheese until smooth. Add powdered sugar and vanilla extract, and mix until creamy. Fold in the whipped topping. Spread evenly over the chilled crust.
3️⃣ Prepare the pudding: Whisk together the pudding mix and cold milk until thickened, about 2–3 minutes. Spread over the cheesecake layer.
4️⃣ Add the final layers: Spread the remaining whipped topping over the pudding layer. Then, spoon the cherry pie filling evenly on top.
5️⃣ Chill and serve: Refrigerate for at least 4 hours, or until set. Slice into squares and serve cold.
Notes
- Prep Time: 20 MIN
- Cook Time: 4 HRS


