

Why Mini Pumpkin Pies Are a Must for Thanksgiving
When it comes to Thanksgiving desserts, pumpkin pie has long been a centerpiece on holiday tables. However, as gatherings evolve to include buffet-style meals, grazing boards, and an array of small bites, the classic pie is getting a modern twist. Make-ahead mini pumpkin pies offer all the creamy, spiced flavor of traditional pie in a more convenient, bite-size form.
These mini pumpkin pie tarts are more than just adorable—they’re incredibly practical. You can prepare them in advance, chill or freeze until needed, and top with whipped cream just before serving. This not only saves oven space but also frees you up to focus on other Thanksgiving dishes. Plus, they’re perfect for guests who want just a taste of something sweet without committing to a full slice.
The appeal of these mini treats also lies in their versatility. Whether you’re creating a rustic Thanksgiving dessert platter inspired by Pinterest ideas or need something travel-friendly for a potluck, these pies deliver. Their portability, ease of serving, and delightful texture make them ideal for modern celebrations.
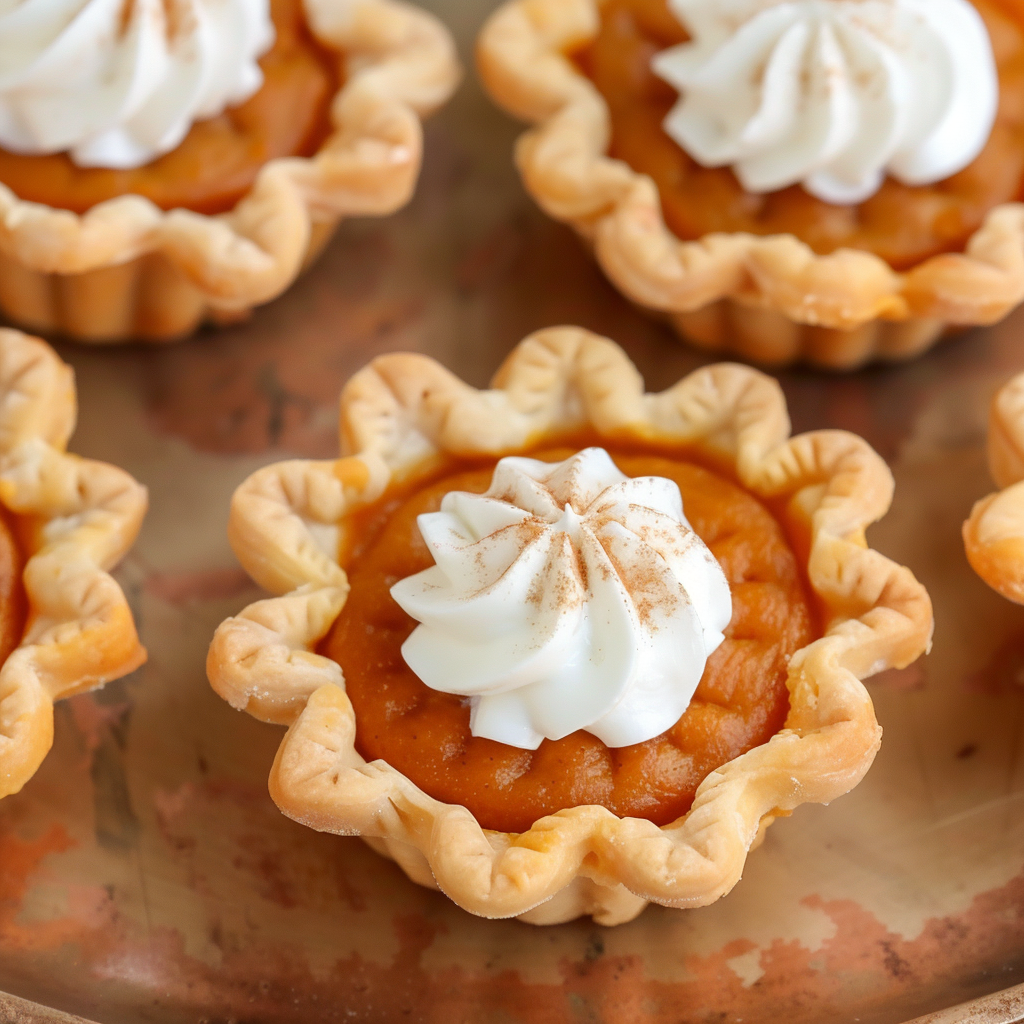
And let’s not forget their visual charm. Styled with a swirl of cream or a dusting of cinnamon, these little tarts stand out on any dessert table. Inspired by the classic pumpkin pie, they honor tradition while fitting perfectly into today’s entertaining needs. Whether you’re hosting a formal meal or a casual fall gathering, these pies will win over guests of all ages.
Why Go Mini? Benefits of Bite-Size Pumpkin Pie Tarts
Opting for bite-size pumpkin pie tarts over a full-sized pie offers more than just novelty—they solve real challenges that hosts face during Thanksgiving. These mini desserts are designed with convenience and guest satisfaction in mind, making them a smart choice for busy holiday cooks.
-
Portion control: One of the most appreciated features of mini pumpkin pies is built-in portioning. Guests can easily enjoy just one or two without overindulging, making them ideal for those who want to sample multiple desserts.
-
Mess-free serving: Unlike full pies that require slicing and transferring to plates—often resulting in broken crusts and messy presentation—these tarts pop right out of a muffin tin and onto a platter, neat and tidy.
-
Kid-friendly size: Kids love foods made just for them. These bite-size pies are small enough for little hands, helping avoid waste and dessert overload.
-
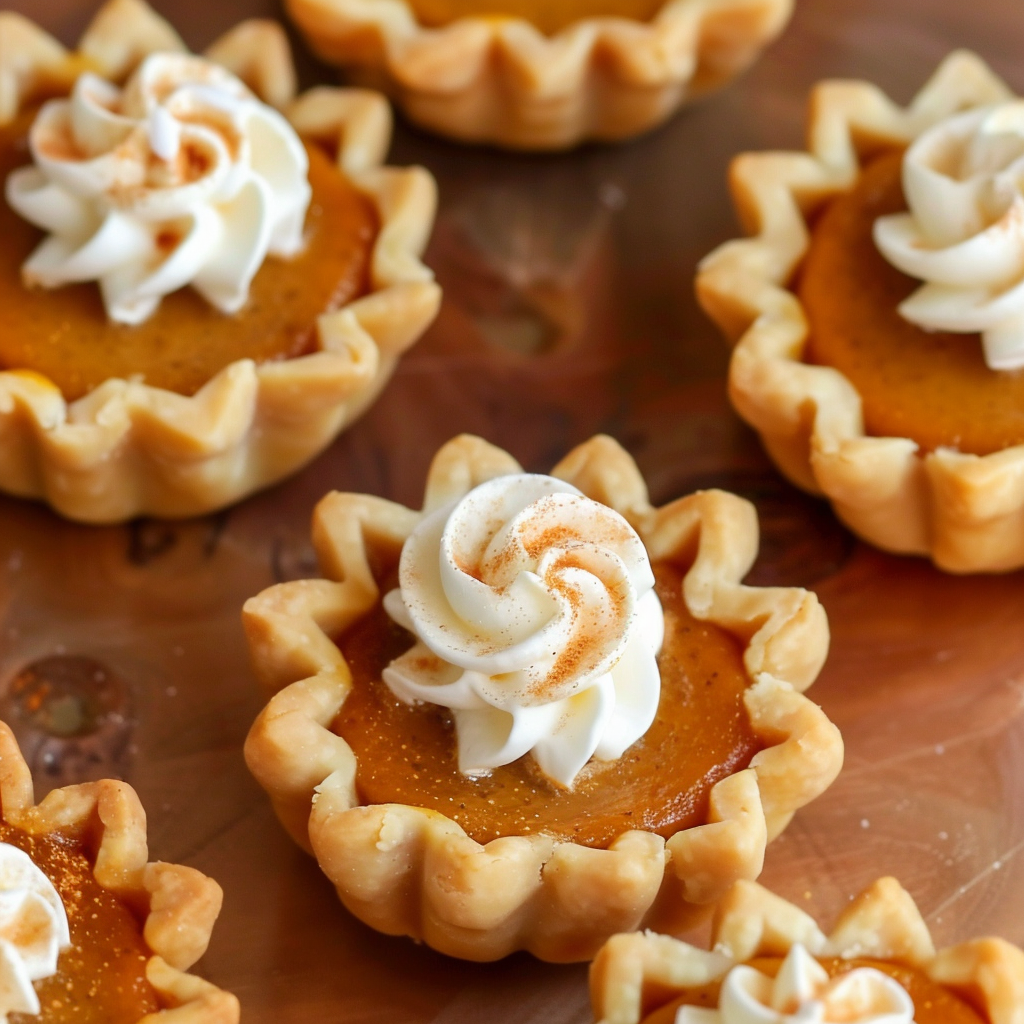
Perfect for dessert tables: Whether you’re creating a Pinterest-worthy Thanksgiving dessert board or filling a buffet, their uniform shape and golden-brown tops make them a visual standout.
-
Customizable variety: Make multiple variations from one batch of filling—some with whipped cream, others with candied pecans or a dusting of pumpkin spice—to suit different palates.
Another advantage of these tarts is their compatibility with other fall baking recipes, as highlighted in this Pinterest board. You can use the same base and flavor profiles for other mini pie variations, like apple or pecan, without changing your kitchen workflow.
Ultimately, these mini tarts align perfectly with the movement toward party-friendly, make-ahead desserts that are easy to share, easy to store, and irresistibly festive. Whether displayed on a rustic wooden tray or passed around at a potluck, they’ll leave a lasting impression.
Make-Ahead Magic: How These Pies Save Time and Oven Space
One of the biggest challenges during Thanksgiving meal prep is managing oven space. With multiple dishes competing for time and temperature—turkey, stuffing, casseroles, and rolls—it’s easy to feel overwhelmed. This is where make-ahead mini pumpkin pies shine. They allow you to prepare dessert in advance and skip the last-minute scramble on the big day.
By baking these pies a day or two ahead, you eliminate a major source of stress. Once cooled, they store beautifully in the refrigerator. Before serving, simply top them with whipped cream, perhaps piped in a decorative swirl as seen in these whipped cream topping designs, and they’re ready to go—no reheating necessary unless you prefer them warm.
These bite-size pumpkin tarts also freeze exceptionally well. Just wrap each tart individually in plastic wrap and store them in an airtight container. On Thanksgiving morning, transfer them to the fridge to thaw. This strategy clears up your schedule and lets you focus on dishes that must be made fresh.
They also help reduce oven overcrowding, an issue during most large meals. While a traditional Thanksgiving dinner often requires multiple rounds of oven use, these pies can be baked earlier in the week and stored. With dessert done ahead, you can better manage oven rotations for items like turkey or roasted vegetables.
For larger gatherings, mini pumpkin pies double as grab-and-go options. No forks, plates, or serving utensils required. This makes them ideal for casual meals or kids’ tables, and even better for buffet lines where guests are already balancing multiple items. When compared with full-sized pies, which often result in leftovers and cleanup, these pre-portioned tarts streamline both serving and storage.
With their convenience, flexibility, and elegant presentation, these make-ahead desserts are a host’s secret weapon. They embody the flavors of fall while easing the burden of holiday cooking—proof that small things can make a big impact.
Ingredients Breakdown & Alternatives
Crafting the perfect mini pumpkin pies starts with choosing the right ingredients. While the core elements are classic—pumpkin purée, eggs, evaporated milk, and pumpkin spice—there’s flexibility built into every part of the recipe. Whether you’re aiming for traditional flavor or need dietary adjustments, the ingredients can be adapted without sacrificing taste.
Crust Options
The base of any good pie is the crust, and for mini tarts, it needs to be both sturdy and flaky. Most home cooks opt for refrigerated pie crusts for convenience, which roll out easily and hold their shape well in muffin tins. However, you can elevate your crust in several ways:
-
Homemade crust: For those who prefer scratch baking, a buttery homemade crust adds a rich flavor and texture.
-
Graham cracker crust: This option pairs well with creamy pumpkin filling, offering a sweet, crumbly alternative. It’s also a no-rolling solution—just press into tins and bake for five minutes before filling.
-
Gluten-free crusts: Store-bought or DIY gluten-free pie crusts are widely available and allow everyone at the table to enjoy this dessert.
Inspiration for creative crust options can be found in holiday pie recipes, which often include nut-based or cookie crusts that add crunch and complexity.
Filling Essentials
The heart of any pumpkin pie is its filling. The base typically includes pumpkin purée, eggs, brown sugar, and evaporated milk. Each plays a crucial role in achieving the rich, creamy texture and deep autumn flavor.
-
Pumpkin purée: Choose 100% pure pumpkin, not pumpkin pie filling, which contains added sugar and spices. Homemade purée also works well if you prefer fresh ingredients.
-
Evaporated milk: This gives the filling its smooth texture and slight caramel flavor. Alternatives like heavy cream, half-and-half, or coconut milk (for dairy-free versions) work equally well. Learn more about this ingredient on Wikipedia.
-
Brown sugar: Adds depth with a hint of molasses. You can adjust sweetness to taste or use coconut sugar for a less refined option.
-
Eggs: They bind the mixture and give the filling structure. For a vegan version, flax eggs or commercial egg replacers can be substituted.
-
Pumpkin pie spice: A blend of cinnamon, nutmeg, ginger, and cloves. If you don’t have pre-mixed spice, combine your own with these four staples in proper ratios. For more background on this warm, seasonal blend, see pumpkin spice.
Adding a splash of vanilla extract enhances the overall flavor, rounding out the spice profile.
Toppings and Garnishes
The final touch to these bite-size pumpkin pies is what sets them apart. Whipped cream is the classic go-to, whether piped or spooned on top. For an elevated look, follow designs from this Pinterest collection.
Other topping ideas include:
-
Candied pecans for crunch
-
Cinnamon sugar dusting for visual appeal and added spice
-
Cream cheese frosting for a richer, tangier finish
-
Maple syrup drizzle for sweetness with a fall twist
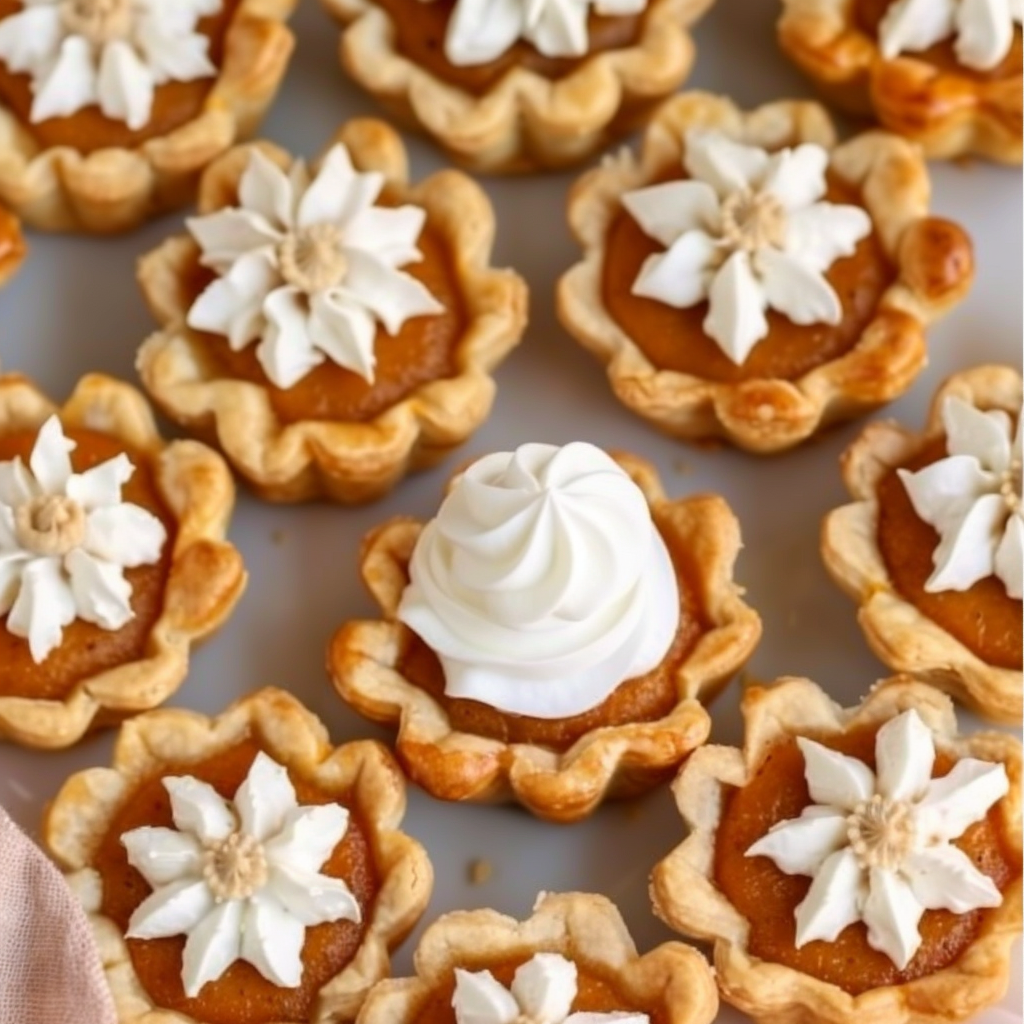
For visual inspiration on toppings and presentation, explore mini pumpkin pie ideas to see how these small desserts can be styled for maximum holiday charm.
These ingredient options and variations make mini pumpkin pies not only a holiday favorite but also a canvas for creativity, suitable for almost any dietary need or flavor preference.
Tools You’ll Need
Making mini pumpkin pies is simple, but having the right tools on hand ensures efficiency and consistency. Whether you’re a seasoned baker or preparing for your first Thanksgiving dessert, here are the essential items you’ll need:
-
Muffin tin: A standard 12-cup muffin pan works best for this recipe. Nonstick pans help the pies release easily, but greasing thoroughly is still important.
-
Round cookie cutter or glass: You’ll need one about 3 to 4 inches in diameter to cut the crusts. A drinking glass or biscuit cutter also works.
-
Rolling pin: If using homemade or refrigerated dough, a rolling pin will help you get an even thickness for the crust.
-
Mixing bowls: One large bowl for combining the filling and a smaller one for beating eggs or mixing spices.
-
Whisk or electric hand mixer: For a smooth, lump-free pumpkin filling.
-
Measuring cups and spoons: Accurate measurements make a big difference in flavor and texture.
-
Cooling rack: Once baked, cooling the pies on a wire rack helps prevent soggy bottoms and ensures a crisp crust.
-
Piping bag or zip-top bag (optional): For neatly adding whipped cream just before serving.
These tools are likely already in your kitchen, and with them, you’ll be fully equipped to create flawless bite-size pumpkin pie tarts.
Customization Ideas: Beyond Traditional Pumpkin Spice
One of the best things about mini pumpkin pies is how easy they are to personalize. Whether you’re catering to different flavor preferences or dietary needs, a few tweaks can turn the classic into something truly special.
-
Maple swirl: Add a tablespoon of pure maple syrup to the filling or swirl it on top before baking for an earthy sweetness.
-
Chocolate chip mini pumpkin pies: Stir mini chocolate chips into the filling for a kid-friendly twist that adds texture and richness.
-
Bourbon-spiked filling: A splash of bourbon or dark rum in the batter gives the pies a grown-up depth—perfect for holiday dinners.
-
Crumb topping (streusel): Mix brown sugar, flour, butter, and oats to create a crunchy topping that pairs beautifully with creamy pumpkin.
-
Vegan and dairy-free versions: Swap evaporated milk for coconut milk and eggs for flax eggs. Use a vegan pie crust or graham cracker base.
-
Nut crusts: Crushed pecans or almonds mixed with a bit of sugar and butter make a flavorful and gluten-free crust option.
Explore more creative versions of mini pies on this Pinterest board of mini pumpkin pie ideas, where visuals and recipes can spark fresh inspiration for your own variations.
Customizing allows you to serve a Thanksgiving dessert that caters to all your guests—traditionalists and adventurous eaters alike.
Step-by-Step Instructions for Perfect Mini Pumpkin Pies
Creating the perfect batch of make-ahead mini pumpkin pies is all about following a few simple steps. With the right technique, you’ll get flaky crusts, creamy centers, and the perfect holiday flavor in every bite.
Preheat and Prep
-
Set your oven to 350°F (175°C).
-
Lightly grease your muffin tin to prevent sticking.
-
Roll out your pie crust on a floured surface to ensure it doesn’t tear.
Form the Mini Crusts
-
Use a round cookie cutter or glass (3–4 inches wide) to cut circles from the dough.
-
Press each circle into a muffin cup, gently shaping it to fit the sides and bottom.
-
Chill the crusts for 5–10 minutes in the refrigerator while you prepare the filling to help prevent shrinking.
Make the Pumpkin Filling
-
In a large mixing bowl, whisk together:
-
1 can (15 oz) pumpkin purée
-
2 large eggs
-
¾ cup brown sugar
-
1 tsp pumpkin pie spice or a mix of cinnamon, ginger, nutmeg, and cloves
-
½ tsp vanilla extract
-
¾ cup evaporated milk
-
-
Whisk until smooth and creamy. For a silkier texture, use a hand mixer on low speed.
You can learn more about the texture benefits of evaporated milk here.
Fill and Bake
-
Spoon the pumpkin filling into each crust, filling about ¾ full to allow room for expansion.
-
Bake for 25–30 minutes, rotating the pan halfway through for even cooking.
-
The centers should be set and slightly puffed. A toothpick inserted should come out clean.
Cool, Store, and Serve
-
Let the pies cool in the pan for 10 minutes, then gently remove them and place on a wire rack.
-
Cool completely before refrigerating.
-
Just before serving, top with whipped cream. Style with ideas from whipped cream topping boards.
Make-Ahead Tips and Storage Guidelines
Making mini pumpkin pies ahead of time not only simplifies your holiday prep but ensures your dessert is just as delicious, if not more, the next day. Here’s how to store and serve them for best results:
-
Refrigerator: Once completely cooled, store the pies in an airtight container in the fridge for up to 3 days. This keeps the filling fresh and the crust crisp.
-
Freezer: Wrap each tart tightly in plastic wrap and place in a freezer-safe container. They can be frozen for up to 1 month.
-
Thawing: Move frozen pies to the refrigerator the night before serving. Do not thaw at room temperature as it can make the crust soggy.
-
Reheating: Warm them in a 300°F oven for 5–8 minutes. Avoid microwaving, which can ruin the texture.
-
Whipped cream: Add just before serving to maintain its shape and texture.
Proper storage ensures that your make-ahead mini pumpkin pies are just as delightful on Thanksgiving Day as they were when first baked.
Serving Suggestions & Presentation Tips
The beauty of mini pumpkin pies is how easily they can be styled for a festive presentation. These small treats lend themselves well to elegant displays or rustic arrangements.
-
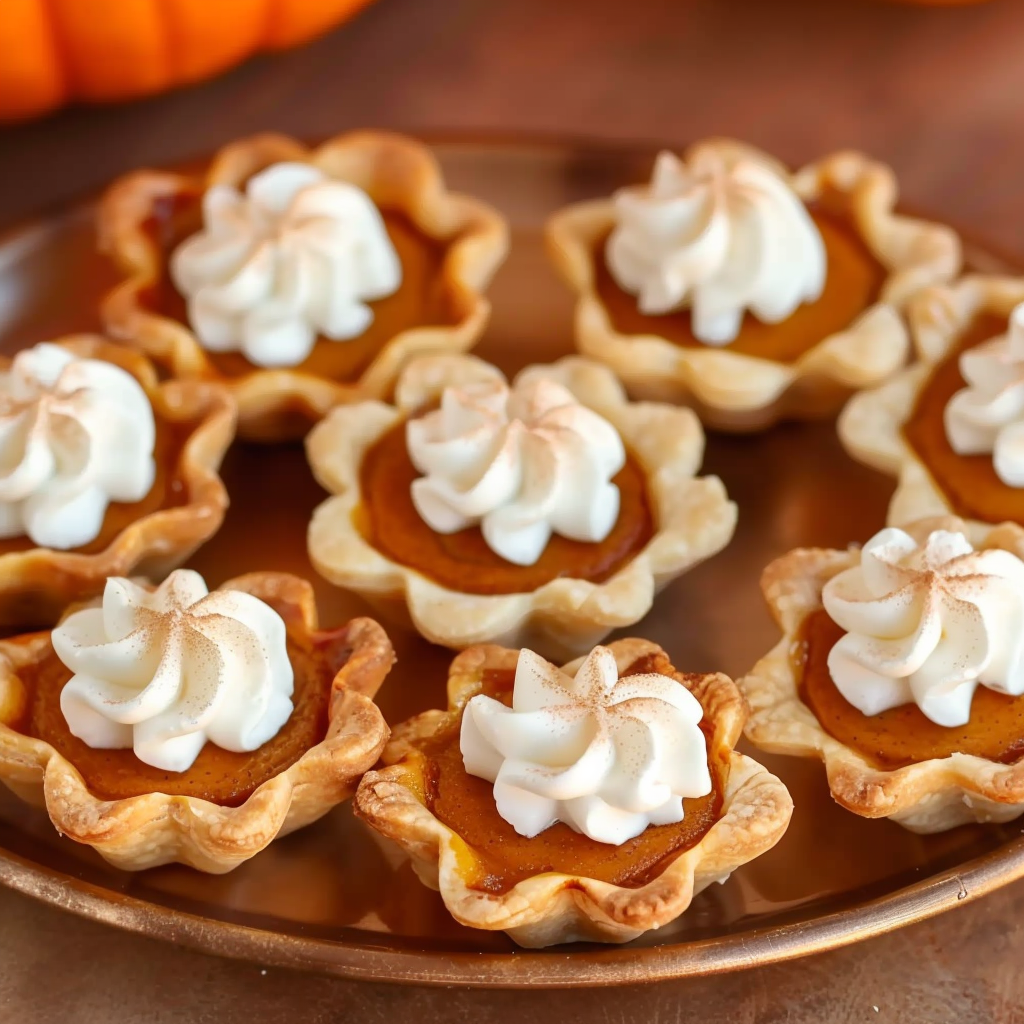
Arrange on a tiered dessert tray with cinnamon sticks, mini gourds, or colorful fall leaves.
-
Use cupcake liners with decorative patterns for a pop of color and easy serving.
-
Create a dessert board with other fall baking recipes like apple crisps or pecan bars, as seen on this Pinterest board.
-
Dust with cinnamon or nutmeg for a simple yet festive finish.
-
Pair with warm drinks like cider, chai tea, or hot chocolate to complete the cozy experience.
With minimal effort, your bite-size pumpkin pie tarts can be the visual and flavorful highlight of your holiday dessert table.
Troubleshooting & Pro Tips
Even a simple recipe like mini pumpkin pies can run into issues if you’re not careful. Here are the most common problems and how to solve them:
-
Cracks in the filling: Overbaking is usually the culprit. Take them out as soon as the centers are set.
-
Soggy crust: Pre-bake the crusts for 5 minutes before filling, or chill the dough thoroughly before baking.
-
Shrinking crusts: Avoid stretching the dough when pressing into muffin tins and chill them before baking.
-
Sticky removal: Use a thin knife to loosen edges before taking pies out of the tin.
-
Crust not browning: Move the tray to a lower rack in the oven during the last 5 minutes of baking.
Expert tip: Use a metal muffin tin instead of silicone for crispier crusts.
With these tips, you can confidently serve up bakery-quality Thanksgiving mini pies every time.
Frequently Asked Questions
Can you freeze mini pumpkin pies?
Yes. Once cooled, wrap each pie in plastic wrap and freeze for up to 1 month. Thaw overnight in the fridge before serving.
How long do mini pumpkin pies last in the fridge?
Stored in an airtight container, they stay fresh for up to 3 days. Add whipped cream just before serving.
Can I make these with a graham cracker crust?
Absolutely. Press the mixture into muffin tins and pre-bake for 5 minutes before adding the filling. It’s a great no-roll alternative.
What’s the best way to top mini pumpkin pies?
Whipped cream is the classic choice. Pipe it just before serving, then sprinkle with cinnamon or use candied pecans for a crunch.
Can I make these vegan or dairy-free?
Yes. Use coconut milk in place of evaporated milk and replace eggs with flaxseed meal mixed with water. Choose a vegan crust or make one with oats and nuts.

Make-Ahead Mini Pumpkin Pies Perfect for Thanksgiving
- Author: Naomi
Description
These Make-Ahead Mini Pumpkin Pies deliver all the comforting flavor of classic pumpkin pie in a perfectly portioned tart. Made with a rich, spiced filling and a flaky crust, these bite-size desserts are ideal for Thanksgiving gatherings, potlucks, or fall celebrations. Easy to prepare in advance, they free up oven space and simplify holiday prep. Serve them chilled or warm, topped with whipped cream and a dash of cinnamon for a festive finish.
Ingredients
- Refrigerated pie crusts (or homemade)
- Pumpkin purée
- Brown sugar
- Eggs
- Evaporated milk
- Pumpkin pie spice (or cinnamon, nutmeg, ginger, and cloves)
- Vanilla extract
- Whipped cream (optional for topping)
Instructions
- Preheat the oven
Set your oven to 350°F (175°C). - Prepare the crusts
Roll out your pie dough and use a round cookie cutter (about 3–4 inches wide) to cut small circles. Press each into a greased muffin tin to form mini crusts. - Make the filling
In a large bowl, whisk together pumpkin purée, brown sugar, eggs, evaporated milk, pumpkin pie spice, and vanilla until smooth and creamy. - Fill and bake
Spoon the pumpkin filling into each mini crust, filling about ¾ full. Bake for 25–30 minutes, or until the centers are set and slightly puffed. - Cool and serve
Let the mini pies cool in the pan for 10 minutes, then transfer to a wire rack. Once cooled completely, top with whipped cream if desired.
Notes
-
For a richer filling, substitute heavy cream for evaporated milk.
-
Chill the dough before cutting and pressing into tins to prevent shrinking.
-
Mini muffin tins will yield more bite-size servings—reduce baking time by 5 minutes.
-
For a dairy-free option, use coconut milk and vegan pie crust.
-
Keep crust crisp by storing the pies uncovered until completely cooled, then refrigerate.


