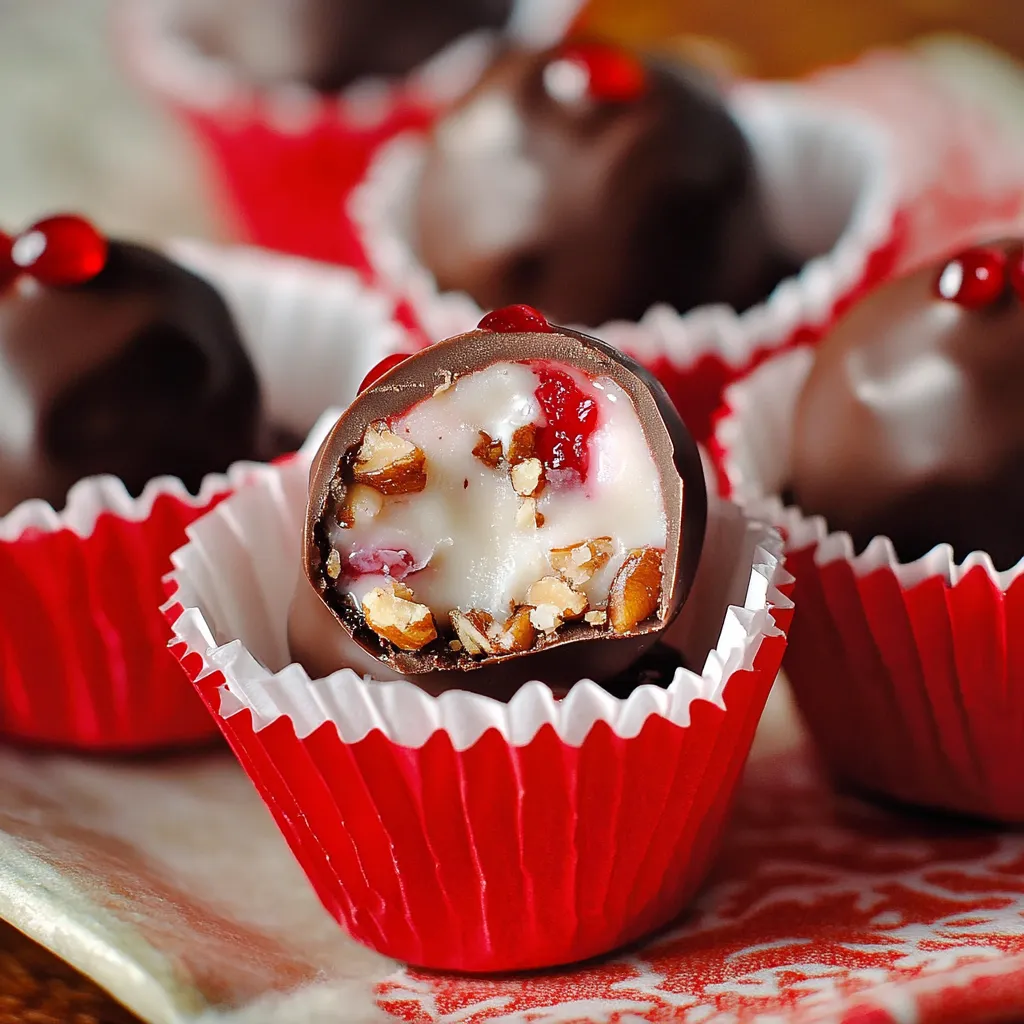
If you’re in the mood for a classic, old-fashioned treat that’s rich, chocolatey, and just the right amount of sweet, this Martha Washington Candy Recipe Without Coconut is a must-try. Traditionally made with coconut, this version skips it entirely — making it perfect for those who prefer their sweets smooth, nutty, and cherry-filled.
Martha Washington candies are a beloved holiday treat, but honestly, they’re good any time of year. I first made these without coconut for a friend who didn’t love the texture, and the result was so creamy and satisfying that it became my go-to version. These bite-sized sweets are great for gift boxes, cookie trays, or simply as a nostalgic treat to keep in your fridge.
They’re super easy to make — no baking required — and they hold up beautifully in the fridge or freezer, making them ideal for make-ahead prep. Let’s get started with everything you need.
Ingredients for Martha Washington Candy (No Coconut)
- 1 can (14 oz) sweetened condensed milk
- 1 stick (½ cup) unsalted butter, melted
- 1 teaspoon vanilla extract
- 1 pound powdered sugar (about 4 cups)
- 1 cup chopped pecans or walnuts (optional)
- 1 cup chopped maraschino cherries, drained and patted dry
- 16 oz semi-sweet or dark chocolate chips
- 2 tablespoons shortening or coconut oil (for melting chocolate)
Note: If you’d still like a touch of coconut, you can add up to ½ cup of sweetened shredded coconut — but it’s totally optional and easy to leave out for this version.
STEPS: Start the Candy Base
Step 1: Mix the Wet Ingredients
In a large mixing bowl, combine the melted butter, sweetened condensed milk, and vanilla extract. Stir well until the mixture is smooth and uniform.
Step 2: Add the Powdered Sugar
Gradually mix in the powdered sugar, about a cup at a time, stirring until a thick, sticky dough begins to form. It’ll be soft but should hold its shape.

Step 3: Fold in Cherries and Nuts
Next, fold in the chopped maraschino cherries and chopped nuts (if using). Make sure the cherries are well-drained and patted dry to avoid extra moisture. Stir until everything is evenly combined.

Chill, Shape, and Dip: Making Your Martha Washington Candies
Now that your rich, cherry-studded filling is mixed and ready, it’s time to turn it into bite-sized candy perfection. This part is all about shaping and dipping — and while it might sound like a lot, it’s actually very simple (and even a little fun).
Chilling the mixture first helps make rolling easier, and freezing the balls for a short time before dipping ensures that they keep their shape when they hit the warm melted chocolate. Once dipped, the candies look beautifully glossy and taste just as good as any box of store-bought chocolates — only fresher, and with your own personal touch.
STEPS: Chill and Shape the Candy Centers
Step 4: Chill the Filling Mixture
Transfer the entire bowl of cherry-nut filling to the refrigerator and chill for 30 to 60 minutes. You want it firm enough to roll into balls without sticking to your hands too much.

Step 5: Roll Into Balls
Using a small cookie scoop or a spoon, roll the chilled filling into 1-inch balls. Place them on a parchment-lined baking sheet or tray. Once you’ve rolled them all, place the tray in the freezer for 15–20 minutes to help them set before dipping.
STEPS: Melt Chocolate and Dip the Candies
Step 6: Melt the Chocolate
In a microwave-safe bowl, melt the chocolate chips with the shortening (or coconut oil) in 30-second intervals, stirring after each round, until smooth and fully melted. You can also melt the chocolate in a double boiler if you prefer.
Step 7: Dip and Set
Remove the chilled balls from the freezer. Using a fork or a dipping tool, dip each one into the melted chocolate, turning to coat completely. Let any excess chocolate drip off, then place each candy back onto the parchment-lined tray.
Final Chill and Finishing Touches
Step 8: Let Candies Set
Allow the candies to set at room temperature, or refrigerate them for faster results. Once the chocolate is firm, transfer them to an airtight container for storage.
Tips for Smooth Dipping and Storing
- Use dry cherries: Extra moisture can cause the chocolate to seize, so blot cherries well before mixing.
- Keep your chocolate warm: If it starts to thicken while dipping, reheat gently in the microwave for 10–15 seconds.
- Storage tip: These candies last up to 2 weeks in the fridge and can also be frozen for longer storage.

Martha Washington Candy FAQ: Storage, Variations, and Finishing Tips
You’ve rolled, dipped, and set your candies — now comes the best part: enjoying (and maybe even sharing) them! Whether you’re making a big batch for the holidays or just keeping a stash on hand for late-night cravings, this final section answers the most common questions about storing, serving, and customizing your Martha Washington Candy Without Coconut.
1. Can I make these candies without nuts?
Yes! The chopped nuts are totally optional. If you want to skip them, just leave them out. The texture will still be creamy and rich without the crunch.
2. How long do these candies last?
Stored in an airtight container in the fridge, these candies will stay fresh for up to 2 weeks. If you want to keep them longer, you can freeze them for up to 2 months. Just let them thaw in the fridge before serving.
3. Do I have to use shortening or coconut oil in the chocolate?
You don’t have to, but it helps create a smoother, glossier coating and makes dipping easier. If you skip it, the chocolate may be a bit thicker and set with a slightly matte finish.
4. What if the filling is too soft to roll?
Chill it a bit longer. If it’s still too soft after 60 minutes, you can add a little more powdered sugar (a tablespoon at a time) to stiffen it up. Just be careful not to overdo it — you want the centers to stay creamy.
5. Can I add different flavors?
Absolutely. Try almond extract instead of vanilla for a more cherry-forward flavor, or add a touch of orange zest to the filling for a citrusy twist. You can even use white or milk chocolate for dipping if you prefer.
Conclusion: A Classic Treat with a Custom Twist
These Martha Washington Candies Without Coconut are a perfect blend of old-fashioned charm and modern convenience. Rich, chocolatey, and filled with sweet cherry flavor, they’re easy to make, easy to store, and always a crowd-pleaser.
They make beautiful additions to holiday dessert trays, sweet gifts for friends and neighbors, or just a fun project for a cozy weekend afternoon. Whether you keep them classic or get creative with your own mix-ins, this recipe is sure to earn a spot in your regular treat rotation.
Tried a variation? Added your own twist? I’d love to hear how you made it your own — let me know in the comments!
Print
Martha Washington Candy Recipe Without Coconut
- Total Time: 2 hrs 15 min
Description
This nostalgic treat layers rich peanut butter fudge, creamy vanilla centers, and smooth chocolate, finished with a sprinkle of toasted pecans. No coconut—just pure, buttery indulgence!
Ingredients
For the peanut butter layer:
-
1½ cups smooth peanut butter (no stir)
-
1 cup unsalted butter, softened
-
2 tsp vanilla extract
-
3¼ cups powdered sugar
For the creamy center:
-
½ cup unsalted butter, softened
-
1¾ cups powdered sugar
-
1½ tsp vanilla extract
-
2 tbsp heavy cream (milk works too)
For the chocolate topping:
-
2 cups semi-sweet chocolate chips
-
2 tbsp shortening or coconut oil (for shine)
Optional topping:
-
½ cup toasted pecans, finely chopped
Instructions
1️⃣ Line your pan:
Line a 9×5″ loaf pan with parchment paper so edges hang over—this makes it easy to lift out later.
2️⃣ Make the peanut butter layer:
In a bowl, beat together peanut butter, 1 cup softened butter, and 2 tsp vanilla until creamy. Gradually beat in 3¼ cups powdered sugar until thick and smooth. Press evenly into bottom of the pan. Chill 20–30 minutes to set.
3️⃣ Prepare the creamy center:
In a fresh bowl, beat ½ cup softened butter, 1¾ cups powdered sugar, 1½ tsp vanilla, and 2 tbsp cream until light, fluffy, and smooth. Spread evenly over the chilled peanut butter layer. Chill another 20 minutes.
4️⃣ Create the chocolate topping:
Melt chocolate chips with shortening (or oil) in 30-second intervals, stirring until smooth. Spread over center layer. If desired, sprinkle chopped pecans immediately on top. Chill until fully set, about 1 hour.
5️⃣ Slice and serve:
Use parchment overhang to lift out the candy slab. Let sit 5 minutes at room temperature before slicing into ½″ squares.
Notes
-
Swappable nut butter: If you’re allergic to peanuts, use smooth almond or cashew butter for Layer 1.
-
Flavor twist: Add ½ tsp almond extract into either creamy layer instead of vanilla.
-
Cutting tip: Warm your knife under hot water, then wipe clean before each cut for smooth edges.
-
Storage: Keep refrigerated in an airtight container for up to 2 weeks—or freeze for a holiday treat later.
- Prep Time: 15 min
- Cook Time: 2 hrs