

1.Strawberry Banana Crunch Cups
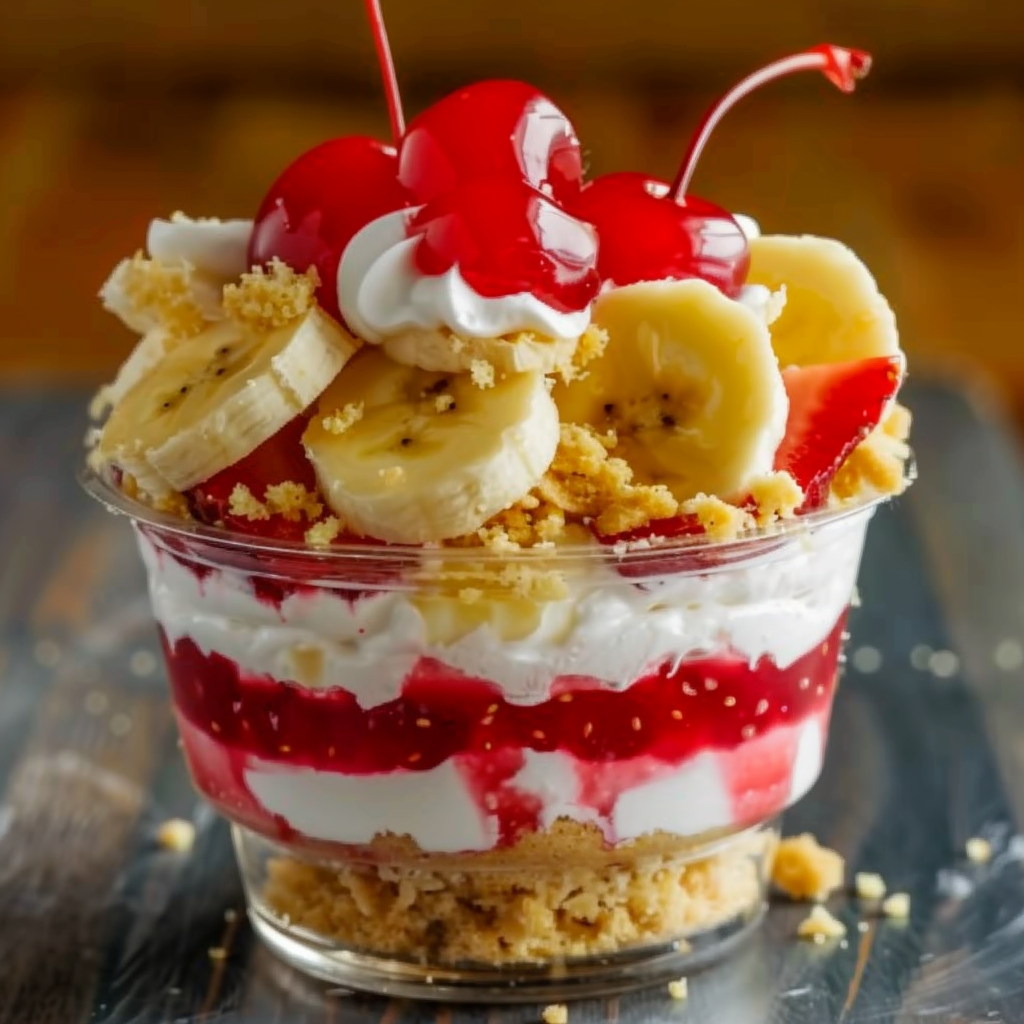
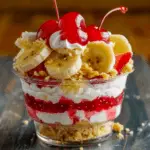
Strawberry Banana Crunch Cups are the perfect no-bake dessert for any occasion, combining layers of moist vanilla cake, creamy banana pudding, and whipped cream, all topped with a vibrant strawberry crunch made from golden Oreos and gelatin powder. This simple and indulgent treat is served in cups or jars, making it ideal for parties, barbecues, or a quick make-ahead dessert that feels fancy without the fuss.
This dessert is a twist on several classics — it merges the nostalgic flavors of banana pudding and strawberry shortcake, while borrowing texture and presentation ideas from cheesecake cups. What makes it stand out is how easy it is to layer these familiar flavors into individual portions that look stunning and taste even better. The contrast between the creamy filling, the soft cake, and the crunchy topping creates a multi-textured experience that feels like a layered trifle in cup form.
For those curious about the science behind the creamy and crunchy textures, check out how whipped cream stabilizes and cornstarch thickening works in puddings. Meanwhile, exploring visual inspiration on Pinterest can spark creative ideas for layering and presentation.
Whether you’re hosting a party or simply craving something sweet and satisfying, no-bake strawberry banana shortcake poke cake cups offer the ideal solution. They’re also endlessly customizable — from cake mix variations to flavor-infused cream layers — making them a versatile addition to your dessert rotation.
2. What Makes This Dessert So Popular?
The popularity of Strawberry Banana Crunch Cups lies in their perfect balance of convenience, flavor, and presentation. They cater to modern dessert lovers looking for quick and creative ways to serve sweets without sacrificing taste or aesthetics. One of the main appeals is that this dessert is no-bake, which means it eliminates the need for complicated techniques or long oven times — making it ideal for busy home bakers or summer days when turning on the oven is the last thing you want.
Another reason for its popularity is the nostalgic fusion of flavors. The combination of banana pudding, cheesecake-style cream, and strawberry shortcake elements appeals to both kids and adults. It echoes the familiar flavor of banana pudding and the vibrant texture of shortcake, making it an instant comfort food in a cup. The use of crushed Golden Oreos in the topping adds a fun, crunchy twist that mimics strawberry crunch bars — a beloved childhood favorite.
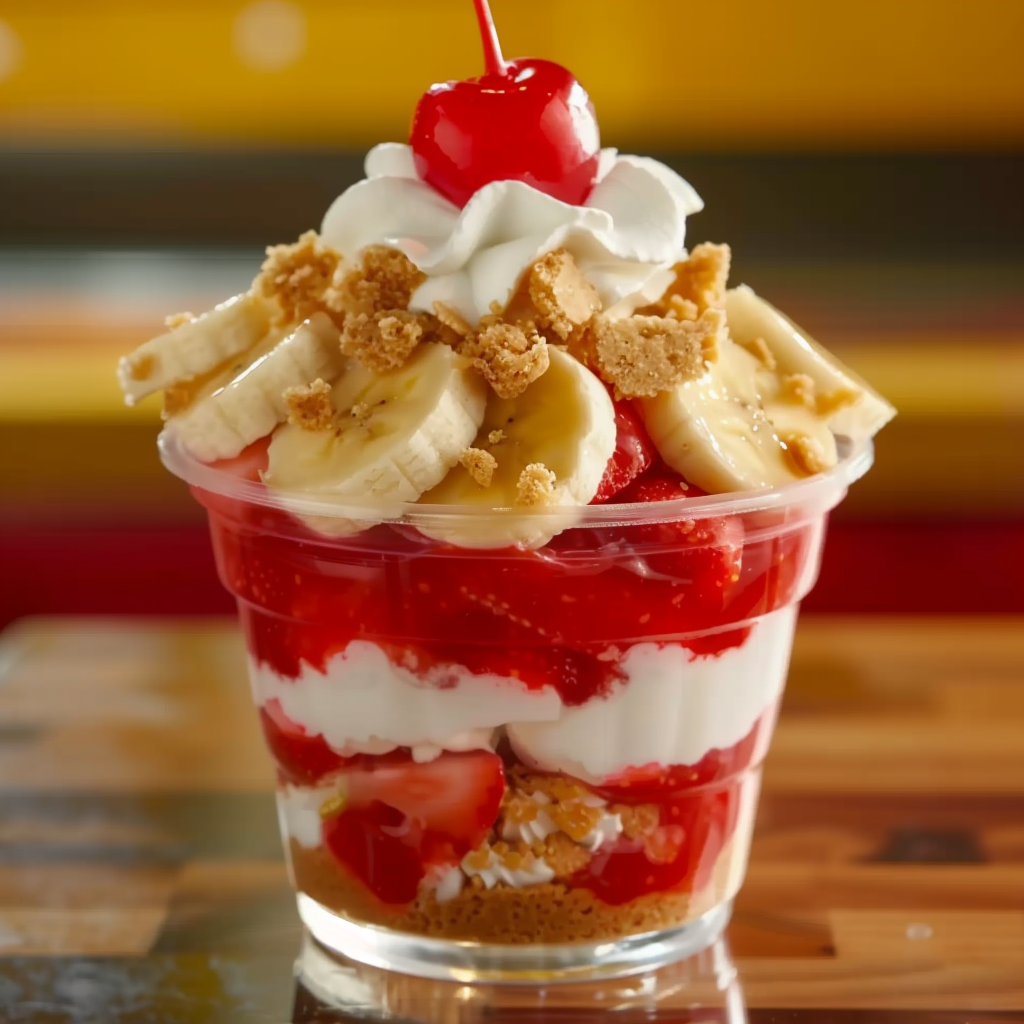
Presentation plays a big role as well. Served in clear jars or plastic cups, each layer is visible, creating a stunning visual that’s just as impressive as it is tasty. Browsing Pinterest dessert cup ideas shows how creative people have gotten with their own versions, often adding decorative toppings or themed garnishes.
Moreover, this dessert is easy to scale and customize. Whether you’re making a few for family or a tray of 20 for a party, the layering process remains simple. It’s also easy to adapt to different dietary needs by using dairy-free cream or sugar-free pudding mix, which makes it a go-to for many households. The versatility, nostalgia, and no-bake simplicity all contribute to why strawberry banana shortcake cups continue to trend across recipe blogs, food boards, and kitchen counters alike.
3. Key Ingredients Overview
Each layer of the Strawberry Banana Crunch Cups plays a vital role in building the perfect balance of flavor, texture, and appearance. Let’s break down the ingredients by layer and explore how they work together to create this indulgent, no-bake treat.
Cake Layer
The base of this dessert uses a classic vanilla cake mix, combined with eggs, oil, and water. It’s simple, light, and acts as the perfect sponge to soak up the fruit flavors. While the cake is technically baked, you can easily substitute with store-bought pound cake, angel food cake, or even ladyfingers if you’re aiming for a full no-bake experience. The key is to cut it into cubes that fit neatly into dessert cups or jars. For more on the foundational dessert, see vanilla cake.
Fruit Filling
This layer brings freshness and natural sweetness. A mix of mashed banana and chopped strawberries is simmered with sugar and cornstarch until thickened, then finished with a splash of vanilla extract. The result is a jammy, vibrant fruit blend that complements the light cake and creamy layers. Understanding how cornstarch thickening works can help ensure the fruit layer sets properly without becoming runny.
Crunch Topping
The strawberry crunch is one of the most memorable components. Made from crushed Golden Oreos, melted butter, and strawberry gelatin powder, this topping mimics the nostalgic flavor of strawberry crunch ice cream bars. Once baked briefly to crisp it up, it adds a vibrant color and satisfying crunch to the cups. For those curious, the classic Oreo page outlines the various types of cookies that can be used here.
Cream Layer
Freshly whipped heavy cream sweetened with powdered sugar and vanilla extract adds airiness and ties the entire dessert together. You can opt for stabilized whipped cream if preparing in advance, or substitute with Cool Whip for a longer-lasting option. This layer creates a soft, cheesecake-like texture without requiring any actual baking. To dive deeper into this ingredient’s role, check out whipped cream.
Optional Enhancements and Substitutions:
-
Replace strawberry gelatin powder with freeze-dried strawberries for a natural flavor and color boost.
-
Add softened cream cheese to the whipped cream to mimic a cheesecake flavor.
-
Make it tropical by including diced pineapple or mango in the fruit layer.
-
Use dairy-free whipped topping and eggless cake mix for a vegan variation.
For additional presentation and layering inspiration, Pinterest’s strawberry desserts section is full of ideas to personalize this recipe. From decorative toppings to creative jars, you’ll find endless ways to make your dessert stand out visually as well as tastefully.
This ingredient breakdown showcases how each element complements the next, resulting in a dessert that’s visually appealing, flavor-packed, and incredibly easy to prepare.
4. Step-by-Step Instructions Breakdown
Creating Strawberry Banana Crunch Cups may look fancy, but the process is refreshingly simple. Each layer can be prepared ahead of time and then assembled for a visually stunning and irresistibly tasty dessert. Here’s how to make them step by step:
Step 1: Bake the Cake Layer
Start by preparing the vanilla cake mix according to package directions — typically combining the mix with eggs, water, and vegetable oil. Pour it into a 9×13 inch pan and bake until golden and set. Once baked, let it cool completely before cutting into small cubes. This cake will form the base of your dessert cups and may be gently poked with a fork to help soak up the fruit mixture if desired, turning it into a soft poke cake.
Step 2: Cook the Fruit Filling
In a saucepan, combine mashed banana, chopped strawberries, granulated sugar, and a tablespoon of cornstarch. Stir continuously over medium heat until the mixture thickens to a jam-like consistency. Once thickened, remove from heat and add a dash of vanilla extract for extra flavor. Allow it to cool to room temperature before layering.
For those curious about texture control, the science behind cornstarch thickening ensures the filling sets perfectly, avoiding watery layers that might break down the dessert.
Step 3: Prepare the Crunch Layer
In a mixing bowl, combine crushed Golden Oreos, melted butter, and strawberry gelatin powder. Spread the mixture evenly on a baking sheet and bake at 350°F for 5–7 minutes until lightly toasted. Let it cool. This forms the strawberry crunch topping that brings color and contrast to the dessert. You can also explore variations using ingredients from the gelatin dessert family, such as flavored powders or crushed freeze-dried fruits.
Step 4: Make the Whipped Cream Layer
In a clean mixing bowl, beat heavy whipping cream, powdered sugar, and vanilla extract until stiff peaks form. This whipped cream layer acts as a light, creamy contrast to the fruity and crunchy components. If you’re looking for more stable results for make-ahead prep, consider adding a spoonful of instant pudding mix to help hold the texture. See more on the role of whipped cream in dessert construction.
Step 5: Assemble the Cups
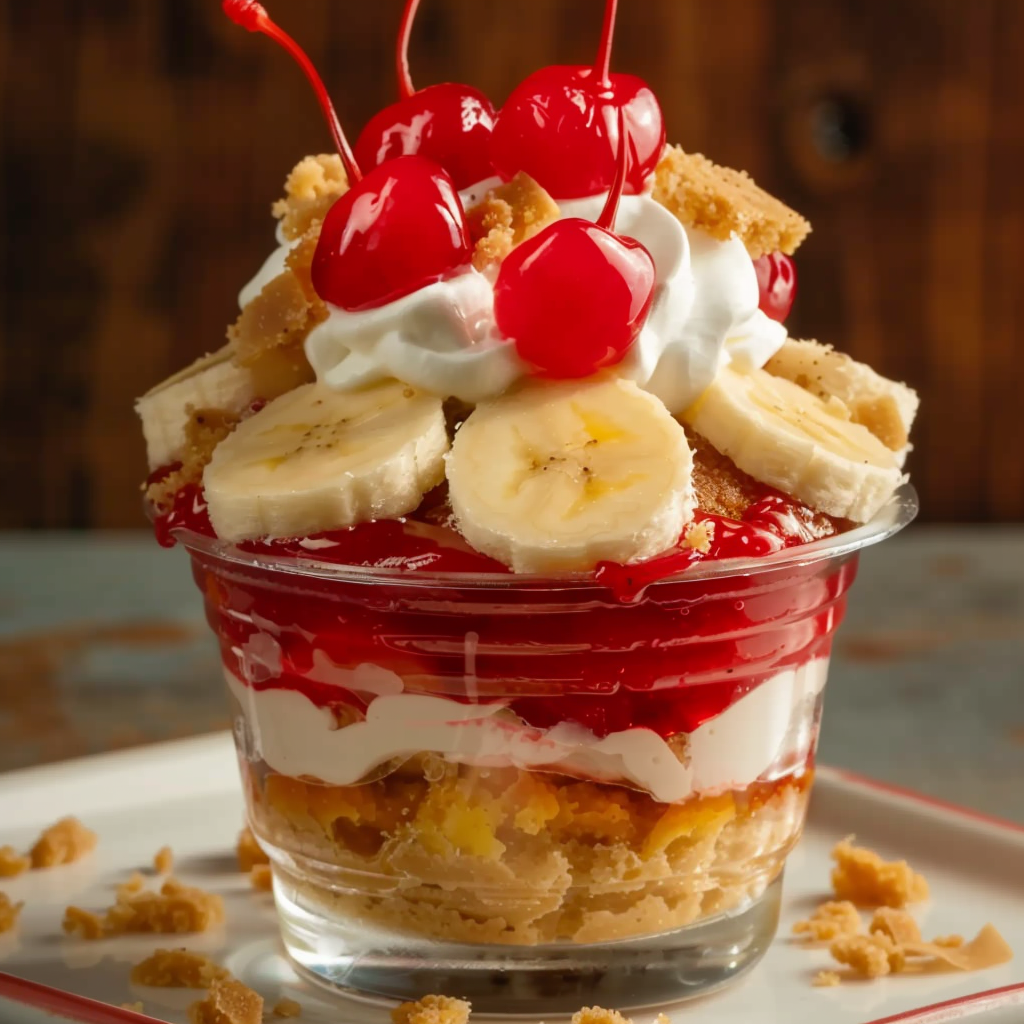
Choose small mason jars or clear dessert cups for a layered effect. Begin with a base of cake cubes, followed by a spoonful of fruit filling, a dollop of whipped cream, and a sprinkle of strawberry crunch. Repeat the layers until the cup is full, finishing with extra crunch and a swirl of whipped cream on top.
For visual ideas, search no bake cake cups on Pinterest to see different ways people style their cups — from layering techniques to presentation tips.
Step 6: Chill Before Serving
Place the assembled cups in the refrigerator for at least one hour before serving. This helps the layers firm up and the flavors blend beautifully. If prepping in advance for a party, cover with lids or plastic wrap and store chilled.
This methodical approach ensures that every element shines on its own while contributing to a harmonious, layered dessert that’s as impressive to look at as it is to eat.
5. Kitchen Tools You’ll Need
To make Strawberry Banana Crunch Cups easily and efficiently, it’s helpful to have the right kitchen tools on hand. These tools are common in most home kitchens and make each step of the process smoother, especially when assembling multiple dessert cups for a party or gathering.
-
Mixing Bowls – You’ll need separate bowls for mixing the cake batter, preparing the fruit filling, making whipped cream, and combining the crunch topping.
-
Hand Mixer or Stand Mixer – Essential for whipping the heavy cream until stiff peaks form. You can use a balloon whisk, but a mixer saves time and effort.
-
Baking Sheet – Used to bake the strawberry crunch mixture until golden and crisp.
-
Saucepan – Needed for simmering the banana-strawberry fruit mixture. A medium-sized nonstick saucepan works best for even heating.
-
Measuring Cups and Spoons – Accurate measurement ensures the right texture and sweetness across each layer.
-
9×13 Inch Baking Pan – Ideal for baking the vanilla cake layer, which will later be cut into cubes. This size ensures even baking and enough cake for multiple cups.
-
Rubber Spatula – Useful for folding whipped cream or transferring layers without deflating mixtures.
-
Mason Jars or Clear Plastic Dessert Cups – These are key for presentation. The transparent sides show off the vibrant, layered look of the dessert.
For decorative inspiration, check out Pinterest’s strawberry dessert presentations. You’ll find beautiful examples of jar desserts with ribbons, custom lids, and layered colors that enhance the visual appeal — perfect for holidays, parties, or gifting.
Using the right tools makes preparation faster, cleaner, and more enjoyable, letting you focus on the fun part: assembling and serving your beautifully layered strawberry banana crunch cups.
6. Nutritional Overview
While Strawberry Banana Crunch Cups are rich and indulgent, understanding their nutritional profile can help with portion control or planning dietary swaps. Since this dessert includes layers of cake, whipped cream, fruit filling, and cookie crunch, it’s naturally higher in sugar and fat — but there are ways to adjust if needed.
Here’s an approximate breakdown for one standard 8 oz serving:
-
Calories: 350–450 (varies based on cream and cake used)
-
Total Fat: 20g (primarily from whipped cream and cookies)
-
Sugar: 30–35g (from fruit, cake, and topping)
-
Carbohydrates: 40–50g
-
Protein: 3–5g
To lighten it up:
-
Use light whipped topping instead of heavy cream
-
Replace sugar with natural sweeteners like stevia or monk fruit
-
Use a sugar-free cake mix or protein-enhanced base
-
Opt for low-fat cookies or reduce the amount of crunch topping
Although it’s not designed to be a health food, this dessert can fit into a balanced diet, especially with mindful portion sizes or smart substitutions.
For a visual comparison, search banana pudding dessert jars to see how others create small, single-serve versions that help with portion control while still satisfying your sweet tooth.
7. Fun Variations to Try
One of the best things about Strawberry Banana Crunch Cups is how adaptable they are. You can take the basic structure and tweak it to suit your taste, the occasion, or what ingredients you have on hand. Here are some creative and delicious variations:
-
Chocolate Strawberry Crunch Cups
Replace the vanilla cake with chocolate cake or brownies for a richer flavor. Add mini chocolate chips or a drizzle of chocolate ganache between layers. -
Tropical Banana Cups
Mix in diced pineapple, mango, or kiwi to the fruit layer for a tropical twist. Swap strawberry gelatin with pineapple or mango gelatin in the crunch layer. -
Cheesecake Layer Addition
Blend softened cream cheese with powdered sugar and fold it into the whipped cream for a cheesecake-style cream layer. -
Vegan Strawberry Banana Cups
Use plant-based whipped topping, dairy-free cake mix, and vegan cookies. For gelatin, swap in crushed freeze-dried strawberries. -
Shortcut No-Bake Version
Skip baking altogether. Use store-bought pound cake, ladyfingers, or even graham crackers for the cake layer. This speeds up prep and enhances the “no-bake” appeal. -
Festive Versions
Tint the whipped cream with food coloring or add edible glitter for themed events like Valentine’s Day, birthdays, or baby showers.
Explore more creative variations on Pinterest to find inspiration for seasonal ingredients, jar decorations, or presentation styles.
8. Storage Tips & Shelf Life
Proper storage is essential to maintaining the freshness, texture, and flavor of your Strawberry Banana Crunch Cups. Since this dessert contains whipped cream and fruit, it needs refrigeration.
-
Refrigerator: Store assembled cups in an airtight container or cover with plastic wrap. They stay fresh for up to 3 days.
-
Do not freeze: The texture of the whipped cream and fruit changes in the freezer, resulting in separation or sogginess upon thawing.
-
Best served chilled: Always serve straight from the fridge for best flavor and structure.
If making ahead for an event, you can prep all components (cake cubes, fruit filling, crunch, whipped cream) separately and assemble them a few hours before serving. This prevents soggy layers and keeps the crunch topping crisp.
9. Best Occasions to Serve This Dessert
Strawberry Banana Crunch Cups are ideal for a wide variety of events and celebrations. Their individual size, bright colors, and layered appeal make them an easy favorite at gatherings.
Perfect occasions include:
-
Summer BBQs and Picnics – Cool, fruity, and refreshing
-
Birthday Parties – Easy for kids and adults to grab and enjoy
-
Bridal or Baby Showers – Elegant and customizable
-
Holiday Gatherings – Great for Easter, Valentine’s Day, and Mother’s Day
-
Potlucks or Office Parties – Individual portions reduce mess and prep
The layered effect in clear cups makes them look polished and professional, ideal for photo-worthy spreads. For event planning ideas, check Pinterest no bake cake cups for inspiration.
10. Serving Suggestions
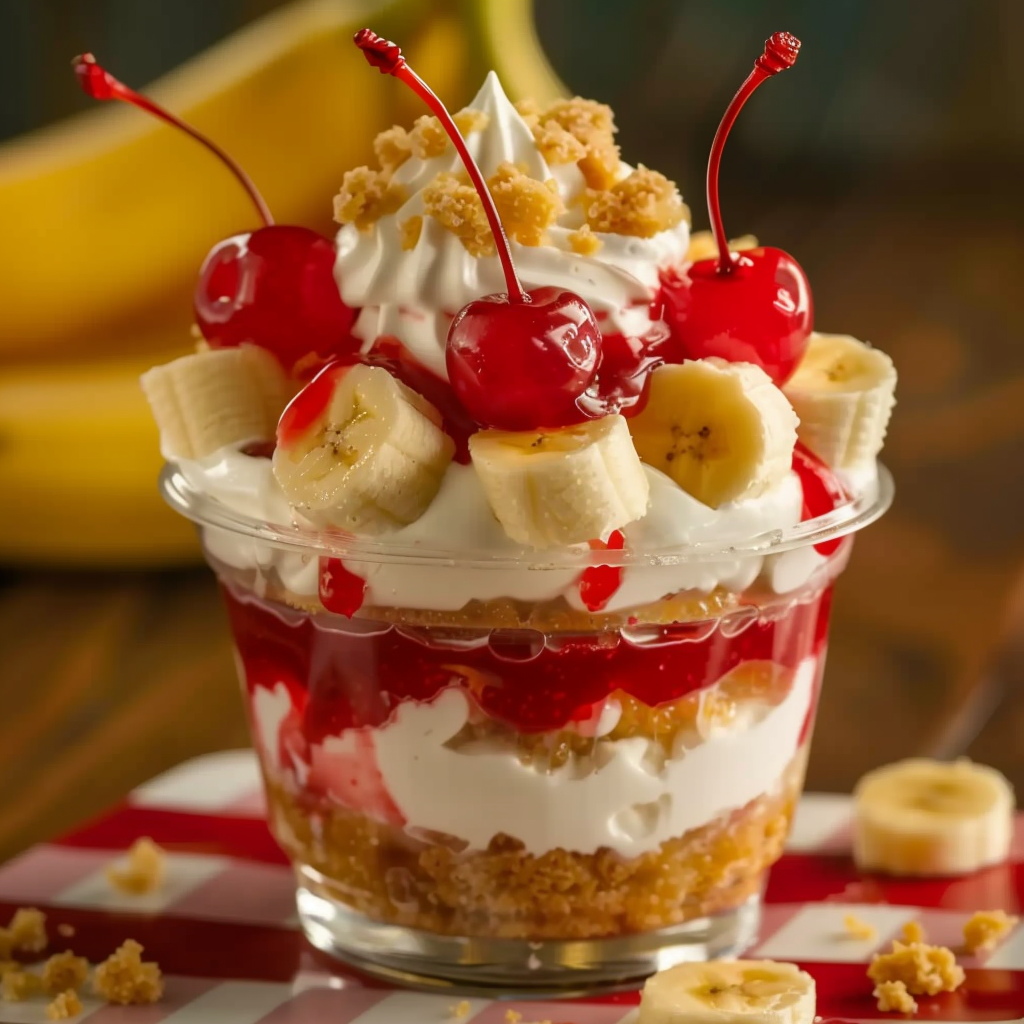
Presentation adds the final wow factor. Here’s how to take your Strawberry Banana Crunch Cups to the next level when serving:
-
Serve in clear mason jars, mini trifle bowls, or disposable dessert cups for easy portioning.
-
Garnish with:
-
Fresh strawberry or banana slices
-
Crushed Golden Oreos
-
Mint leaves
-
White chocolate curls
-
A drizzle of strawberry or chocolate syrup
-
-
Add texture with granola, coconut flakes, or chopped nuts for a unique twist.
To keep presentation clean, use piping bags for the whipped cream layer and clean the inside rim of cups before chilling. For more layering and topping inspiration, visit Pinterest strawberry dessert jars.
11. FAQs – Frequently Asked Questions
Can I use Cool Whip instead of homemade whipped cream?
Yes, Cool Whip is a great substitute. It’s more stable than homemade whipped cream and holds up better over time, especially in make-ahead desserts.
Can I make this dessert ahead of time?
Absolutely. Assemble the cups up to 24–48 hours in advance and refrigerate until serving. If you want the crunch to stay crisp, store it separately and add just before serving.
Can I freeze strawberry banana pudding cups?
Freezing is not recommended. The whipped cream and fruit filling may separate or become icy, compromising texture and flavor.
How do I make a cheesecake layer?
For a cheesecake-style cream, mix 8 oz of softened cream cheese with ¼ cup powdered sugar. Fold this into your whipped cream for a thicker, tangier layer.
Can I skip baking the cake?
Yes. Replace baked cake with store-bought pound cake, ladyfingers, or shortbread cookies to make it a true no-bake dessert.
What if I don’t have strawberry gelatin powder?
You can use crushed freeze-dried strawberries or strawberry pudding mix as an alternative. They’ll provide similar flavor and a natural red hue.
Can I make this dessert vegan?
Yes. Use dairy-free whipped topping, vegan cake mix, and plant-based cookies. Check that your gelatin or replacement is vegan-friendly.
How do I layer the cups neatly?
Use a piping bag or zip-top bag with the corner snipped off to control placement of the whipped cream. Clean the inside edges with a paper towel before chilling for a professional look.
Can I make this into a large trifle instead of cups?
Yes. Simply layer all components in a large glass trifle dish. Follow the same order: cake, fruit filling, whipped cream, crunch. Repeat as needed.
How do I keep the bananas from browning?
Mash or slice them right before using, and mix with a bit of lemon juice to reduce oxidation. In the cooked fruit layer, the banana is stabilized by sugar and heat.
No Bake Strawberry Banana Shortcake Poke Cake Cups with Cake Mix and Whipped Cream
- Author: Naomi
Description
These Strawberry Banana Shortcake Crunch Cups are a delightful, no-bake dessert packed with layers of moist vanilla cake, rich banana-strawberry filling, fluffy whipped cream, and a nostalgic strawberry crunch topping made from Golden Oreos. Served in jars or dessert cups, they’re perfect for summer parties, potlucks, or make-ahead sweet treats. With easy-to-find ingredients and a stunning presentation, they’re the ultimate layered dessert that looks fancy but is simple to make.
Ingredients
For the cake:
- 1 box vanilla cake mix
- 3 large eggs
- 1 cup water
- 1/3 cup vegetable oil
For the filling:
- 1 banana, mashed
- 1 cup strawberries, chopped
- 1/4 cup granulated sugar
- 1 tablespoon cornstarch
- 1/2 teaspoon vanilla extract
For the crunch layer:
- 1 cup crushed golden Oreos
- 2 tablespoons butter, melted
- 2 tablespoons strawberry gelatin powder
For the cream layer:
- 1 cup heavy whipping cream
- 1/4 cup powdered sugar
- 1/2 teaspoon vanilla extract
Instructions
Preheat oven to 350°F (175°C) and prepare the vanilla cake mix according to package instructions. Bake in a 9×13 inch pan and let it cool completely.
In a saucepan over medium heat, combine mashed banana, strawberries, granulated sugar, and cornstarch. Stir constantly until mixture thickens. Remove from heat and stir in vanilla extract. Let cool.
In a bowl, mix crushed Oreos, melted butter, and strawberry gelatin powder until crumbly. Spread on a baking sheet and bake at 350°F for 5-7 minutes. Let cool.
In a mixing bowl, beat heavy cream, powdered sugar, and vanilla extract until stiff peaks form.
Use small cups or jars to layer the dessert. Start with cake cubes, followed by fruit filling, a spoonful of whipped cream, and a sprinkle of crunch. Repeat layers as desired.
Chill for at least 1 hour before serving.
Notes
-
For the crunch layer, don’t skip the bake time. It helps create that perfect crisp texture.
-
Chill at least 1 hour before serving to let the layers set.
-
Assemble right before serving if you want the crunch topping to stay extra crispy.
-
To save time, use store-bought cake or whipped topping.
-
Customize with different fruits, flavors, or presentation jars for any occasion.


