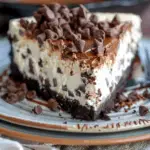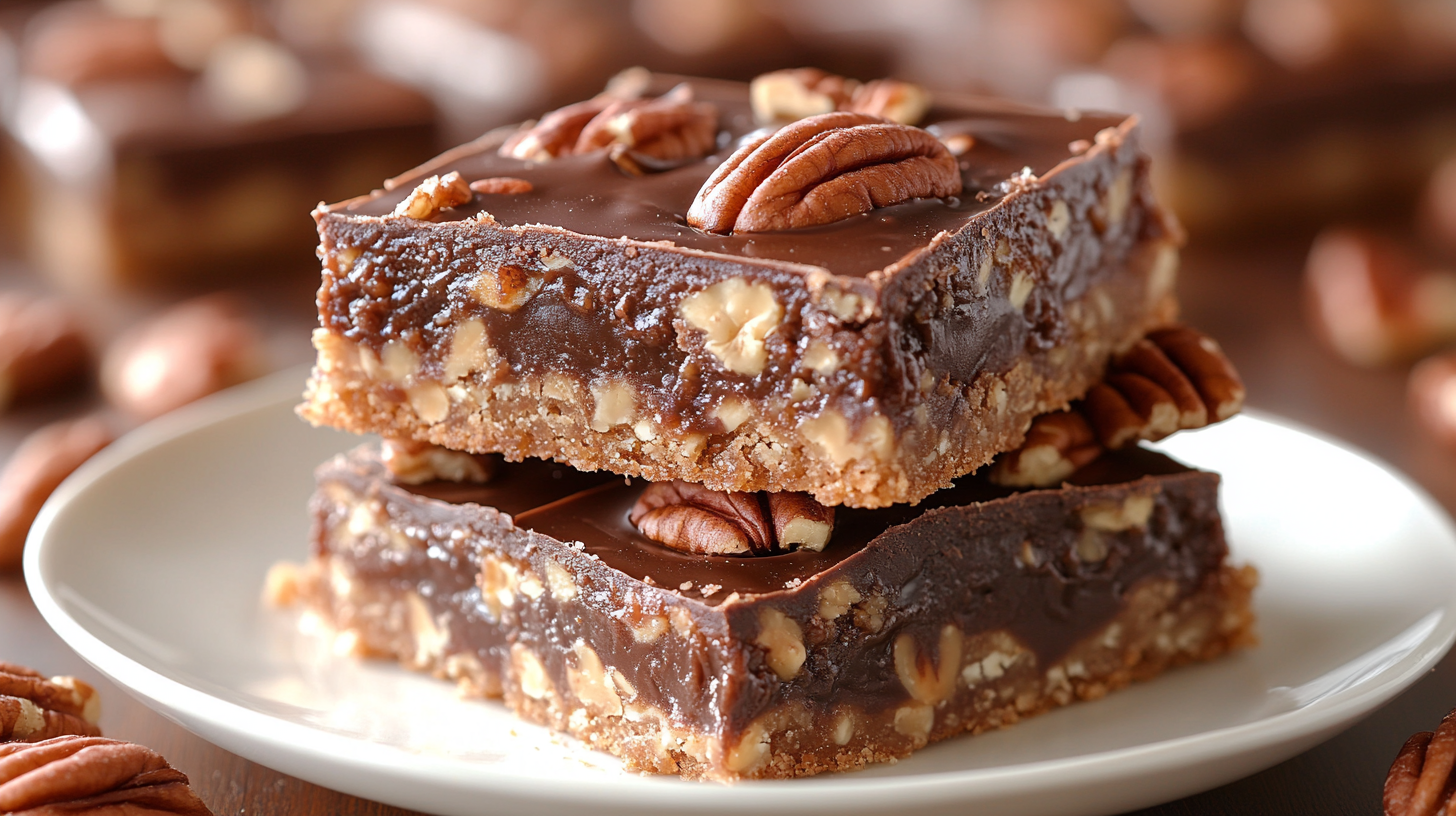
Pecan Turtle Bars are a delightful dessert that combines layers of rich, buttery flavors with a satisfying crunch. These bars feature a crisp shortbread crust, a luscious caramel layer, crunchy pecans, and a smooth, chocolatey top, making them an irresistible treat for any occasion. Loved for their perfect balance of sweet, salty, and nutty flavors, pecan turtle bars are a crowd-pleaser, ideal for holidays, parties, or as an indulgent homemade snack.
This recipe is cherished because of the simplicity of its steps and the incredible results. You begin by creating a buttery shortbread crust, then top it with homemade caramel and toasted pecans. Finally, a generous layer of melted chocolate finishes off the treat, offering a glossy, delicious bite in every square. Whether you’re a beginner baker or a seasoned expert, this recipe is easy to follow and guarantees delicious results. With just a few ingredients and straightforward steps, you’ll soon have a batch of pecan turtle bars that are sure to impress family and friends alike.
Ingredients Overview
The success of pecan turtle bars lies in the quality of the ingredients. Each component plays a vital role in delivering the rich flavors and perfect textures that make these bars irresistible. By using fresh, high-quality ingredients, you ensure the bars have a buttery, crunchy crust, smooth caramel, and a decadent chocolate layer.
Role of Each Ingredient
- Flour and Powdered Sugar: These ingredients form the foundation of the shortbread crust. The flour provides structure, while the powdered sugar adds sweetness without the grainy texture of regular sugar, giving the crust a melt-in-your-mouth quality.
- Unsalted Butter: Butter is the key to the richness and moisture in both the crust and caramel layer. Using unsalted butter allows you to control the salt content in the recipe, ensuring that the flavors of the pecans and caramel shine through without being overly salty.
- Brown Sugar and Light Corn Syrup: These two ingredients combine to create the caramel layer. Brown sugar adds depth with its molasses-like flavor, while light corn syrup helps prevent the caramel from crystallizing, keeping it smooth and gooey.
- Sweetened Condensed Milk: This thick, sweet milk adds creaminess to the caramel, preventing it from becoming grainy and ensuring the perfect texture. It also adds a balanced sweetness that complements the other layers.
- Pecans: Chopped pecans add a delightful crunch and nutty flavor that contrasts beautifully with the smooth caramel and chocolate. Their buttery texture enhances the richness of the bars.
- Chocolate Chips: Semisweet chocolate chips melt over the hot caramel and pecans to form a glossy, smooth topping. This layer provides a rich, slightly bitter contrast to the sweetness of the caramel and shortbread.
Substitutions and Tips for Variations
- Chocolate: You can swap semisweet chocolate chips for dark chocolate if you prefer a less sweet flavor, or use milk chocolate for a creamier, sweeter topping.
- Nuts: Pecans can be substituted with walnuts or almonds for a different nutty flavor.
- Butter: If salted butter is all you have, reduce the additional salt in the recipe to maintain balance.
Choosing the Best Pecans and Chocolate
- Pecans: Fresh pecans are essential for the best flavor. Look for plump, unbroken pecans with a sweet, nutty aroma. Old or rancid pecans will have an off taste that could spoil the bars.
- Chocolate: High-quality chocolate is key to achieving a smooth, glossy topping. Opt for chocolate chips or bars with a cocoa content of at least 60% for a rich, deep flavor. Lower-quality chocolate can leave a waxy aftertaste, diminishing the overall quality of the dessert.
Step-by-Step Instructions
Prepare the Crust
Before you begin, it’s crucial to preheat your oven to 350°F (175°C). Preheating ensures your oven reaches the proper temperature by the time the crust is ready, leading to even baking and a crisp, golden shortbread base.
To make the crust, combine 2 cups of all-purpose flour, ½ cup of powdered sugar, and 1 cup of softened unsalted butter in a large mixing bowl. It’s important that the butter is softened to room temperature; this ensures it blends smoothly with the flour and sugar, creating a cohesive dough.
Using a pastry cutter, fork, or your hands, mix the ingredients together until the dough begins to form. It should resemble coarse crumbs but hold together when pressed. Once combined, press the dough evenly into a greased 9×13-inch baking pan. Pressing it evenly ensures a uniform base that bakes consistently. You can use your hands or the back of a spoon to smooth it out.
Bake the crust for 15-20 minutes, or until the edges turn a light golden brown. This is the key indicator that the shortbread is ready. Once baked, set it aside to cool slightly while you prepare the caramel layer.

Making the Caramel Layer
Creating a rich, smooth caramel is the heart of these pecan turtle bars. To start, melt 1 cup of unsalted butter in a medium saucepan over medium heat. Butter provides the fat base for your caramel and gives it a deep, rich flavor.
Once the butter has melted, add 1 cup of packed brown sugar, ¼ cup of light corn syrup, and 1 can (14 oz) of sweetened condensed milk to the saucepan. These ingredients combine to create the sweet, gooey caramel layer. The brown sugar adds a molasses-like depth to the caramel, while the corn syrup prevents crystallization, keeping the caramel smooth.
Bring the mixture to a gentle boil while stirring constantly. Constant stirring is essential to prevent the caramel from burning or sticking to the bottom of the pan. Once it reaches a boil, reduce the heat slightly and allow it to simmer for 5-7 minutes. Continue stirring to ensure even cooking. The caramel will thicken and develop a deep golden color.
Achieving the perfect consistency is important. The caramel should be thick but still pourable. Avoid common mistakes like burning or separation by keeping the heat moderate and stirring constantly. If the caramel looks grainy, it may have overheated, so maintaining control over the temperature is key.
Once the caramel reaches the right consistency, carefully pour it evenly over the baked crust. Use a spatula to spread it if necessary, ensuring it covers the entire surface. This will serve as a smooth, sticky layer that holds the pecans and chocolate.
Adding the Pecan Topping
With the caramel still warm, it’s time to add the pecan topping. Take 2 cups of coarsely chopped pecans and sprinkle them evenly over the caramel layer. Spreading them evenly is essential for consistent flavor and crunch in every bite. Make sure to gently press the pecans into the caramel with your hands or a spatula to help them adhere as the caramel cools.
Once the pecans are in place, return the pan to the oven and bake for an additional 10-15 minutes. This step allows the caramel to bubble slightly and the pecans to become toasted, enhancing their nutty flavor. Keep an eye on the pecans during baking to ensure they don’t burn. You’re looking for a lightly toasted appearance, which will add a layer of crunch without overwhelming the caramel and chocolate.
To get the perfect toasted pecans, make sure the oven is still at 350°F, and avoid over-baking, as this can dry out the nuts and make them overly bitter.
Adding and Spreading the Chocolate Layer
As soon as you remove the bars from the oven, immediately sprinkle 1½ cups of semisweet chocolate chips evenly over the hot caramel and pecans. The heat from the caramel will melt the chocolate chips within a few minutes.
Allow the chocolate to sit undisturbed for 2-3 minutes until it starts to soften and melt. Then, using a spatula or the back of a spoon, gently spread the melted chocolate evenly across the surface of the bars. Work quickly but carefully to avoid mixing the chocolate with the caramel.
For a glossy, professional-looking finish, spread the chocolate in smooth, even strokes. You can also tap the pan gently on the counter to even out the chocolate layer. If you prefer, you can sprinkle a small amount of sea salt over the chocolate at this stage to create a salted caramel effect.
Allow the chocolate to set for a few minutes before proceeding to the next step.
Cooling and Setting the Bars
Once the chocolate has been spread, it’s crucial to allow the bars to cool completely at room temperature. This cooling process helps the caramel and chocolate layers to firm up, making the bars easier to cut later.
After they’ve cooled at room temperature, place the bars in the refrigerator for at least 1 hour to allow the chocolate to fully set. The cold environment helps the chocolate harden to the perfect texture for slicing.
When the bars are fully set, remove them from the refrigerator and allow them to sit at room temperature for about 10 minutes before cutting. This helps prevent the chocolate from cracking as you slice the bars into squares. Use a sharp knife, wiping it clean between cuts, for clean, precise squares.
Tips for Success
Avoiding Common Pitfalls
- Avoiding Overcooking the Caramel or Chocolate
Overcooking the caramel can lead to a hard, chewy layer instead of a soft, gooey one. To avoid this, watch the caramel carefully as it simmers, stirring constantly to prevent it from sticking to the pan and burning. Keep the heat moderate and don’t rush the process. The caramel should be golden and thickened after 5-7 minutes of simmering.Similarly, be careful not to overheat the chocolate. When spreading it over the bars, the residual heat from the caramel should be enough to melt the chocolate chips. If needed, you can gently heat the pan in the oven for a minute to soften the chocolate, but avoid applying direct high heat to prevent it from seizing. - Ensuring the Crust Doesn’t Crumble
If your crust crumbles or falls apart when you cut the bars, it’s likely underbaked or wasn’t pressed tightly enough into the pan. Make sure to bake the crust until it turns a light golden brown around the edges, and press the dough firmly into the pan before baking. A well-baked shortbread crust should hold its structure but still be tender to bite into. - What to Do If Your Caramel Separates or Crystallizes
If the caramel begins to separate or crystallize, it’s often because the mixture was stirred unevenly or overheated. To fix this, you can remove the pan from the heat and whisk in a small amount of cream or butter to bring the caramel back together. Stirring constantly and controlling the heat will help you avoid this issue altogether.
Serving Suggestions
- Best Way to Cut the Bars
For clean, precise cuts, use a sharp chef’s knife or a large serrated knife. Warming the knife by running it under hot water and then wiping it dry can help you glide through the chocolate layer without cracking it. After each cut, wipe the knife clean to prevent the layers from smudging together. - Ideal Serving Size for Parties or Gifts
Depending on the occasion, cut the bars into either bite-sized squares or larger, more generous portions. For parties or potlucks, smaller pieces are ideal as they are easy to pick up and enjoy. If you’re gifting them, larger bars packaged in a box or tin with parchment paper are a thoughtful presentation. - Presentation Tips
For a professional look, drizzle extra melted chocolate or caramel over the top of the bars before serving. You can also sprinkle a touch of sea salt or decorate with additional chopped pecans for added texture and flavor. These simple garnishes can elevate the appearance and make your pecan turtle bars look bakery-worthy!
Recipe Variations
Flavor Variations
- Salted Caramel Pecan Turtle Bars
For a more sophisticated flavor, try adding a sprinkle of sea salt over the chocolate layer just before it sets. The contrast of the sweet caramel with the salty finish will enhance the depth of flavor and create a rich, salty-sweet balance. - Dark or White Chocolate Variations
If you prefer a less sweet or more intense flavor, substitute semisweet chocolate chips with dark chocolate. Dark chocolate (70% cacao or higher) offers a deeper, more bitter flavor that pairs beautifully with the caramel and pecans. For a sweeter, creamier option, try using white chocolate. Its sweetness will contrast with the toasted nuts for a delightful variation. - Different Nuts
While pecans are classic in this recipe, you can also experiment with walnuts, almonds, or a mixture of both. Walnuts offer a slightly bitter, earthy taste, while almonds provide a crunchy texture. These variations will give the bars a unique flavor profile and texture.
Making Gluten-Free or Vegan Versions
- Gluten-Free Shortbread Crust
To make the crust gluten-free, simply replace the all-purpose flour with a 1:1 gluten-free flour blend. These blends often contain xanthan gum, which helps mimic the texture of regular flour. - Vegan Substitutes
For a vegan version, replace the butter with vegan butter or coconut oil. Instead of sweetened condensed milk, use coconut condensed milk or make your own using non-dairy milk and sugar. These substitutions still deliver a rich and indulgent texture without using animal products.
Storing and Preserving Pecan Turtle Bars
Best Storage Methods
Pecan turtle bars can be stored at room temperature in an airtight container for up to 3-4 days. This keeps the bars soft but slightly firm for easy cutting and serving. For longer storage, refrigerate them, which helps the chocolate set more firmly and extends their freshness for up to 1 week. Just be sure to bring them back to room temperature before serving for the best texture.
Freezing Tips
To store the bars for an even longer period, freeze them. Once the bars have fully set, cut them into squares and place them in a single layer on a baking sheet to freeze individually. Once frozen, transfer the squares to a freezer-safe container or bag, placing parchment paper between layers to prevent sticking. Pecan turtle bars can be frozen for up to 3 months. To thaw, simply place them in the refrigerator overnight or leave them at room temperature for a few hours before serving.
Making Ahead for Events or Gifting
These bars are perfect for making ahead. You can prepare the entire batch in advance, store them in the refrigerator or freezer, and they’ll still taste fresh when ready to serve or gift. Just wrap them individually for gifting, making them a thoughtful, delicious homemade treat!
FAQs Section
Q: Can I make these bars ahead of time?
A: Yes! Pecan turtle bars are perfect for making ahead. You can store them in an airtight container at room temperature for up to 3-4 days or refrigerate for up to a week. If you need to store them for longer, simply freeze the bars. They freeze well and can be kept for up to 3 months. Thaw them at room temperature or in the refrigerator before serving.
Q: How can I make this recipe gluten-free?
A: To make this recipe gluten-free, substitute the all-purpose flour in the shortbread crust with a 1:1 gluten-free flour blend. These blends often contain xanthan gum or similar ingredients, which help mimic the texture of regular flour, ensuring the crust is still tender and firm.
Q: Can I use different nuts in this recipe?
A: Absolutely! You can swap out pecans for walnuts, almonds, or macadamia nuts for a different flavor and texture. You can even use a mix of nuts to add more complexity to the bars. Just be sure to chop them coarsely so they spread evenly over the caramel layer.
Q: What if my caramel layer turns grainy?
A: Grainy caramel is often caused by crystallization. To prevent this, make sure to include corn syrup in your caramel mixture, and stir continuously during cooking. Maintaining an even temperature and avoiding rapid heating can also help prevent crystallization.
Q: Is there a way to make these bars less sweet?
A: Yes! To reduce sweetness, you can reduce the amount of brown sugar in the caramel layer, or substitute dark chocolate for semisweet chocolate in the topping. Dark chocolate’s more bitter flavor helps balance the sweetness of the caramel and pecans.
Conclusion
Pecan Turtle Bars are a decadent yet surprisingly easy treat to make. With just a few simple steps—creating a buttery shortbread crust, making a rich caramel, adding toasted pecans, and finishing with a glossy chocolate topping—you can whip up a batch of these irresistible bars in no time. Whether you’re a beginner or an experienced baker, this recipe is straightforward and rewarding, yielding delicious results with minimal effort.
Feel free to experiment with this recipe by trying different flavor variations, such as adding sea salt for a salted caramel twist or using dark or white chocolate for a new taste. You can also swap out the pecans for other nuts, like walnuts or almonds, to personalize the bars to your liking.
We’d love to hear how your pecan turtle bars turned out! Whether you tried a variation or stuck with the classic recipe, share your baking experience with us in the comments or on social media. Your creativity might inspire others to put their own twist on these delicious bars!
Print
Pecan Turtle Bars
Description
Pecan Turtle Bars are a delectable dessert that combines the buttery crunch of shortbread with rich, gooey caramel, toasted pecans, and a smooth layer of melted chocolate. These bars are perfect for holidays, special occasions, or whenever you crave a sweet, indulgent treat. With their blend of textures and flavors, they are sure to be a hit with both kids and adults alike.
Ingredients
For the Shortbread Crust:
- 2 cups all-purpose flour
- ½ cup powdered sugar
- 1 cup unsalted butter, softened
For the Caramel Layer:
- 1 cup unsalted butter
- 1 cup packed brown sugar
- ¼ cup light corn syrup
- 1 can (14 oz) sweetened condensed milk
For the Topping:
- 2 cups coarsely chopped pecans
- 1½ cups semisweet chocolate chips
Instructions
- Prepare the Crust:
Preheat your oven to 350°F (175°C). In a large bowl, mix together the flour, powdered sugar, and softened butter until the dough forms. Press the dough evenly into a greased 9×13-inch baking pan. Bake for 15-20 minutes, or until the edges turn light golden brown. Set aside to cool slightly. - Make the Caramel Layer:
In a medium saucepan, melt the butter over medium heat. Add the brown sugar, corn syrup, and sweetened condensed milk. Stir constantly and bring to a boil. Reduce heat and simmer for 5-7 minutes, stirring continuously, until the caramel thickens and turns a deep golden color. Pour the caramel evenly over the baked crust. - Add the Pecan Topping:
Sprinkle the chopped pecans evenly over the caramel layer, pressing them down gently into the caramel. Bake for an additional 10-15 minutes, until the caramel is bubbly and the pecans are toasted. - Add and Spread the Chocolate:
Remove the bars from the oven and immediately sprinkle the chocolate chips over the hot caramel and pecans. Let the chocolate sit for a few minutes to melt, then spread it evenly over the top using a spatula. - Cool and Set:
Allow the bars to cool completely at room temperature. Once cool, refrigerate for at least 1 hour to set the chocolate. After setting, cut the bars into squares and enjoy!
Notes
- Butter: For a richer flavor, make sure to use high-quality unsalted butter. If using salted butter, reduce the added salt in the recipe.
- Caramel: Stir the caramel constantly while cooking to prevent it from burning or separating. If it starts to crystallize, add a tablespoon of cream or butter to bring it back together.
- Pecans: Toasting the pecans adds extra flavor and crunch. You can swap pecans for walnuts, almonds, or any other nuts you prefer.
- Variations: Experiment with dark or white chocolate for a different flavor twist. For a salted caramel version, sprinkle sea salt over the melted chocolate before it sets.