

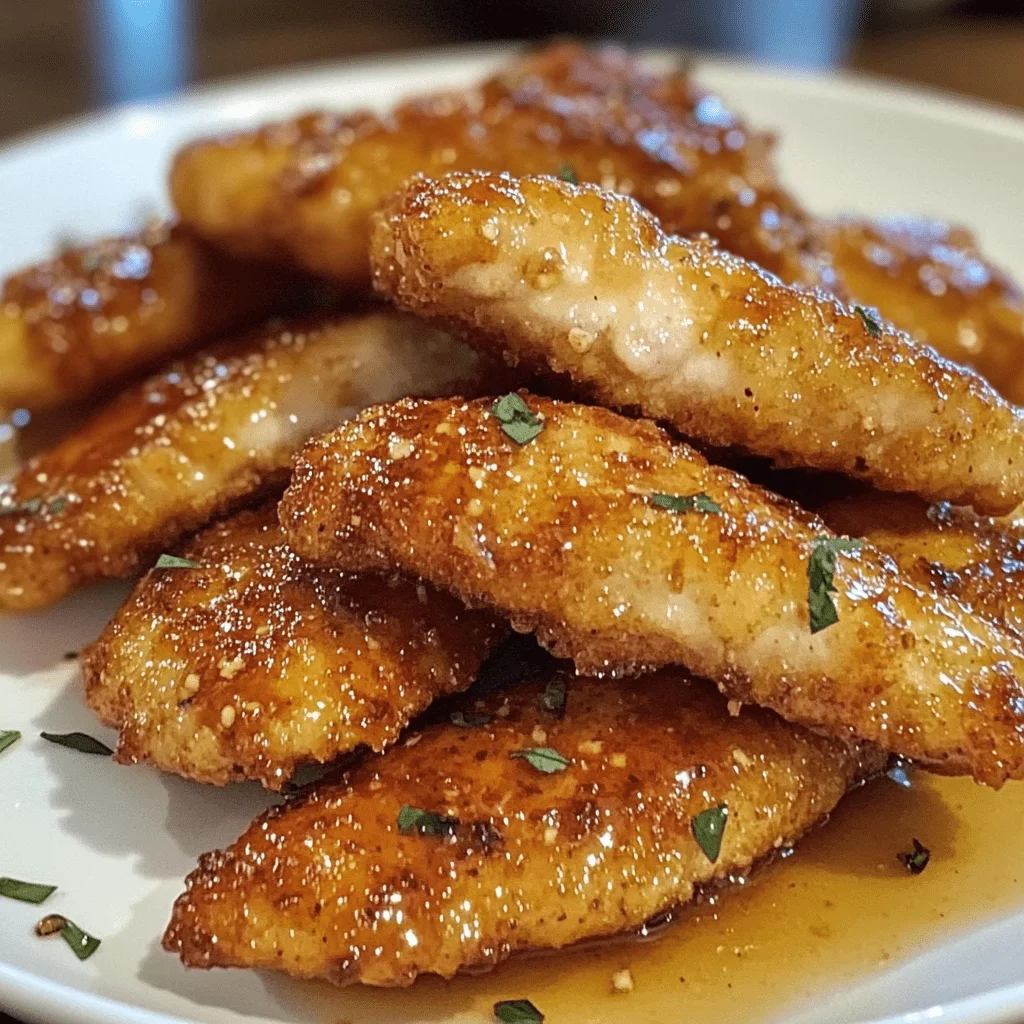
Craving crispy, flavorful chicken without the guilt of deep frying? Our air fryer chicken recipes create restaurant-quality results in just 30 minutes.
These honey garlic tenders contain only 320 calories per serving and pack an impressive 25g of protein, unlike traditional fried chicken. Panko breadcrumbs and precise cooking at 375°F create that perfect crunch without excess oil.
We understand the challenge of preparing quick, healthy meals as busy home cooks. Our perfected air fryer chicken breast recipes are both family-friendly and quick. You’ll need 15 minutes to prep and 15 minutes to cook for a delicious meal that serves 4.
Your chicken tenders deserve a mouthwatering honey butter garlic glaze. Let’s take a closer look at this simple yet impressive recipe that will become your new weeknight favorite!
Essential Ingredients for Perfect Honey Garlic Chicken Tenders
Quality ingredients make exceptional air fryer chicken tenders. The right chicken cuts and perfect sauce balance will create this delicious dish.
Selecting the Best Chicken Cuts
You have two excellent options to get tender results. 1-2 pounds of pre-cut chicken tenders offer the simplest approach with no additional cutting. You can also take 2 large boneless, skinless chicken breasts and slice them into 1-inch thick strips. Boneless skinless chicken thighs make a budget-friendly alternative that naturally gives juicier results.
Your chicken’s thickness will substantially affect the outcome. Chicken breast strips should be about 2/3-inch (1.5cm) thick to cook evenly. This consistent thickness helps your chicken cook through without drying out thinner parts.
The Secret to a Flavorful Honey Garlic Sauce
The perfect honey garlic sauce needs a precise balance of sweet and savory elements. Here are the key ingredients:
- Honey: Natural sweetness creates that irresistible sticky texture
- Garlic: 5-6 cloves give robust flavor
- Soy sauce: Depth and saltiness from umami
- Brown sugar: Rich caramelization
- Rice vinegar: Subtle acidity balances sweetness
- Cornstarch: Thickens the sauce (mix with water first)
Butter creates a richer, fuller-bodied flavor profile than oil in your sauce base. The timing of garlic addition matters – sauté some early to infuse the base and add fresh minced garlic later for pronounced flavor.
Breading Options for Extra Crispiness
Your choice of breading shapes the final result. All-purpose flour serves as a traditional base, but Japanese panko breadcrumbs create superior crunch with their larger size and extra texture.
The binding layer offers choices. A beaten egg and water mixture works as a standard adhesive. Some recipes add a tablespoon of mayonnaise with dijon mustard to improve flavor and moisture.
Your breading needs generous seasoning. Use at least 3/4 teaspoon salt and 1/2 teaspoon black pepper per 1.5 cups of flour. Garlic powder, paprika, or Italian seasonings add extra flavor.
A chef’s secret: press the coating firmly onto the chicken and let it rest briefly before cooking. This creates a slightly “gooey” texture that becomes beautifully crisp in the air fryer.

Preparing Your Air Fryer Chicken for Maximum Crispiness
Making restaurant-quality crispy chicken in your air fryer just needs the right prep work. The line between soggy disappointment and golden perfection comes down to these vital pre-cooking steps.
The Perfect Breading Technique
You’ll need the right approach to create that irresistible crunch. A three-step process works best for traditional results: first dredge in seasoned flour, then dip in beaten egg, and coat with panko or breadcrumbs. Some simpler air fryer chicken breast recipes skip flour and eggs – you just spray chicken with olive oil before adding seasoned breadcrumbs.
The secret lies in complete coverage, whatever method you choose. Your chicken needs full breadcrumb coverage to lock in moisture and stay juicy. Press the coating firmly onto the chicken and make sure no bare or damp spots show. This attention to detail stops those “floury spots” from staying uncooked during air frying.
Pre-Air Fryer Tips for Juicier Results
Brining makes a big difference in tenderness. Mix 2 tablespoons of salt in 2 cups of room temperature water and let the chicken soak for at least 15 minutes – though 2 hours gives the best results. This step helps your chicken stay moist during high-heat cooking and brings it to room temperature so it cooks evenly.
After brining, rinse the chicken with fresh water and pat it dry with paper towels. Here are more vital tips:
- Slice chicken breasts thin (about ¼ inch thick) so they cook faster and more evenly
- Keep your air fryer basket from getting crowded – this creates steam instead of crispiness
- Spray cooking oil on all sides of your breaded chicken
- Give your air fryer 5 minutes to preheat before adding chicken
A wire rack in your air fryer will help the chicken cook better than placing it directly in the basket. This lets air flow all around and makes the bottom just as crispy as the top.

Step-by-Step Air Fryer Cooking Method
The path from basic chicken to crispy, juicy tenders lies in your cooking technique. The quickest way to achieve this is through proper air fryer settings and handling.
Setting the Right Temperature and Time
Multiple temperature tests show 375°F works best for cooking chicken in an air fryer. This sweet spot creates a golden exterior while keeping the inside tender and juicy.
Your cooking time depends on chicken piece sizes:
- Small tenders (5-7 ounces): 7-10 minutes total
- Medium pieces (8-10 ounces): 10-12 minutes total
- Larger cuts (11+ ounces): 12-16 minutes total
A 3-5 minute preheat before adding chicken makes a big difference. Air fryers cook food 30-40% faster than regular ovens.
How to Arrange Chicken for Even Cooking
The right arrangement makes all the difference in getting consistent results. Your chicken pieces should sit in a single layer with small gaps between them. Hot air needs space to circulate – crowded pieces won’t cook evenly.
Keep your chicken tenders from touching each other in the basket. You might need to cook in batches, usually 4 tenders at a time based on your air fryer size. This extra time gives you perfectly crispy results.
When and How to Flip for Perfect Results
The air circulation helps, but you’ll still need to flip for the best results. Most cooks flip their chicken halfway through. Start with the best-looking side down, then flip it so that side gets the final crisp.
Open your air fryer carefully after 5-6 minutes and flip each piece with tongs. Keep cooking until you hit an internal temperature of 165°F. An instant-read thermometer gives you the most accurate reading.
Let your chicken rest for 3-5 minutes after cooking. In fact, this rest helps the juices spread through the meat, so every bite stays moist and flavorful.
Creating and Applying the Honey Garlic Glaze
The magic of honey garlic chicken tenders comes from that sticky, sweet-savory glaze. This coating turns simple chicken into an amazing meal. Your air-fried chicken will taste like restaurant quality with this final touch.
Balancing Sweet and Savory Flavors
A perfect honey garlic glaze needs the right balance of sweet and savory elements. These core ingredients create a flavor profile that works together:
- Honey (¼ to ½ cup): Gives natural sweetness and creates that sticky texture
- Soy sauce (¼ cup): Adds depth and balances sweetness
- Garlic (5-6 cloves, minced): Brings aromatic flavor
- Apple cider vinegar or rice vinegar (1-2 tablespoons): Balances sweetness
- Optional brown sugar (1-2 tablespoons): Helps caramelization
The sort of thing I love about this combination is how sugar works with both salty and sour flavors. The honey makes soy sauce less salty, and soy sauce keeps the honey from being too sweet.
Red pepper flakes (⅛ teaspoon) add an extra kick if you like heat. The right contrast between sweet and savory makes each ingredient shine naturally.
Proper Glazing Techniques for Even Coating
The right timing matters when you glaze air fryer chicken. Make your sauce while the chicken cooks:
- Melt 2 tablespoons butter in a small saucepan
- Sauté minced garlic until fragrant (about 30-60 seconds)
- Add honey, soy sauce, and vinegar, then bring to a gentle simmer
- Mix 1 teaspoon cornstarch with 1 tablespoon water for a thicker glaze
- Let it simmer 3-5 minutes until slightly thick but still pourable
Your chicken should reach 165°F internal temperature. You can then glaze it two ways. Use a pastry brush for precise coating, or toss the tenders in a bowl with sauce until evenly coated.
The glaze might thicken as it stands. Just add a teaspoon of water and reheat it quickly. If it’s too thin, let it simmer longer or add more cornstarch mixture.
A good glaze should stick to your chicken. This creates that irresistible coating that makes everyone love honey garlic chicken tenders.
Conclusion
You can make restaurant-quality honey garlic chicken tenders easily at home with an air fryer. Quality ingredients, proper prep techniques, and precise cooking methods help you create this delicious dish. The recipe perfectly balances health and flavor.
The magic happens in the details. Choose quality chicken cuts and master the three-step breading process at the right temperature. Our signature honey garlic glaze turns simple tenders into an unforgettable meal that strikes the perfect balance of sweet and savory flavors.
Your patience during cooking will reward you with crispy, juicy results every time. These tenders work great as quick weeknight dinners or party appetizers. The recipe delivers professional results and keeps the calorie count low. Try these techniques today and watch these honey garlic tenders become your family’s favorite dish.

FAQs
Q1. How can I make crispy honey garlic chicken in an air fryer?
Place seasoned chicken pieces in the air fryer basket, spray with cooking oil, and cook at 375°F for 7-10 minutes, flipping halfway. For the sauce, sauté minced garlic in a pan, then add honey, soy sauce, and vinegar. Brush or toss the cooked chicken with this glaze for a perfect finish.
Q2. What’s the secret to making delicious honey garlic chicken tenders?
The key is in the breading and sauce. Coat chicken tenders in seasoned flour, egg wash, and panko breadcrumbs. Air fry until golden and crispy. For the sauce, combine honey, minced garlic, soy sauce, and a splash of vinegar. Toss the cooked tenders in this sweet and savory glaze for irresistible flavor.
Q3. How long should I cook chicken tenders in an air fryer?
Cooking time depends on the size of your chicken pieces. For small tenders (5-7 ounces), cook for 7-10 minutes. Medium pieces (8-10 ounces) need 10-12 minutes, while larger cuts (11+ ounces) require 12-16 minutes. Always ensure the internal temperature reaches 165°F for safe consumption.
Q4. What ingredients do I need for honey garlic chicken?
Essential ingredients include chicken (breasts or tenders), honey, minced garlic, soy sauce, and vinegar (apple cider or rice). For breading, you’ll need flour, eggs, and panko breadcrumbs. Seasonings like salt, pepper, and optional spices like paprika can enhance the flavor.
Q5. How do I ensure my air fryer chicken stays juicy?
To keep your chicken juicy, consider brining it in saltwater for 15 minutes to 2 hours before cooking. Avoid overcrowding the air fryer basket, and flip the chicken halfway through cooking. Let the chicken rest for 3-5 minutes after cooking to allow juices to redistribute throughout the meat.


