Strawberry Earthquake Cake is one of those desserts that sounds fancy but is actually super easy to whip up, even in my tiny kitchen. Seriously, I remember the first time I attempted this recipe. I was scrolling through Pinterest, as one does, and stumbled upon this cake that looked like a strawberry explosion. It had that “wow” factor, and honestly, I was just looking for something to impress my friends at a casual get-together without breaking the bank. Plus, who doesn’t want a cake that can double as a conversation starter?
Now, here’s the thing: I’m not a professional baker. I learned to cook because, well, I had to. When you’re living on a budget, you get creative, and I love finding recipes that taste gourmet but are simple enough for regular folks like us. So, when I found this Strawberry Earthquake Cake recipe, it felt like the perfect fit. It’s sweet, it’s indulgent, and it has that fun, quirky name that makes you want to dive right in.
This recipe is for anyone who craves something special without spending hours in the kitchen. It’s perfect for busy weekdays, casual gatherings, or even when you just want to treat yourself (because, let’s be real, we all deserve a little indulgence sometimes). So grab your apron, and let’s get to baking!
Why You’ll Love This Recipe
- Quick and Easy: Seriously, you won’t be spending all day making this cake. It comes together in no time.
- Flavor Explosion: The combination of strawberries, white chocolate, and coconut is just divine. You’re going to love it!
- Budget-Friendly: Most of the ingredients are pantry staples or easy to find without breaking the bank.
- Impressive Look: This cake looks like a million bucks, but you don’t need to be a baking wizard to pull it off.
- Customizable: Don’t want to use nuts? No problem. Allergic to coconut? Just leave it out!
When I first made this cake, I was a bit nervous about the whole swirling technique. Would it look as pretty as it did in the pictures? Spoiler alert: it did! But honestly, don’t stress about it too much. The beauty of home cooking is that it doesn’t have to be perfect. Just focus on enjoying the process!
Ingredients You’ll Need
- 1 box strawberry cake mix: This is your base. It keeps things easy and flavorful.
- Ingredients listed on the box: Usually eggs, oil, and water—check the back for specifics.
- 1½ cups fresh or frozen strawberries (chopped): Fresh is great if you can get them, but frozen works just as well.
- 1 cup white chocolate chips or chunks: For that creamy sweetness. You can also sub in dark chocolate if you prefer.
- 1 cup sweetened shredded coconut: Adds a lovely texture and tropical flavor.
- ½ cup chopped pecans or walnuts (optional): For a little crunch. Totally up to you!
- 8 oz cream cheese (softened): This makes the swirl creamy and dreamy.
- ½ cup unsalted butter (softened): Helps with that luscious cream cheese mixture.
- 2½ cups powdered sugar: Sweetens the cream cheese mixture and gives it that velvety texture.
- 1 tsp vanilla extract: Because everything’s better with vanilla, right?
Look, I get it. Sometimes ingredients can be pricey or hard to find. If you can’t find white chocolate chips, feel free to swap them for whatever chocolate you have on hand. And if you’re not a fan of coconut, just leave it out. The world won’t end, and your cake will still taste amazing.
Let’s Get Started
Step 1: Preheat and Prepare
First things first, preheat your oven to 350°F (175°C). While that’s warming up, grab your box of strawberry cake mix and follow the instructions on the box. Usually, this means mixing together the cake mix with the eggs, oil, and water. It’s super straightforward, and the smell of the batter will instantly make your kitchen feel like a bakery.
Step 2: Mix in the Good Stuff
Once your batter is ready, gently fold in those chopped strawberries, white chocolate chips, shredded coconut, and nuts if you’re using them. Just be careful not to overmix; you want those strawberries to stay intact. This is where the magic starts to happen—the colors and textures all coming together are just beautiful!
Step 3: Layer the Batter
Now, pour half of that delicious batter into a greased 9×13-inch pan. I usually use cooking spray or a bit of butter to grease it up. You want to make sure it doesn’t stick!
Step 4: Make the Cream Cheese Mixture
In a separate bowl, beat the softened cream cheese and butter together until smooth. This is where the arm workout comes in! Once it’s creamy, add the powdered sugar and vanilla extract. Keep beating until it’s all combined and creamy. The mixture should be smooth and a bit fluffy—don’t skip this part!
Step 5: dollop the Cream Cheese Mixture
Drop spoonfuls of the cream cheese mixture over the batter in the pan. It doesn’t have to be perfect; you’re going for that “earthquake” look here. It’s going to bake into the cake and create those lovely swirls.
Step 6: Add the Remaining Batter
Pour the remaining cake batter on top of the cream cheese mixture. Then, grab a knife and gently swirl it all together. This is the fun part! Just a few swirls will do—don’t overdo it or you’ll lose the pretty marbled effect.
Step 7: Bake it Up
Pop that bad boy into the oven and bake for 40–45 minutes. You’ll know it’s done when a toothpick inserted into the center comes out clean. The smell will fill your kitchen, and trust me, it’s worth the wait!
Step 8: Cool and Serve
Once it’s done baking, let the cake cool completely before slicing and serving. I know, it’s hard to wait, but it’s important! It’ll be easier to cut and taste even better when it’s cooled down.
Swirl of Flavors
Now that your cake is baked and cooled, you might be wondering how to jazz it up before serving. Here’s a little secret—sprinkle some extra coconut or chocolate chips on top for garnish. If you’re feeling adventurous, a light dusting of powdered sugar can add a lovely touch. Just remember, it’s all about what you like!
Tips for the Best Strawberry Earthquake Cake
- Don’t Stress the Swirls: If you’re nervous about swirling, just go for it. Even if it doesn’t turn out perfect, it will still taste great!
- Room Temperature Ingredients: Make sure your cream cheese and butter are softened for easier mixing.
- Storage: If you have leftovers (which might be a stretch), store them in an airtight container in the fridge. It lasts about 3-4 days, but I doubt it’ll stick around that long!
- Experiment with Flavors: Try adding different fruits or chocolates. Blueberries, raspberries, or even a hint of almond extract could add a fun twist.
Storage Tips
Okay, let’s talk storage. I live in a small apartment, so I’m always looking for ways to save space. Once your cake is cool, store it in an airtight container in the fridge. It should last about 3-4 days, but honestly, it rarely lasts that long in my house.
If you’re living alone or with roommates, consider cutting it into slices and wrapping each piece individually. That way, you can just grab a slice when you’re craving something sweet without having to deal with the whole cake.
Frequently Asked Questions About Strawberry Earthquake Cake
Can I use other fruits?
Absolutely! This recipe is quite forgiving. You could swap out strawberries for blueberries, raspberries, or even peaches. Just remember to adjust the amount based on the fruit’s moisture content.
What if I don’t have white chocolate chips?
No worries! You can use dark chocolate chips or even butterscotch chips. Get creative with what you have on hand!
Can I make this in advance?
Definitely. This cake actually tastes better the next day as the flavors meld together. Just store it properly in the fridge, and you’re good to go!
Is this a good cake for parties?
Yes! It’s visually appealing and serves a crowd. Plus, it’s super easy to cut into squares for serving.
What can I do if the cake is too dense?
If your cake turns out dense, it might be due to overmixing the batter. Next time, mix just until combined. Also, make sure your baking powder is fresh, as old leavening agents can cause density issues.
Final Thoughts
So there you have it! Strawberry Earthquake Cake is officially on your baking radar, and I can’t wait for you to try it. Remember, cooking is all about having fun and experimenting. Don’t worry if it doesn’t turn out perfect the first time; you’ll learn something each time you bake.
I’m already thinking about making this cake again for my next get-together. Maybe I’ll switch out the strawberries for blueberries or throw in some lemon zest for a refreshing twist. Whatever you decide, just know that you’re doing great in your kitchen. Happy baking!

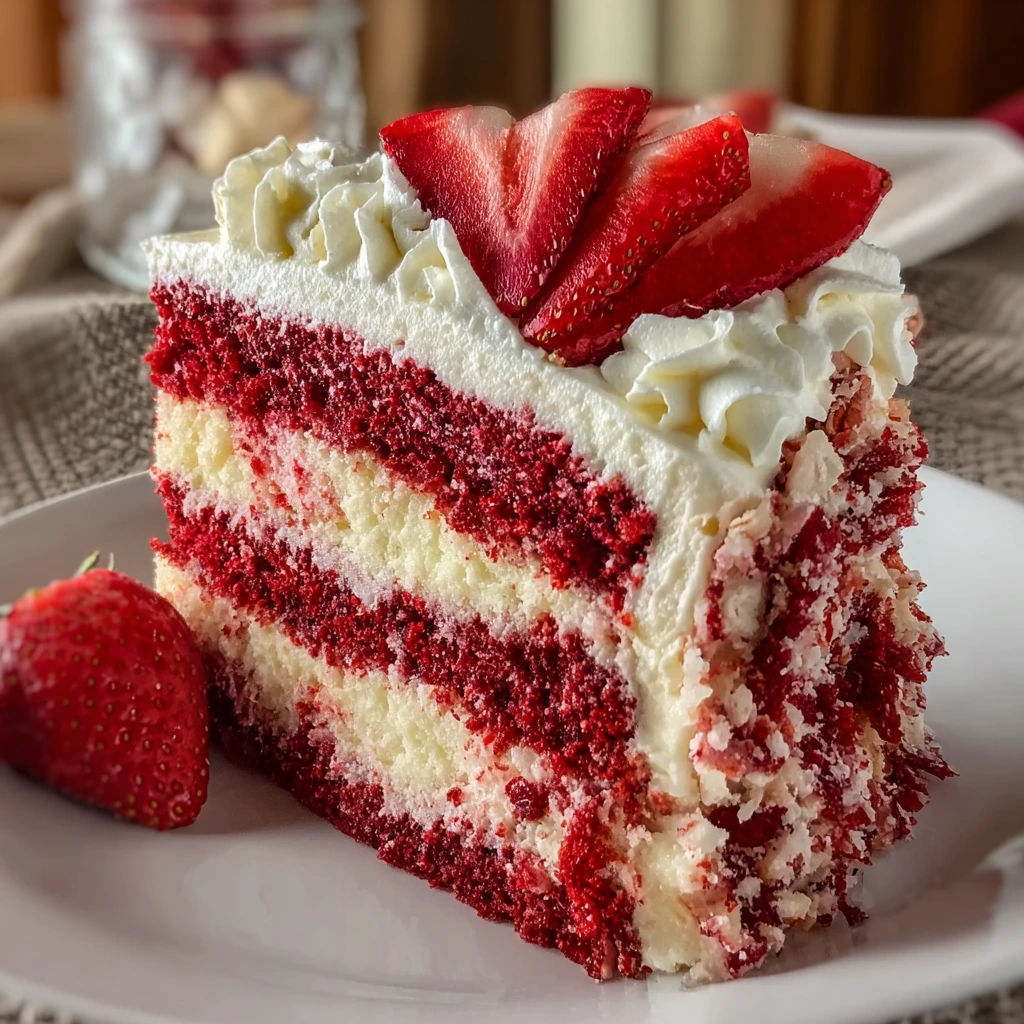
Strawberry Earthquake Delight
Ingredients
- 1 box strawberry cake mix
- Ingredients listed on the box (usually eggs, oil, water)
- 1½ cups fresh or frozen strawberries (chopped)
- 1 cup white chocolate chips or chunks
- 1 cup sweetened shredded coconut
- ½ cup chopped pecans or walnuts (optional)
- 8 oz cream cheese (softened)
- ½ cup unsalted butter (softened)
- 2½ cups powdered sugar
- 1 tsp vanilla extract
Instructions
- Preheat your oven to 350°F (175°C). Prepare the cake mix according to the instructions on the box.
- Gently fold in the chopped strawberries, white chocolate chips, shredded coconut, and nuts if you're using them.
- Pour half of the prepared batter into a greased 9x13-inch pan.
- In a separate bowl, beat the softened cream cheese and butter together until smooth. Then add the powdered sugar and vanilla extract; continue to beat until the mixture is creamy.
- Drop spoonfuls of the cream cheese mixture over the batter in the pan.
- Pour the remaining cake batter on top and use a knife to swirl it gently.
- Bake in the preheated oven for 40–45 minutes, or until a toothpick inserted into the center comes out clean.
- Allow the cake to cool completely before slicing and serving.