

Chicken Fried Chicken is a beloved Southern comfort food that embodies the essence of hearty, home-cooked meals. This dish, with its golden, crispy coating and tender, juicy chicken inside, is a staple in Southern kitchens and has become a symbol of warmth and hospitality. It’s more than just a meal; it’s a culinary tradition passed down through generations, often evoking memories of family gatherings and Sunday dinners.
Historically, Chicken Fried Chicken has its roots in Southern cuisine, where frying food was a practical and tasty method of cooking that could be done over an open flame. The dish evolved from its close relative, chicken fried steak, which was influenced by European immigrants, particularly Germans and Austrians, who brought their schnitzel-making techniques to America. Over time, this method of frying meat was adapted to use chicken, a readily available ingredient in the South, leading to the creation of Chicken Fried Chicken.
Ingredients Breakdown
Chicken: Using thin-sliced chicken breasts is crucial for achieving the ideal texture in Chicken Fried Chicken. Thinner cuts cook more evenly and quickly, ensuring the chicken remains juicy while the exterior becomes crispy. Thicker pieces might result in undercooked centers or overcooked exteriors, so starting with thin slices guarantees that perfect balance.
Flour: Flour is the foundation of the crispy coating that defines Chicken Fried Chicken. When combined with seasonings and fried, it forms a golden crust that locks in moisture while providing a satisfying crunch. The flour adheres to the chicken, creating a layer that crisps up beautifully when fried, thanks to its natural starches.
Baking Powder & Baking Soda: These leavening agents play a pivotal role in making the coating light and crispy. Baking powder and baking soda react with the acidic components in the recipe (like buttermilk), creating tiny bubbles in the batter. This reaction results in a lighter, fluffier crust with an appealing texture.
Spices (Salt, Pepper, Garlic Powder): The combination of salt, pepper, and garlic powder in the flour mixture balances and enhances the flavor of the chicken. Salt amplifies the other flavors, pepper adds a mild heat, and garlic powder contributes a subtle, savory depth. Together, they ensure each bite is flavorful and well-seasoned.
Buttermilk: Buttermilk is a key ingredient that not only tenderizes the chicken but also adds a tangy flavor. Its acidity helps break down the proteins in the chicken, making it more tender. Additionally, the buttermilk mixture clings to the flour, ensuring a better adherence of the coating during frying.
Egg & Hot Sauce: The egg acts as a binding agent in the buttermilk mixture, helping the flour coating adhere more effectively to the chicken. The hot sauce, while subtle, adds a hint of spice that enhances the overall flavor without overpowering the dish. It also contributes to the color and richness of the coating.
Oil: The choice of oil is critical for achieving the perfect fry. Neutral oils with high smoke points, such as vegetable oil or canola oil, are ideal for frying chicken. These oils can reach the necessary temperature for frying without imparting any unwanted flavors to the chicken, ensuring a clean, crisp finish.
Gravy Ingredients: The reserved oil from frying the chicken forms the base of the gravy, carrying with it the rich flavors from the frying process. Flour is used to create a roux, which thickens the gravy, while milk adds creaminess. Salt and pepper are essential for seasoning, allowing you to adjust the flavor to your preference. This gravy, poured over the crispy chicken, adds a comforting, rich finish to the dish, making it truly indulgent.
Preparation Steps
Step 1: Preparing the Oil
Start by selecting a deep fryer or a large, heavy-bottomed pan that can hold several inches of oil. Pour in enough oil to submerge the chicken pieces but leave enough room to prevent overflow when the chicken is added. Heat the oil over medium-high heat until it reaches 325°F. Use a kitchen thermometer to monitor the temperature accurately. Maintaining this temperature is crucial; if the oil is too hot, the chicken will burn on the outside before cooking through, and if it’s too cool, the chicken will absorb too much oil, becoming greasy and soggy.
Step 2: Preparing the Flour Mixture
In a large mixing bowl, combine 2 cups of flour, 2 teaspoons of baking powder, 1 teaspoon of baking soda, 1 teaspoon of salt, 1 teaspoon of pepper, and 1 teaspoon of garlic powder. Mix these ingredients thoroughly to ensure even distribution of the leavening agents and seasonings. This step is essential because it guarantees that every piece of chicken will have a uniform, flavorful coating. Sifting the flour and dry ingredients together can help prevent clumps and ensure that the baking powder and baking soda are evenly mixed, contributing to a crisp and light crust.
Step 3: Preparing the Buttermilk Mixture
In a separate bowl, whisk together 1 ½ cups of buttermilk, 1 egg, and 1 tablespoon of hot sauce. Whisk until the egg is fully incorporated and the mixture is smooth. The buttermilk helps tenderize the chicken, while the egg binds the flour to the chicken. The hot sauce adds a subtle kick, enhancing the flavor without making the dish overly spicy. If you don’t have buttermilk on hand, you can make a substitute by mixing regular milk with a tablespoon of lemon juice or vinegar and letting it sit for a few minutes until it curdles slightly.
Step 4: Dredging the Chicken
To begin the dredging process, take a thin-sliced chicken breast and coat it thoroughly in the flour mixture. Make sure to press the flour into the chicken, so it adheres well. Next, dip the floured chicken into the buttermilk mixture, ensuring it’s fully coated. Let any excess liquid drip off before placing the chicken back into the flour mixture for a second coating. This double dredging technique is key to achieving a thick, crispy crust. Again, press the flour mixture into the chicken firmly, covering every inch. Repeat this process for each piece of chicken. The second layer of flour will adhere better because of the egg and buttermilk, resulting in a crunchier texture once fried.
Step 5: Frying the Chicken
Carefully place the dredged chicken pieces into the hot oil, making sure not to overcrowd the pan or fryer. Overcrowding can lower the oil temperature and lead to uneven cooking. Fry the chicken for about 3-5 minutes on each side, depending on the thickness of the pieces. The chicken should turn a deep golden brown when ready. Use tongs to flip the chicken halfway through cooking, ensuring even browning on both sides. Once cooked, remove the chicken from the oil and place it on a paper towel-lined plate to drain any excess oil. This step helps keep the chicken crisp by removing surface oil. If you’re cooking in batches, allow the oil to return to 325°F before adding the next batch of chicken to ensure consistent frying. Serve the chicken hot, with your prepared gravy on the side or drizzled on top, for a perfect Southern meal.
Tips for Perfect Chicken Fried Chicken
Maintaining Oil Temperature
Keeping the oil at the correct temperature—around 325°F—is crucial for achieving the perfect Chicken Fried Chicken. If the oil is too hot, the exterior will burn before the chicken is fully cooked inside. Conversely, if the oil is too cool, the coating will absorb too much oil, resulting in a greasy, soggy crust. Use a kitchen thermometer to monitor the temperature throughout cooking and adjust the heat as needed to maintain consistency, ensuring a crisp and evenly cooked chicken.
Using a Meat Thermometer
To guarantee that your chicken is safe to eat and perfectly cooked, use a meat thermometer to check the internal temperature of each piece. Insert the thermometer into the thickest part of the chicken breast without touching bone. The chicken should reach an internal temperature of 165°F. This ensures the meat is cooked through, juicy, and tender, while the exterior remains golden and crispy. Proper temperature control is key to avoiding undercooked or dry, overcooked chicken.
Alternative Seasonings
While the classic combination of salt, pepper, and garlic powder is traditional, you can experiment with other seasonings to add variety to your Chicken Fried Chicken. Consider adding paprika for smokiness, cayenne pepper for heat, or dried herbs like thyme and oregano for an earthy flavor. Customizing the spice blend allows for unique and personalized results.
Serving Suggestions
Chicken Fried Chicken pairs beautifully with traditional Southern sides. Serve it alongside creamy mashed potatoes, tangy coleslaw, or buttery biscuits for a complete comfort food meal. Other great options include cornbread, green beans, or a fresh garden salad. These sides complement the rich, savory flavors of the chicken and gravy perfectly.
Gravy Preparation and Final Touches
Step 1: Reserving Oil
After frying your chicken, carefully reserve about ¼ cup of the oil used in cooking. This oil is infused with the flavors from the chicken and seasoning, making it an essential base for a rich and flavorful gravy. To do this, allow the oil to cool slightly before straining it through a fine mesh sieve or cheesecloth to remove any burnt bits or debris. Discarding this oil would mean losing the depth of flavor that contributes to an authentic Southern gravy. Once strained, set the oil aside in a heatproof container until you’re ready to prepare the gravy.
Step 2: Making the Roux
A roux is the foundation of any good gravy, and it’s made by cooking fat (in this case, your reserved oil) with flour. Begin by heating the reserved oil in a large pan over medium heat. Once the oil is hot, slowly sprinkle in ⅓ cup of flour while stirring constantly. This process should take a minute or so, and the mixture will start to bubble and thicken as the flour cooks. Continue stirring for about 1-2 minutes until the roux reaches a light golden color, which indicates that the flour is properly cooked and won’t taste raw. The roux serves as a thickening agent for your gravy, giving it a smooth, rich consistency. Cooking it to the right color also ensures the gravy has a deep, nutty flavor that complements the chicken.
Step 3: Adding Milk and Seasoning
Once your roux is ready, it’s time to add the milk, which transforms the roux into a creamy gravy. Slowly pour in 2 cups of milk, whisking continuously to incorporate it smoothly into the roux. Adding the milk gradually helps prevent lumps from forming, resulting in a smooth, velvety texture. As the gravy begins to thicken, continue whisking until it reaches your desired consistency. If the gravy seems too thick, you can thin it by adding more milk a little at a time. After achieving the perfect consistency, season the gravy with salt and pepper to taste. Start with a small amount, tasting as you go, and adjust until the seasoning is just right. The salt enhances the flavors, while the pepper adds a subtle kick that ties the dish together.
Step 4: Final Gravy Adjustments
To ensure your gravy is just the way you like it, make any final adjustments at this stage. If the gravy is too thick, add a splash of milk, stirring it in gradually until it reaches the desired consistency. Conversely, if the gravy is too thin, let it simmer for a few more minutes to reduce and thicken. For an extra layer of flavor, consider adding a pinch of herbs like thyme or rosemary, or a dash of hot sauce for a bit of heat. These additions can elevate the gravy, making it even more delicious and customized to your taste.
Serving and Presentation
Plating the Chicken and Gravy
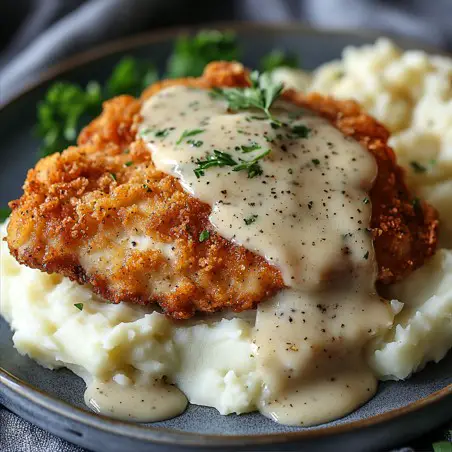
When plating Chicken Fried Chicken, place the fried chicken breasts on individual plates or a serving platter if serving family-style. To ensure an even distribution of gravy, use a ladle to pour the warm gravy over the center of each piece of chicken, allowing it to gently cascade down the sides. This technique keeps the crispy edges exposed, maintaining the contrast between the crunchy coating and the smooth gravy. For a more elegant presentation, consider serving the gravy in a small sauceboat on the side, allowing guests to add it themselves to their preferred amount.
Garnishing Suggestions
To add a pop of color and enhance the dish’s visual appeal, sprinkle freshly chopped parsley over the gravy and chicken. For a touch of heat and color contrast, a dash of paprika can be dusted over the top. These simple garnishes not only beautify the plate but also subtly enhance the flavors.
FAQs
Why is buttermilk used in Chicken Fried Chicken?
Buttermilk is used in Chicken Fried Chicken because of its acidity, which tenderizes the chicken by breaking down proteins. This results in a more tender and juicy texture. Additionally, buttermilk adds a subtle tangy flavor that complements the savory spices in the coating. Its thick consistency also helps the flour mixture adhere better to the chicken, creating a crispier crust.
Can I use a different cut of chicken?
Yes, you can use different cuts of chicken, such as thighs, drumsticks, or wings. However, keep in mind that cooking times will vary based on the thickness and bone content of the cuts. Thighs and drumsticks, for example, may require slightly longer frying times than thin-sliced breasts. Ensure the chicken reaches an internal temperature of 165°F for safe consumption.
What can I substitute for hot sauce?
If you prefer a milder flavor or don’t have hot sauce on hand, you can substitute it with a small amount of Dijon mustard or apple cider vinegar for tanginess. Alternatively, for a non-spicy option, omit the hot sauce altogether or use a mild sauce like Worcestershire sauce for added depth without the heat.
How do I know when the chicken is fully cooked?
The chicken is fully cooked when it reaches an internal temperature of 165°F. Use a meat thermometer inserted into the thickest part of the chicken to check. Additionally, the chicken should be golden brown on the outside, with juices running clear when pierced. Avoid cutting into the chicken too early, as this can release the juices and result in a drier texture.
Can I make Chicken Fried Chicken in an air fryer?
Yes, Chicken Fried Chicken can be made in an air fryer for a healthier version with less oil. Preheat the air fryer to 375°F, place the dredged chicken in a single layer, and cook for 15-20 minutes, flipping halfway through. Spray the chicken lightly with oil before cooking to achieve a crispy exterior.
What other gravies can I serve with this dish?
While the traditional white gravy is a favorite, you can experiment with other gravies like brown gravy, mushroom gravy, or even a spicy sausage gravy. Each offers a unique flavor profile that can complement the crispy chicken in different ways.
How can I make the dish less spicy?
To make the dish less spicy, reduce or omit the hot sauce in the buttermilk mixture. You can also adjust the amount of pepper in the seasoning blend. If you still want flavor without the heat, consider adding mild spices like paprika or a pinch of smoked paprika for depth without the spiciness.
Print
Chicken Fried Chicken
Description
This Chicken Fried Chicken recipe offers a classic Southern dish that features tender, juicy chicken breasts with a perfectly seasoned, crispy coating. Paired with a rich, creamy gravy, this dish is the epitome of comfort food, bringing the warmth and flavors of the South to your table.
Ingredients
- 6–8 thin sliced chicken breasts
- 2 cups flour
- 2 tsp baking powder
- 1 tsp baking soda
- 1 tsp salt
- 1 tsp pepper
- 1 tsp garlic powder
- 1 1/2 cup buttermilk
- 1 egg
- 1 Tbs hot sauce
- Oil for frying
Gravy:
- 1/4 cup reserved oil from frying
- 1/3 cup flour
- 2 cup milk
- Salt & pepper
Instructions
-
Heat oil in deep fryer or large pan on stove (a few inches deep) to 325.
-
In large bowl whisk together your flour, baking powder, baking soda, salt, pepper and garlic powder.
-
In another bowl whisk together buttermilk, egg and hot sauce.
-
Dredge your chicken in the flour mixture then dip into the egg mixture than back into the flour mixture making sure to press down flour to get stuck on the steak real good.
-
Place chicken in pan/deep fryer and fry on each side 3-5 minutes until golden brown, remove and drain on paper towel lined plate, repeat with all chicken.
-
To make your gravy, in large pan add 1/4″ of oil from cooking and heat on medium-high, stir in your flour until absorbed and cook for about 1 minute.
-
Slowly add in your milk whisking to blend and heat until thickened then stir in salt and pepper to desired taste.
-
Pour gravy over individual chicken before serving.
Notes
For best results, use thin-sliced chicken breasts to ensure even cooking. Maintain the oil temperature at 325°F during frying for a crispy, golden-brown crust. If you prefer a milder flavor, feel free to adjust the seasonings and hot sauce to suit your taste. This recipe can be easily adapted for an air fryer to reduce oil content without sacrificing flavor.


