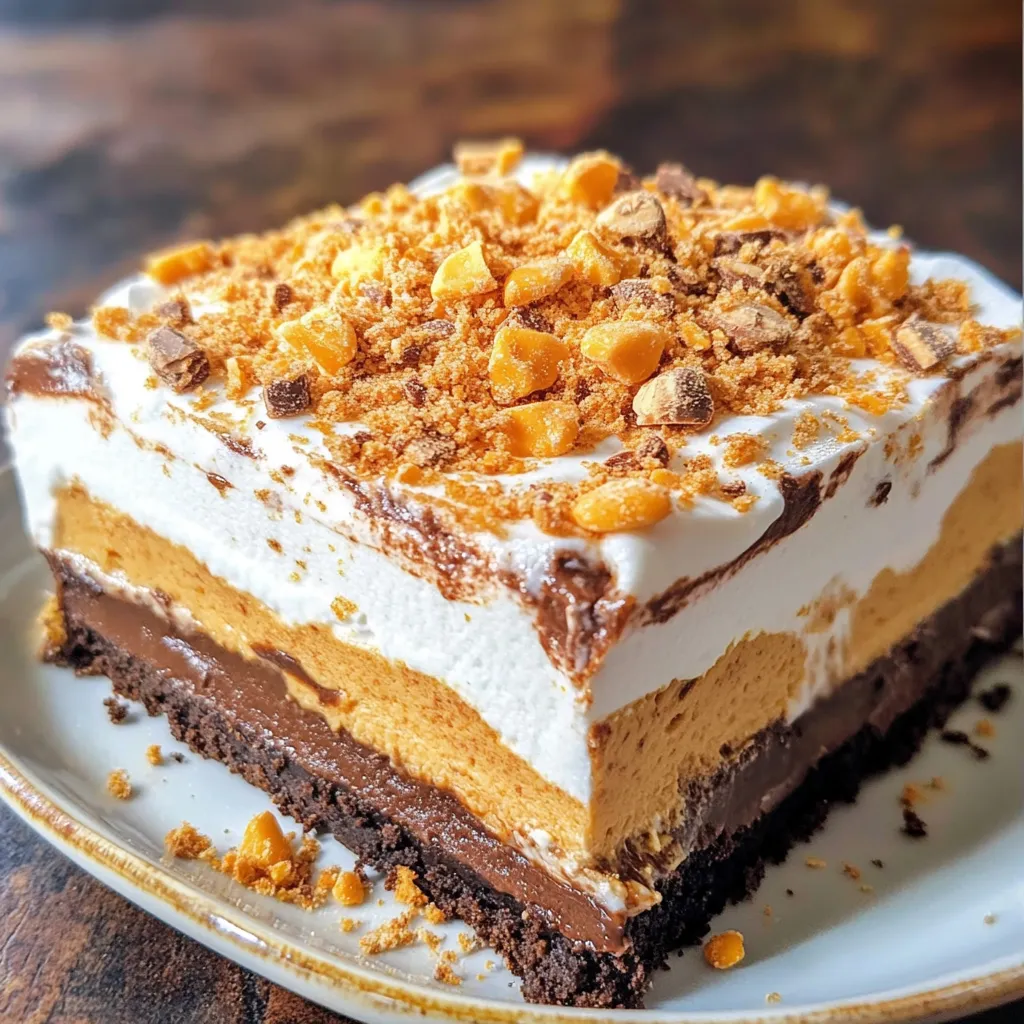
When you’re craving a decadent, no-bake dessert that’s guaranteed to impress, this Easy Butterfinger Lush Dessert Recipe is the answer. With layers of creamy filling, rich chocolate pudding, and crunchy Butterfinger candy, this dessert delivers the perfect combination of textures and flavors in every bite.
Lush desserts are always a hit because they’re simple to make, don’t require any baking, and are ideal for feeding a crowd. Whether it’s for a potluck, holiday gathering, or just a sweet treat for your family, this Butterfinger version is sure to become a favorite.
WHY YOU’LL LOVE THIS BUTTERFINGER LUSH
Here’s why this dessert belongs in your regular recipe rotation:
- No baking required
- Perfect balance of creamy, crunchy, and chocolatey goodness
- Easy to prepare ahead of time
- Great for holidays, parties, or casual get-togethers
- Uses simple, pantry-friendly ingredients
INGREDIENTS YOU’LL NEED
Here’s everything you’ll need to make this irresistible dessert:
Crust Layer:
- 1 ½ cups graham cracker crumbs
- ½ cup unsalted butter, melted
Cream Cheese Layer:
- 8 oz cream cheese, softened
- 1 cup powdered sugar
- 1 container (8 oz) whipped topping (Cool Whip), thawed
Pudding Layer:
- 2 boxes (3.4 oz each) instant chocolate pudding mix
- 3 cups cold milk
Topping:
- 1 container (8 oz) whipped topping (Cool Whip), thawed
- 1 ½ cups crushed Butterfinger candy bars
HELPFUL TIPS BEFORE YOU START
- Use softened cream cheese for a smooth, lump-free filling.
- Crush Butterfingers ahead of time using a rolling pin or food processor.
- Make sure the whipped topping is fully thawed before using.
- Allow plenty of chill time for clean, easy slicing.
- Use a 9×13-inch baking dish for perfect layering.
LET’S GET STARTED: THE FIRST STEPS
STEP 1: MAKE THE CRUST
In a bowl, combine the graham cracker crumbs and melted butter. Mix until fully combined and press firmly into the bottom of a 9×13-inch baking dish. Place the dish in the refrigerator to chill while you prepare the next layer.

STEP 2: PREPARE CREAM CHEESE LAYER
In a mixing bowl, beat the softened cream cheese and powdered sugar together until smooth. Gently fold in the whipped topping until fully combined. Spread the mixture evenly over the chilled crust.

STEP 3: PREPARE PUDDING LAYER
In a separate bowl, whisk together the chocolate pudding mix and cold milk until thickened, which takes about 2 minutes. Spread this pudding mixture evenly over the cream cheese layer.

FINISHING AND LAYERING YOUR BUTTERFINGER LUSH DESSERT
Once your pudding layer is in place, it’s time to finish off this luscious dessert with the remaining layers that give it that perfect creamy, crunchy bite. The best part of a lush dessert is how all the layers come together after chilling, creating a showstopping treat that looks as good as it tastes.
THE SECRET TO PERFECT LUSH LAYERS
The key is patience—making sure each layer is spread evenly and giving the dessert enough chill time. This allows the layers to firm up and makes slicing and serving so much easier.
LET’S CONTINUE: ADDING THE FINAL LAYERS AND CHILLING
STEP 4: ADD FINAL WHIPPED TOPPING
Gently spread the remaining container of whipped topping over the pudding layer. Use a spatula to smooth the surface evenly across the entire dessert.
STEP 5: ADD BUTTERFINGER TOPPING
Evenly sprinkle the crushed Butterfinger candy bars over the whipped topping layer. Make sure to cover the entire surface so you get that signature crunch in every bite.
STEP 6: CHILL
Place the completed dessert in the refrigerator for at least 4 hours, or overnight if possible. This chilling time allows the layers to set properly and the flavors to meld together.
STEP 7: SERVE
Once fully chilled, slice into squares and serve cold. The combination of creamy filling, rich chocolate, and crunchy Butterfinger pieces makes each bite absolutely irresistible.
EXPERT TIPS FOR THE BEST BUTTERFINGER LUSH DESSERT
- Use instant pudding only: Cook-and-serve pudding won’t set up the same way in a layered dessert.
- Fully thaw whipped topping: This helps it blend smoothly into the cream cheese and spread easily on top.
- Crush Butterfingers evenly: Use a rolling pin or food processor for consistent-sized pieces.
- Chill long enough: Don’t rush the chill time; it’s essential for clean, firm layers.
- Use a sharp knife for slicing: Wipe the knife between cuts for cleaner presentation.
SERVING SUGGESTIONS
This Butterfinger Lush Dessert is perfect for many occasions:
- Potlucks and family gatherings
- Holiday dessert tables
- Birthday parties
- Weekend treats
- Summer barbecues
It’s a guaranteed hit wherever you serve it.

FREQUENTLY ASKED QUESTIONS ABOUT EASY BUTTERFINGER LUSH DESSERT
Let’s cover some common questions to help you make this dessert perfectly every time.
1. CAN I USE HOMEMADE WHIPPED CREAM INSTEAD OF COOL WHIP?
Yes. You can substitute homemade stabilized whipped cream if you prefer. Just make sure it’s whipped to firm peaks so it holds its shape in the layers.
2. CAN I MAKE THIS DESSERT AHEAD OF TIME?
Absolutely. This dessert is perfect for making a day ahead. In fact, the flavors and layers set even better after overnight refrigeration.
3. HOW SHOULD I STORE LEFTOVERS?
Store any leftovers covered in the refrigerator for up to 4 days. Keep in mind that the graham cracker crust may soften slightly the longer it sits.
4. CAN I FREEZE BUTTERFINGER LUSH DESSERT?
Freezing is not recommended, as the texture of the whipped topping and pudding layers may change when thawed.
5. CAN I USE OTHER CANDY BARS INSTEAD OF BUTTERFINGER?
Yes! While Butterfinger adds a unique crunch and peanut butter flavor, you can experiment with Snickers, Reese’s, or Heath bars for a different twist.
6. WHAT SIZE DISH SHOULD I USE?
A standard 9×13-inch baking dish works best for this recipe. It allows the layers to spread evenly and gives you clean slices.
7. DO I HAVE TO USE GRAHAM CRACKER CRUMBS FOR THE CRUST?
No. You can substitute crushed Oreos, vanilla wafers, or even shortbread cookies for the crust if you want a different base flavor.
CONCLUSION: A NO-BAKE DESSERT THAT EVERYONE WILL LOVE
This Easy Butterfinger Lush Dessert Recipe You’ll Love is the perfect combination of creamy, chocolatey, and crunchy layers that come together effortlessly. With simple ingredients, no baking, and rich flavor in ev
ery bite, it’s a dessert you’ll want to make again and again.
Whether you’re serving it for a party, holiday, or just because, this Butterfinger lush is guaranteed to be a crowd favorite. Plus, with make-ahead convenience, it’s as practical as it is delicious.
Print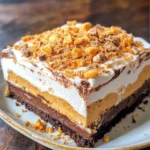
EASY BUTTERFINGER LUSH DESSERT RECIPE YOU’LL LOVE
- Total Time: 4 hrs 20 min
Description
This Easy Butterfinger Lush Dessert is a no-bake layered treat packed with creamy pudding, rich cream cheese, crushed Butterfingers, and a buttery cookie crust. Perfect for potlucks, holidays, or whenever you need an easy crowd-pleasing dessert!
Ingredients
For the crust:
-
1 package (14 oz) Golden Oreos, crushed
-
½ cup (1 stick) unsalted butter, melted
For the layers:
-
1 (8 oz) package cream cheese, softened
-
1 cup powdered sugar
-
1 (8 oz) container whipped topping (Cool Whip), thawed (divided use)
-
2 (3.4 oz each) boxes instant vanilla pudding mix
-
2 ½ cups cold milk
-
1 ½ cups crushed Butterfinger candy bars (about 5 full-size bars)
For garnish (optional):
-
Extra crushed Butterfingers
-
Chocolate or caramel drizzle
Instructions
1️⃣ Prepare the crust:
In a medium bowl, combine crushed Golden Oreos and melted butter. Mix well and press firmly into the bottom of a 9×13-inch baking dish. Refrigerate while preparing the next layer.
2️⃣ Make the cream cheese layer:
In a large bowl, beat softened cream cheese and powdered sugar until smooth. Fold in 1 cup of the whipped topping. Spread this mixture evenly over the chilled crust.
3️⃣ Prepare the pudding layer:
In another bowl, whisk together vanilla pudding mix and cold milk until thickened (about 2 minutes). Gently fold in ½ cup crushed Butterfingers. Spread evenly over the cream cheese layer.
4️⃣ Top with remaining whipped topping:
Spread the remaining whipped topping over the pudding layer.
5️⃣ Garnish:
Sprinkle remaining crushed Butterfingers over the top. Add chocolate or caramel drizzle if desired.
6️⃣ Chill:
Refrigerate for at least 4 hours, or overnight, to allow the layers to set and flavors to meld.
7️⃣ Serve:
Slice into squares and serve chilled.
Notes
-
You can substitute graham crackers or Nilla wafers for the crust if preferred.
-
Make sure the dessert is well chilled before slicing for clean layers.
-
Leftovers can be stored in the refrigerator for up to 4 days.
- Prep Time: 20 min
- Cook Time: 4 hrs chill