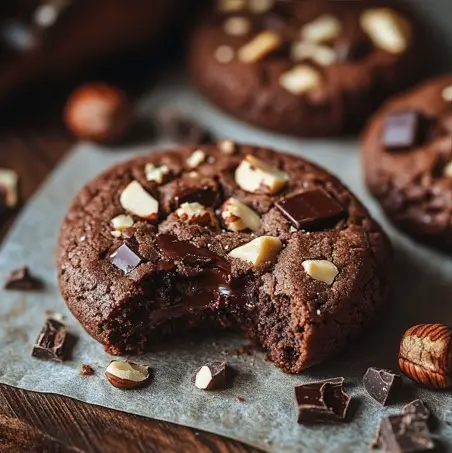
Ferrero Rocher-inspired cookies are a delightful treat that brings the luxurious flavors of hazelnuts and chocolate into a homemade dessert. These cookies are a tribute to the classic Ferrero Rocher confection, known for its rich hazelnut center, creamy chocolate coating, and crispy wafer shell. By incorporating these key elements into a cookie, you create a dessert that is both decadent and satisfying.
The combination of hazelnuts and chocolate is a timeless pairing in the world of desserts. Hazelnuts add a distinct, nutty flavor and a satisfying crunch, while chocolate brings a sweet, velvety richness that complements the nuts perfectly. This balance of flavors and textures is what makes these cookies so irresistible.
This recipe is not only delicious but also straightforward, making it accessible for bakers of all levels. With simple ingredients and easy-to-follow steps, you can recreate the indulgence of Ferrero Rocher in the form of a delightful cookie that’s perfect for any occasion.
Ingredients Overview
This Ferrero Rocher-inspired cookie recipe uses a carefully selected set of ingredients, each playing a vital role in creating the perfect balance of flavors and textures.
- Butter (⅔ cup, unsalted, soft): Butter is essential for adding richness and moisture to the cookies. It helps create a tender texture while also carrying the flavors of the other ingredients throughout the dough.
- Nutella (½ cup): Nutella is the star ingredient, providing the signature chocolate-hazelnut flavor that defines these cookies. It adds sweetness, creaminess, and a smooth texture to the dough.
- Kosher Salt (½ teaspoon): A small amount of salt enhances the sweetness of the cookies and balances the flavors, preventing them from becoming overly sweet.
- Vanilla Extract (2 teaspoons): Vanilla extract adds depth and complexity to the flavor profile, enhancing the taste of both the chocolate and hazelnuts.
- Brown Sugar (1 cup) & Granulated Sugar (½ cup): These sugars contribute sweetness and help achieve the desired cookie texture. Brown sugar adds a slight molasses flavor and chewiness, while granulated sugar ensures the cookies have crisp edges.
- Eggs (2) & Egg Yolk (1): Eggs act as a binding agent, holding the ingredients together, while also adding richness and moisture. The extra egg yolk contributes to a denser, more fudgy texture.
- Baking Soda (1 teaspoon): Baking soda serves as a leavening agent, helping the cookies rise and develop a light, tender crumb.
- Flour (2 ½ cups): Flour provides the structure and foundation for the cookies, giving them shape and stability.
- Hazelnuts (½ cup, chopped): Chopped hazelnuts add a satisfying crunch and enhance the nutty flavor, complementing the Nutella.
- Chocolate Chips (1 cup, plus more for topping): Chocolate chips introduce bursts of extra chocolatey goodness, ensuring each bite is indulgent and rich.
Step-by-Step Instructions
Preparing the Cookie Dough
Combining Butter and Nutella:
Start by placing the room temperature, unsalted butter into a large mixing bowl. Add the Nutella to the butter and use an electric hand mixer to blend them together. The key to achieving a creamy and light consistency is to mix the butter and Nutella for about 2-3 minutes. This process aerates the mixture, which will contribute to the cookies’ soft texture. The butter should be soft enough to blend easily, but not melted, as this could lead to a greasy dough. The result should be a smooth, homogenous mixture with a lighter color.
Adding Sugars, Salt, and Vanilla:
Once the butter and Nutella are well-combined, it’s time to add the sugars. Pour in both the brown sugar and granulated sugar, followed by the kosher salt and vanilla extract. Mix these ingredients together for 1-2 minutes until they are fully incorporated. The sugars not only add sweetness but also influence the texture, with brown sugar adding moisture and chewiness, while granulated sugar contributes to a slight crispiness. The vanilla extract enhances the overall flavor, making the cookies taste richer and more complex.
Incorporating Eggs:
Next, add the eggs and the extra egg yolk to the mixture. It’s important that the eggs are at room temperature, as this allows them to emulsify more effectively with the butter and sugar mixture, resulting in a smoother dough. Mix the eggs in thoroughly until the mixture becomes creamy and slightly fluffy. The additional egg yolk enriches the dough, giving the cookies a denser, fudgier texture. Be sure to scrape down the sides of the bowl to ensure all ingredients are evenly distributed.
Mixing in Flour, Hazelnuts, and Baking Soda:
Gradually add the flour, baking soda, and chopped hazelnuts to the wet mixture. It’s best to do this in stages, mixing on low speed to avoid overworking the dough, which can lead to tough cookies. The flour provides structure, while the baking soda acts as a leavening agent, helping the cookies to rise. The chopped hazelnuts add texture and enhance the nutty flavor. Mix until the ingredients are just combined—overmixing can cause the cookies to become dense and less tender.
Folding in Chocolate Chips:
Finally, fold in the chocolate chips using a spatula. It’s crucial to do this step gently to avoid overmixing the dough, which could lead to the formation of gluten and result in tough cookies. The chocolate chips should be evenly distributed throughout the dough, ensuring that each cookie will have the perfect amount of chocolatey goodness. After mixing, the dough should be thick and slightly sticky, ready for the chilling process.
Chilling the Dough
Importance of Resting the Dough:
Chilling the cookie dough is a critical step that greatly impacts the final texture and flavor of the cookies. Resting the dough allows the flour to fully hydrate, which enhances the cookies’ structure and chewiness. It also helps to solidify the fats in the dough, which prevents the cookies from spreading too much during baking, leading to a thicker, more uniform shape.
Recommended Chilling Time:
For best results, it is recommended to chill the dough for at least one hour, though overnight chilling is ideal. An overnight rest in the fridge not only improves the texture but also deepens the flavors, as the ingredients have more time to meld together. If you’re short on time, a minimum of one hour will still yield good results, but for the ultimate Ferrero Rocher cookie experience, overnight chilling is the way to go.
Forming the Cookies
Scooping the Dough:
Once the dough has been properly chilled, it’s time to form the cookies. Using a cookie scooper, scoop out uniform balls of dough, approximately 1 ½ tablespoons each. This ensures that the cookies bake evenly, as uniform size means they will all require the same amount of time in the oven. If you don’t have a cookie scooper, you can use a regular tablespoon to portion out the dough. Roll each portion into a smooth ball with your hands to create a uniform shape.
Coating with Hazelnuts:
To add an extra layer of flavor and texture, dip each dough ball into chopped hazelnuts, rolling them until they are fully coated. This step not only enhances the nutty flavor but also gives the cookies a delightful crunch on the outside. Make sure the hazelnuts are finely chopped to ensure they adhere well to the dough. Once coated, place the dough balls onto a baking sheet lined with parchment paper, ensuring they are spaced about 2 inches apart to allow for spreading during baking.
Baking Instructions
Preparing the Baking Sheet:
Before baking, line your baking sheet with parchment paper. This not only prevents the cookies from sticking but also promotes even baking, as the parchment paper ensures a consistent heat distribution. Additionally, parchment paper makes cleanup easier and allows the cookies to slide off the sheet effortlessly once they’re baked. Arrange the cookie dough balls on the prepared sheet, ensuring there’s enough space between each one for them to spread slightly as they bake.
Baking Time and Temperature:
Preheat your oven to 180°C (350°F). Bake the cookies for 11-12 minutes, or until the edges are lightly golden brown, and the centers are still soft. The key to perfect cookies is not to overbake them; they should look slightly underdone when you take them out of the oven, as they will continue to set while cooling. This ensures a soft, chewy center with slightly crispy edges—a perfect balance that makes these cookies irresistible.
Post-Baking Tips:
After baking, let the cookies cool on the baking sheet for about 5 minutes. This allows them to firm up slightly, making them easier to transfer. Then, move the cookies to a wire rack to cool completely. Cooling on a rack prevents the bottoms from becoming soggy and ensures the cookies retain their ideal texture.
Finishing Touches and Serving Suggestions
Adding the Nutella Topping
Melting Nutella:
To achieve a smooth and spreadable consistency for the Nutella topping, gently warm the Nutella in a microwave-safe bowl. Heat it in short intervals of 10-15 seconds, stirring between each interval until it reaches a pourable consistency. Be careful not to overheat the Nutella, as it can become too runny and lose its creamy texture. Alternatively, you can place the Nutella jar in a bowl of warm water to soften it gradually.
Topping the Cookies:
Once the Nutella is melted, use a small spoon or a piping bag to add a dollop of Nutella to the top of each cooled cookie. For a more decorative finish, you can swirl the Nutella with the back of the spoon or create a drizzle effect by moving the spoon in quick, sweeping motions over the cookies. This adds an extra layer of flavor and makes the cookies look as decadent as they taste, perfect for presentation at any gathering.
Serving Suggestions
Best Ways to Serve Ferrero Rocher Cookies:
These Ferrero Rocher-inspired cookies are best enjoyed with a hot beverage such as coffee or tea, which complements the rich, chocolatey flavors. They also make an excellent dessert, especially when served alongside a scoop of vanilla or hazelnut ice cream. For a special treat, consider serving them with a glass of milk or a hot chocolate, particularly during colder months.
Storage Tips:
To keep your cookies fresh, store them in an airtight container at room temperature. They will stay soft and chewy for up to five days. If you prefer a slightly crispier texture, store them in a loosely covered container. For longer storage, you can freeze the baked cookies for up to three months. Just ensure they are completely cooled before freezing and use parchment paper to separate the layers to prevent sticking.
Troubleshooting Common Issues
Flat Cookies:
If your cookies turn out flat, it could be due to the butter being too warm when mixing the dough, causing the cookies to spread too much during baking. To fix this, make sure your butter is just soft, not melted, and always chill the dough thoroughly before baking. Also, check the freshness of your baking soda; if it’s old, it may not provide enough lift.
Dry Cookies:
Dry cookies can result from overbaking or using too much flour. Be sure to measure your flour correctly by spooning it into the measuring cup and leveling it off, rather than scooping directly from the bag, which can compact the flour. Also, keep a close eye on the baking time; the cookies should be just set in the center when you remove them from the oven. If your dough seems too dry before baking, you can add a tablespoon of milk or an extra egg yolk to increase moisture.
Overbaked Cookies:
Overbaked cookies will be hard and lack the soft, chewy texture that makes them so delightful. Signs of overbaking include edges that are too dark or centers that are overly firm. To prevent this, bake the cookies until the edges are just lightly browned and the centers appear slightly underdone. Remember, they will continue to bake and set as they cool on the baking sheet.
Frequently Asked Questions
Can I use other types of nuts instead of hazelnuts?
Yes, you can substitute hazelnuts with other nuts like almonds, pecans, or walnuts, depending on your preference. Each type of nut will add its unique flavor and texture to the cookies. Almonds provide a mild, slightly sweet flavor, while pecans and walnuts offer a richer, more buttery taste. Just be sure to chop the nuts finely so they mix well into the dough and coat the cookies evenly.
How long can the cookie dough be stored in the fridge?
The cookie dough can be stored in the refrigerator for up to 72 hours. Keeping the dough chilled for longer periods allows the flavors to develop further, resulting in a richer taste. Ensure the dough is tightly wrapped in plastic wrap or stored in an airtight container to prevent it from drying out or absorbing other fridge odors.
What can I substitute for Nutella?
If you don’t have Nutella, you can use any chocolate-hazelnut spread as a substitute. Other alternatives include chocolate almond butter, regular chocolate spread, or even peanut butter for a different flavor profile. Keep in mind that these substitutions may alter the taste slightly but will still yield delicious cookies.
Can I freeze the cookie dough for later use?
Yes, you can freeze the cookie dough for up to three months. To do so, scoop the dough into balls, place them on a baking sheet, and freeze until solid. Then, transfer the dough balls to a freezer-safe bag or container. When ready to bake, simply place the frozen dough balls on a baking sheet and bake as directed, adding a couple of extra minutes to the baking time.
Conclusion
In summary, these Ferrero Rocher-inspired cookies are a delightful combination of rich, chocolatey Nutella, crunchy hazelnuts, and sweet chocolate chips, all wrapped up in a soft, chewy cookie. The recipe is straightforward and easy to follow, making it accessible for bakers of all skill levels. Whether you’re preparing them for a special occasion or simply indulging in a sweet treat at home, these cookies are sure to impress.
The step-by-step process, from preparing the dough to adding the finishing Nutella topping, ensures that every batch comes out perfect. Plus, with the flexibility to customize with different nuts or spreads, you can tailor the recipe to your tastes. So why not give this recipe a try? Share these delicious cookies with family and friends—they’re sure to become a favorite in your home.
Print
Ferrero Rocher Cookies (Hazelnut Chocolate Cookies)
Description
These Ferrero Rocher-inspired cookies are the perfect treat for lovers of chocolate and hazelnuts. With their soft, chewy texture and rich flavor, these cookies capture the essence of the classic Ferrero Rocher confection. The combination of creamy Nutella, crunchy hazelnuts, and sweet chocolate chips makes these cookies irresistible. They are easy to make and perfect for any occasion, whether you’re enjoying them with a cup of coffee or serving them as a dessert at a special gathering.
Ingredients
- ⅔ cup Butter, soft and unsalted
- ½ cup Nutella
- ½ teaspoon Kosher salt
- 2 teaspoons Vanilla extract
- 1 cup Brown sugar
- ½ cup Granulated sugar
- 2 Eggs
- 1 Egg yolk
- 1 teaspoon Baking soda
- 2 ½ cups Flour
- ½ cup Hazelnuts, chopped
- 1 cup Chocolate chips (plus more for the top)
Instructions
- Prepare the Dough:
- In a large mixing bowl, combine the room temperature butter and Nutella. Use an electric hand mixer to cream the mixture for 2-3 minutes until it’s light and creamy.
- Add the brown sugar, granulated sugar, kosher salt, and vanilla extract. Mix for about 1-2 minutes until well combined.
- Add the eggs and egg yolk, mixing until the dough is creamy and well incorporated.
- Gradually mix in the flour, chopped hazelnuts, and baking soda, using the hand mixer until almost combined.
- Fold in the chocolate chips with a spatula until just combined. Cover the bowl with plastic wrap and refrigerate the dough for at least one hour, preferably overnight.
- Form the Cookies:
- Preheat your oven to 180°C (350°F) and line a baking sheet with parchment paper.
- Use a cookie scooper or a tablespoon to scoop out 1 ½ tablespoon-sized portions of dough. Roll each portion into a ball.
- Dip each dough ball into chopped hazelnuts, coating them evenly, and place them on the prepared baking sheet, spacing them about 2 inches apart.
- Bake the Cookies:
- Bake in the preheated oven for 11-12 minutes, until the edges are lightly golden and the centers are still soft.
- Remove from the oven and let the cookies cool on the baking sheet for 5 minutes before transferring them to a wire rack to cool completely.
- Finish with Nutella:
- Melt some Nutella by gently warming it in the microwave or in a bowl over warm water.
- Add a small dollop of melted Nutella to the top of each cooled cookie, using a spoon to create a decorative swirl if desired.
Notes
- Serve the cookies with coffee, tea, or as a dessert. They also pair wonderfully with a glass of milk or a scoop of vanilla ice cream.
- Store the cookies in an airtight container at room temperature for up to five days, or freeze them for up to three months.
- For best results, chill the dough overnight. This not only improves the texture but also enhances the flavors, making the cookies even more delicious.


