

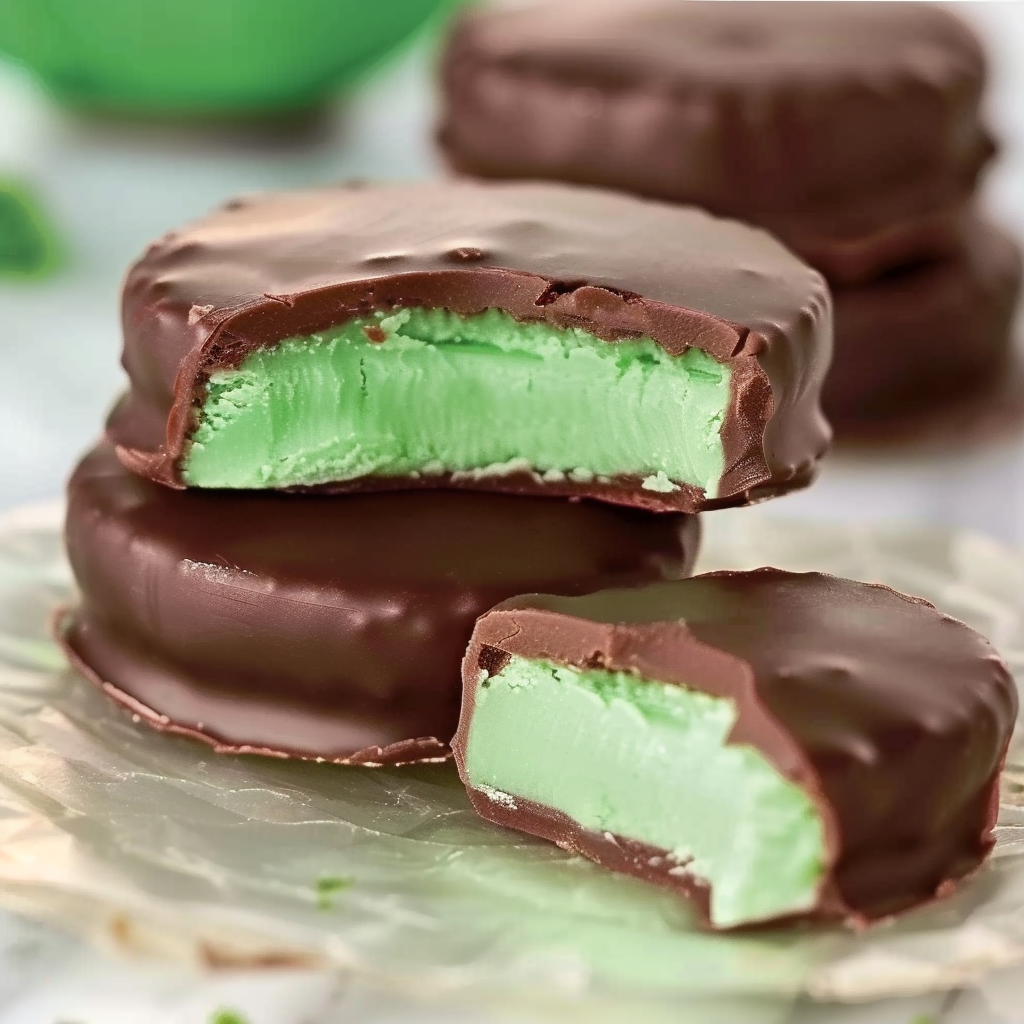
Chocolate Peppermint Patties
There’s something irresistibly nostalgic about homemade chocolate peppermint patties. With their cool, creamy peppermint center wrapped in a rich chocolate shell, these simple treats offer a refreshing bite that’s both indulgent and satisfying. While store-bought options like York Peppermint Patties are readily available, making them at home allows for customization and control over ingredients—no preservatives or additives, just pure flavor.
Rooted in classic American confectionery, peppermint patties have been a popular treat since the 1940s, gaining iconic status for their bright, minty core and smooth coating. If you’ve ever wondered about the origins of this minty marvel, take a look at the history of peppermint and how it’s used in modern candy-making. Whether you enjoy them as a post-dinner refreshment or wrap them as edible gifts, these easy chocolate-covered mint patties are perfect for any occasion.
When made at home, you’re not only avoiding artificial additives but also gaining the opportunity to explore different flavor variations and styles. Plus, if you’ve ever experimented with confectionery basics, you’ll know that creating candies from scratch is both fun and surprisingly simple. For visual inspiration, take a look at this Pinterest board on homemade chocolate treats to see just how creative you can get with your peppermint patties.
Why You’ll Love This Recipe
Homemade chocolate peppermint patties aren’t just about nostalgic flavor—they’re also incredibly practical and rewarding to make. With a short ingredient list and simple techniques, this recipe fits perfectly into any busy kitchen, whether you’re prepping for the holidays or just looking for a freezer-friendly treat.
Here’s why these easy chocolate-covered mint patties will become your go-to:
-
No-bake and fuss-free: You don’t need to turn on the oven. This is a candy recipe that comes together quickly and sets beautifully in the fridge or freezer.
-
Perfect texture combination: A firm, yet creamy peppermint filling pairs with a crisp, glossy chocolate shell for that satisfying snap and melt-in-your-mouth finish.
-
Customizable for any occasion: Add color to the filling for themed events, or top them with crushed candy canes, sea salt, or sprinkles for festive flair. These make ideal edible holiday gifts, especially when wrapped in decorative paper or tucked into gift boxes.
-
Freezer-friendly: Make a big batch and store them for weeks. These patties retain flavor and texture straight from the freezer, making them excellent make-ahead desserts.
-
Naturally gluten-free: Since the base ingredients contain no gluten, they’re a great treat for those with dietary restrictions. For more on the properties of peppermint and its uses, check out the role of peppermint oil vs extract in food and flavoring.
With just a handful of ingredients and no special equipment, this homemade candy delivers maximum impact with minimum effort. It’s a simple, satisfying way to create something sweet, personal, and endlessly shareable.
Ingredients Overview
Creating homemade chocolate peppermint patties is surprisingly simple thanks to a short list of accessible ingredients. Each component plays a crucial role in delivering the signature flavor and texture of this classic treat. Here’s a breakdown of what you’ll need and why:
-
2 cups powdered sugar: This fine sugar forms the bulk of the peppermint filling, giving it a smooth, dense texture that holds its shape well. It also balances the sharpness of the mint extract with sweetness.
-
1 ½ tablespoons unsalted butter (softened): Butter adds richness and creaminess to the filling. It also helps bind the sugar and extract together into a pliable dough.
-
2 teaspoons peppermint extract: The key flavor agent. Peppermint extract provides that cool, refreshing taste that defines this candy. You can explore the differences between extract and oil through this peppermint oil article, especially if considering substitutions.
-
2 tablespoons heavy cream (or milk): This adds moisture, softens the sugar, and makes the dough easier to work with. Heavy cream offers a richer consistency than milk, but both work well.
-
10 oz semi-sweet or dark chocolate (chopped): This is used for coating the patties. Semi-sweet chocolate offers a perfect balance between sweetness and bitterness, while dark chocolate provides a richer, more intense flavor. Explore more about the types of chocolate to choose the best match for your palate.
Optional Add-ins and Variations:
-
A few drops of food coloring (green, red, or pastel) for themed occasions.
-
A dash of vanilla extract for added depth.
-
Toppings like crushed candy canes, flaky sea salt, or decorative sprinkles for added visual appeal and texture. See this Pinterest collection of peppermint dessert recipes for creative ideas.
Understanding each ingredient’s function will help you tweak the recipe confidently, whether you’re accommodating dietary preferences or adding your own twist to this timeless mint chocolate dessert.
Step-by-Step Instructions (Detailed with Tips)
Making homemade chocolate peppermint patties is a straightforward process, but a few small techniques can make a big difference in texture, appearance, and flavor. Below is a detailed guide to crafting perfect peppermint patties with a cool, creamy center and a smooth chocolate shell.
Step 1: Make the peppermint filling
-
In a medium mixing bowl, combine 2 cups powdered sugar, 1½ tablespoons softened unsalted butter, 2 teaspoons peppermint extract, and 2 tablespoons heavy cream (or milk).
-
Use a hand mixer or spatula to mix until a thick, smooth dough forms. It should resemble playdough in consistency—soft enough to shape but not sticky.
-
If the dough is too dry, add a few more drops of cream; if too wet, add more powdered sugar a tablespoon at a time.
-
For visual variation, mix in a few drops of natural food coloring.
Step 2: Shape the patties
-
Roll small portions of dough into balls, about 1 inch in diameter.
-
Flatten each ball into a disc, roughly ¼ inch thick.
-
Place them onto a parchment-lined baking sheet in a single layer.
-
Be consistent with size for even dipping and presentation.
This filling step creates that signature minty bite at the heart of the peppermint patty. To elevate the appearance, visit Pinterest’s candy dipping techniques for shaping and styling inspiration.
Step 3: Freeze to firm the centers
-
Transfer the tray to the freezer for 20–30 minutes.
-
Freezing firms up the peppermint discs, making them easier to dip in melted chocolate without falling apart.
-
Don’t skip this step—it also helps the chocolate set more quickly.
Proper chilling is one of the keys to smooth, crack-free dipping, a common challenge in homemade candy-making. For more candy-related science, explore confectionery basics to understand how temperature and texture interact.
Step-by-Step Instructions (Detailed with Tips)
Step 4: Melt the chocolate
-
Place 10 oz of chopped semi-sweet or dark chocolate in a microwave-safe bowl.
-
Heat in 20-second intervals, stirring well between each until fully melted and glossy. This prevents scorching and ensures a smooth, even melt.
-
Optionally, add 1 teaspoon of coconut oil or shortening to thin the chocolate slightly for easier coating.
For a more traditional method, try using a double boiler, which gives you better temperature control—important for avoiding chocolate bloom or dull finishes.
Step 5: Dip the peppermint patties
-
Remove the chilled peppermint discs from the freezer.
-
Drop each patty into the melted chocolate, using a fork to flip and coat it fully.
-
Lift it out with the fork, letting the excess chocolate drip off.
-
Place coated patties back onto the parchment-lined sheet. For a clean finish, tap the fork on the bowl’s edge gently to shake off excess.
Refer to this Pinterest example for creative dipping and decorating techniques, including using sprinkles or crushed peppermint on top before the chocolate sets.
Step 6: Set and store
-
Refrigerate the dipped patties for 30 minutes or until the chocolate hardens completely.
-
Once set, transfer them to an airtight container. Use parchment between layers to avoid sticking.
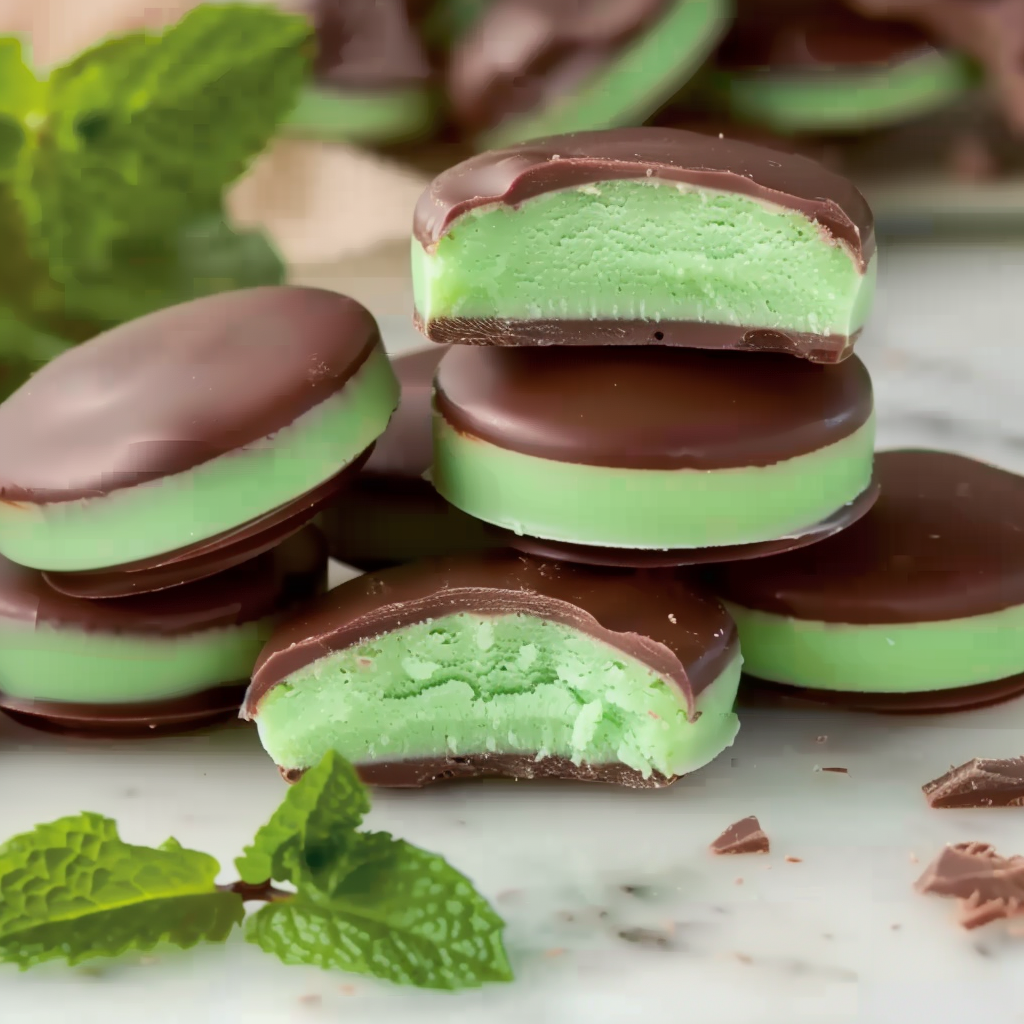
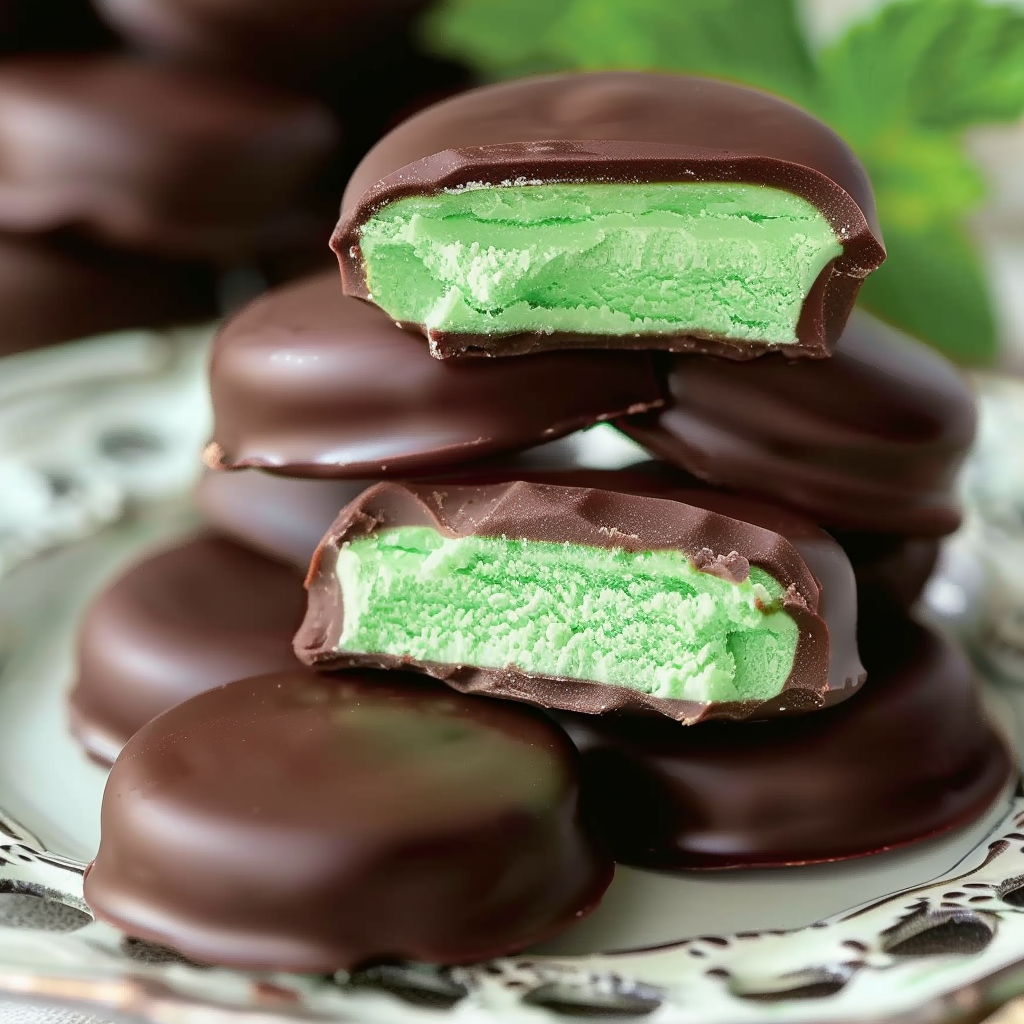
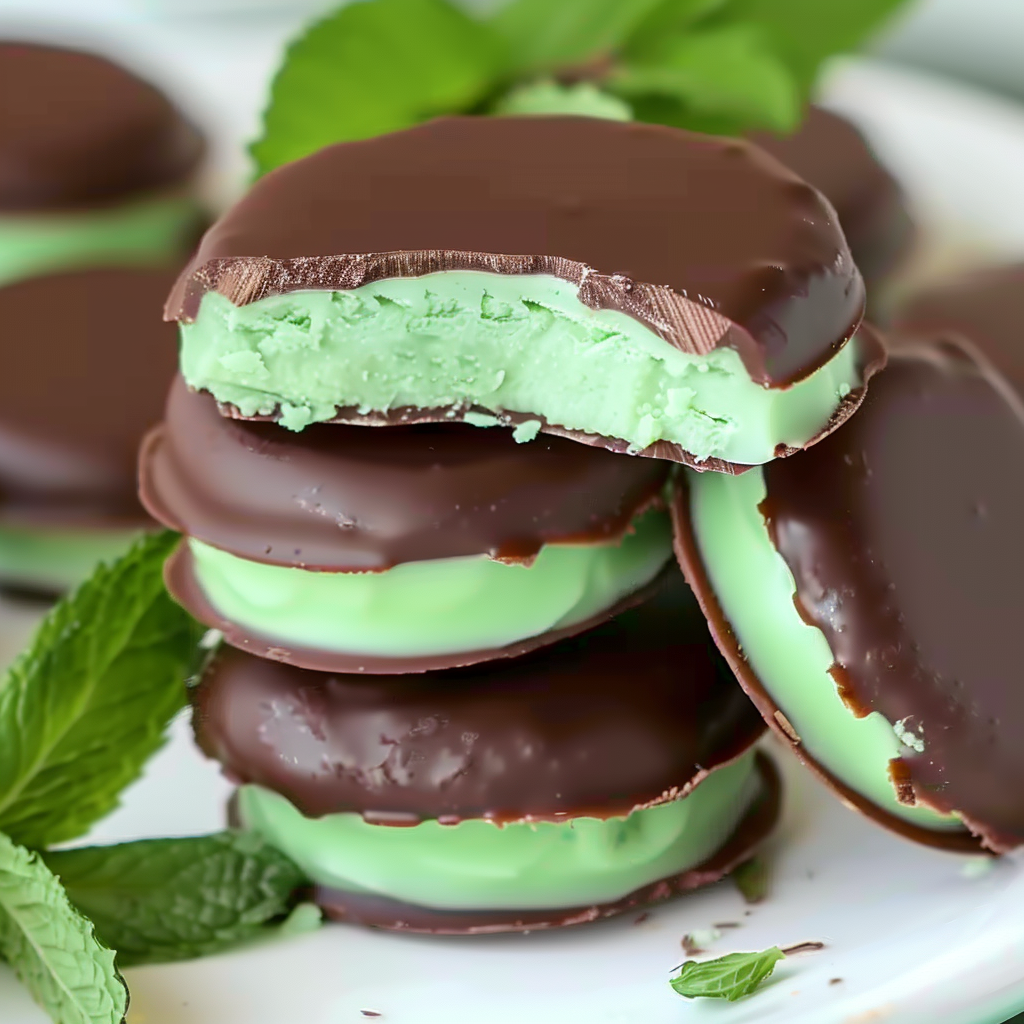
You can keep these easy chocolate-covered mint patties refrigerated for up to two weeks, or freeze them for up to three months. If storing long-term, wrapping individually is ideal for preserving freshness. These also make great holiday candy gifts, perfect for tins or treat bags.
By following these steps closely, you’ll create professional-quality peppermint patties with a clean snap, rich chocolate shell, and cool, creamy center—perfectly balancing freshness and indulgence.
Tools and Equipment You’ll Need
While this recipe is wonderfully simple, having the right tools on hand will make the process smoother and more efficient. Here’s what you’ll need to make homemade chocolate peppermint patties with ease:
-
Mixing bowl: A medium-sized bowl is perfect for mixing the peppermint dough.
-
Electric mixer or sturdy spatula: To combine the ingredients until smooth. A mixer speeds things up, but a spatula works well if you’re patient.
-
Parchment paper: Essential for lining your baking sheet to prevent sticking during shaping and setting.
-
Baking sheet: Use a rimmed sheet to keep patties contained during freezing and chilling.
-
Microwave-safe bowl or double boiler: For melting the chocolate. A double boiler gives you better control, but a microwave method is faster and convenient.
-
Fork or candy dipping tool: This helps dip and lift the patties from the melted chocolate with minimal mess.
Proper tools ensure consistency, ease, and professional-looking results. If you’re new to candy-making, learning basic confectionery techniques can be helpful, especially when working with chocolate.
Nutritional Information (Estimated)
These easy chocolate peppermint patties are indulgent treats, so it helps to be mindful of the nutritional breakdown—especially if you’re gifting or making a large batch.
Per peppermint patty (approx. 1.5″ diameter):
-
Calories: ~110
-
Fat: 6g
-
Saturated Fat: 4g
-
Carbohydrates: 14g
-
Sugar: 13g
-
Protein: 0.5g
Note: Nutritional values may vary based on the type of chocolate used and exact portion sizes.
Since this recipe is made with real ingredients and no preservatives, it can be considered a slightly cleaner version compared to many store-bought alternatives. Using dark chocolate instead of semi-sweet can also lower sugar content while boosting antioxidants.
Flavor Variations & Customizations
One of the best parts about making chocolate peppermint patties at home is how easy it is to personalize them. Try these creative variations to match seasons, flavors, or dietary preferences:
-
Flavored extracts: Substitute or combine peppermint extract with vanilla, almond, or orange extract for a unique twist.
-
Colorful fillings: Add natural food coloring to the dough for holiday themes—green for Christmas, red for Valentine’s Day, or pastel for spring.
-
Toppings and textures:
-
Sprinkle crushed candy canes on top before the chocolate sets.
-
Add flaky sea salt for contrast and a gourmet touch.
-
Use festive sprinkles for themed parties or gifts.
-
-
Chocolate coatings:
-
Swap semi-sweet with white chocolate for a sweeter, creamier shell.
-
Try dark chocolate with a high cocoa percentage for a richer, more bitter profile.
-
Explore this Pinterest board on homemade chocolate treats for more flavor inspiration and styling ideas.
Troubleshooting Common Issues
Even with a simple recipe like this, small problems can occur. Here’s how to troubleshoot the most common challenges when making chocolate covered mint patties:
-
Filling too sticky: If your peppermint dough sticks to your hands or tools, add more powdered sugar a tablespoon at a time until it becomes pliable.
-
Filling too dry or crumbly: Add a few drops of cream or milk, mix, and knead until the dough softens.
-
Chocolate is thick or seizing: Add a teaspoon of coconut oil or shortening to thin out the melted chocolate. Avoid water contact, as it causes seizing.
-
Patties falling apart during dipping: Make sure the patties are well chilled—freeze for at least 30 minutes before dipping.
-
Chocolate coating is uneven or streaky: Use tempered chocolate or let melted chocolate cool slightly before dipping. See these candy dipping techniques for smoother finishes.
Mastering these fixes will help you produce consistent, visually stunning treats every time.
Best Ways to Use Homemade Peppermint Patties
These peppermint patties are versatile, making them ideal for many different settings and occasions:
-
Holiday gifts: Wrap individually in wax paper or place in decorative tins.
-
Party favors: Add to dessert tables, candy buffets, or gift bags.
-
Freezer treats: Keep a stash for when you want a sweet, refreshing bite.
-
Baking mix-ins: Chop and fold into brownies, cookies, or cupcakes for a minty surprise.
-
After-dinner mints: Serve chilled after meals for a cooling, palate-cleansing treat.
They’re also ideal for themed events—adjust the colors and toppings to match any celebration. For more edible gift inspiration, check out these Pinterest holiday candy ideas.
Make-Ahead & Storage Tips
These peppermint patties are excellent for making ahead and storing for weeks. Follow these tips for best results:
-
Refrigerator: Store in an airtight container, layered with parchment, for up to 2 weeks.
-
Freezer: Place in a freezer-safe container for up to 3 months. Let thaw for 10 minutes before serving.
-
Avoid moisture: Keep them in a dry, cool area to prevent the chocolate from sweating or blooming.
-
Individually wrap: For gifts or on-the-go storage, wrap each patty in parchment or wax paper.
Proper storage ensures your peppermint patties stay fresh, glossy, and delicious over time.
Comparing Homemade vs Store-Bought Patties
Making chocolate peppermint patties at home offers several clear advantages over commercial options:
-
Taste: Homemade versions taste fresher and more vibrant due to the real peppermint extract and quality chocolate.
-
Ingredient quality: You control the sweetness, type of chocolate, and avoid preservatives and fillers.
-
Customization: From flavoring to decoration, homemade patties allow total creative freedom.
-
Cost-effective: A batch of homemade patties typically yields more for less money compared to store-bought brands.
Explore more about how chocolate types impact taste and quality by referencing this types of chocolate guide.
Frequently Asked Questions (FAQs)
Can I use peppermint oil instead of extract?
Yes, but use sparingly—peppermint oil is much more concentrated. Start with ¼ teaspoon and adjust to taste. Read more about it in this peppermint oil article.
How do you keep chocolate from cracking when dipping?
Ensure the chocolate isn’t too hot and the patties aren’t too cold. Let the patties sit at room temperature for 5 minutes after freezing to avoid drastic temperature contrast.
Can you freeze homemade peppermint patties?
Absolutely. Freeze them in a single layer, then store in airtight containers with parchment between layers. They’re perfect freezer treats for up to 3 months.
Why is my peppermint filling too runny?
You may have added too much liquid. Add more powdered sugar a little at a time until it thickens into a dough-like consistency.
Are peppermint patties gluten-free?
Yes, this recipe contains no gluten ingredients. Just double-check your chocolate to ensure it’s certified gluten-free.
Can I use coconut oil in the chocolate coating?
Yes. Adding 1 teaspoon of coconut oil helps thin the chocolate and adds a slight sheen, making dipping easier and cleaner.

Homemade Chocolate Peppermint Patties with Rich Chocolate Coating
- Author: Naomi
Description
These homemade chocolate peppermint patties are cool, creamy, and coated in rich chocolate for a perfectly refreshing treat. With just a few simple ingredients, this no-bake recipe creates a batch of minty candies ideal for gifting, holiday platters, or freezer snacks. Customize them with toppings, food coloring, or different chocolate types to make them your own. Naturally gluten-free and freezer-friendly, these peppermint patties deliver a professional finish with homemade simplicity.
Ingredients
- 2 cups powdered sugar
- 1 ½ tbsp unsalted butter, softened
- 2 tsp peppermint extract
- 2 tbsp heavy cream (or milk)
- 10 oz semi-sweet or dark chocolate, chopped
Instructions
- In a mixing bowl, combine powdered sugar, softened butter, peppermint extract, and cream. Mix until a smooth, thick dough forms.
- Roll the dough into small balls, then flatten each into a disc. Place them on a parchment-lined baking sheet.
- Freeze the patties for 20–30 minutes until firm.
- Melt the chocolate in a microwave-safe bowl in 20-second intervals, stirring between each, until smooth.
- Dip each frozen mint patty into the melted chocolate, coating it completely. Use a fork to lift and let excess chocolate drip off.
- Place dipped patties back onto the parchment-lined sheet.
- Chill in the fridge until chocolate is set before serving or storing.
Notes
-
Peppermint extract vs oil: Extract is milder—use oil cautiously.
-
Chocolate matters: Choose good-quality semi-sweet or dark chocolate for best flavor.
-
Don’t skip freezing: It’s essential for easy dipping and neat results.
-
Storage tip: Always use parchment between layers to avoid sticking.
-
Decorating idea: Top with sea salt, crushed peppermint, or sprinkles for seasonal flair.


