


There’s something truly special about the sound of a crusty baguette cracking as you slice into it—especially when it’s fresh from your own oven. If you’ve ever dreamed of baking homemade bread that looks and tastes like it came straight from a French bakery, these Crusty Mini Baguettes are the perfect place to start.
This recipe is ideal for home bakers of all levels. Whether you’re new to working with yeast or a seasoned bread maker, the steps are straightforward and the results are undeniably satisfying. These mini baguettes are golden on the outside, soft and airy on the inside, and perfect for dipping in soup, serving with cheese, or making mini sandwiches.
And the best part? You don’t need any fancy tools—just some basic ingredients, a hot oven, and a little patience while the dough works its magic.
Let’s walk through the ingredients and first few steps of the process so you can start your journey toward warm, crusty, homemade baguettes.
INGREDIENTS YOU’LL NEED:
-
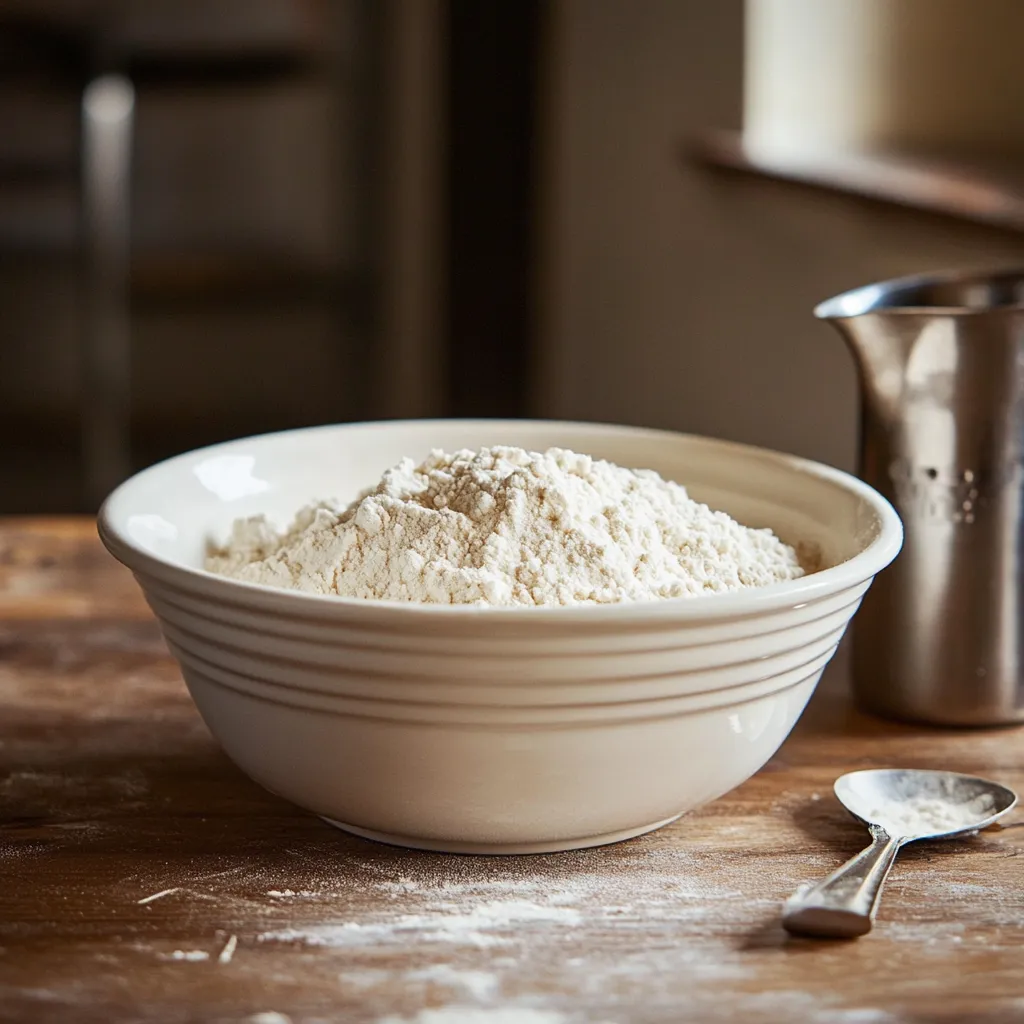
3 1/2 cups (450g) bread flour – High-protein flour gives these baguettes their chewy structure.
-
1 1/4 cups (300ml) warm water – Aim for about 110°F (45°C) to activate the yeast.
-
2 teaspoons active dry yeast – Helps the dough rise and gives it that classic airy texture.
-
2 teaspoons sugar – Feeds the yeast and adds a hint of sweetness to the dough.
-
1 1/2 teaspoons salt – Balances the flavor and strengthens the dough.
-
Extra flour – For kneading and dusting.
STEP 1: ACTIVATE THE YEAST
In a small bowl, combine the warm water, sugar, and active dry yeast. Stir gently and let it sit for 5 to 10 minutes, or until the mixture becomes foamy on top. This step is crucial—it lets you know the yeast is active and ready to do its job.
If your mixture doesn’t foam, your yeast might be expired or the water may have been too hot or too cold. In that case, it’s best to start over to ensure the dough rises properly.
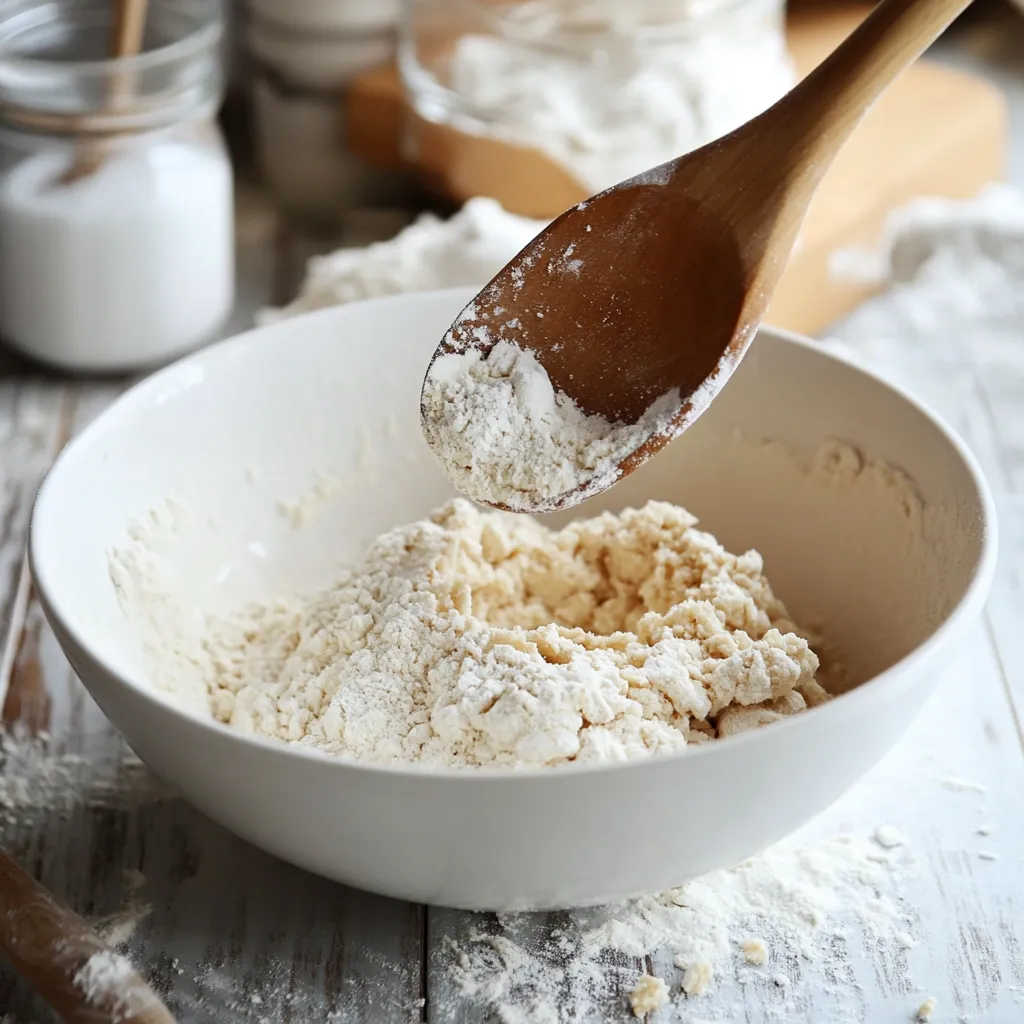
STEP 2: MIX THE FLOUR AND SALT
While the yeast is activating, combine the bread flour and salt in a large mixing bowl. Give it a quick stir to distribute the salt evenly. This dry mix forms the base of your dough and will soon come to life with the addition of the yeast mixture.
STEP 3: COMBINE THE WET AND DRY INGREDIENTS
Once the yeast mixture is foamy, pour it into the bowl of flour and salt. Using a wooden spoon or the dough hook attachment on a stand mixer, mix until a rough, shaggy dough starts to form. It may look a little dry or messy at first—that’s totally normal.
STEP 4: KNEAD THE DOUGH
Turn the dough out onto a lightly floured surface and knead it by hand for about 8 to 10 minutes, or until the dough becomes smooth and elastic. You can also use a stand mixer fitted with a dough hook, kneading for 6 to 7 minutes on medium speed.
Good kneading develops the gluten in the dough, which is what gives your mini baguettes that perfect chewy bite and structured crumb.

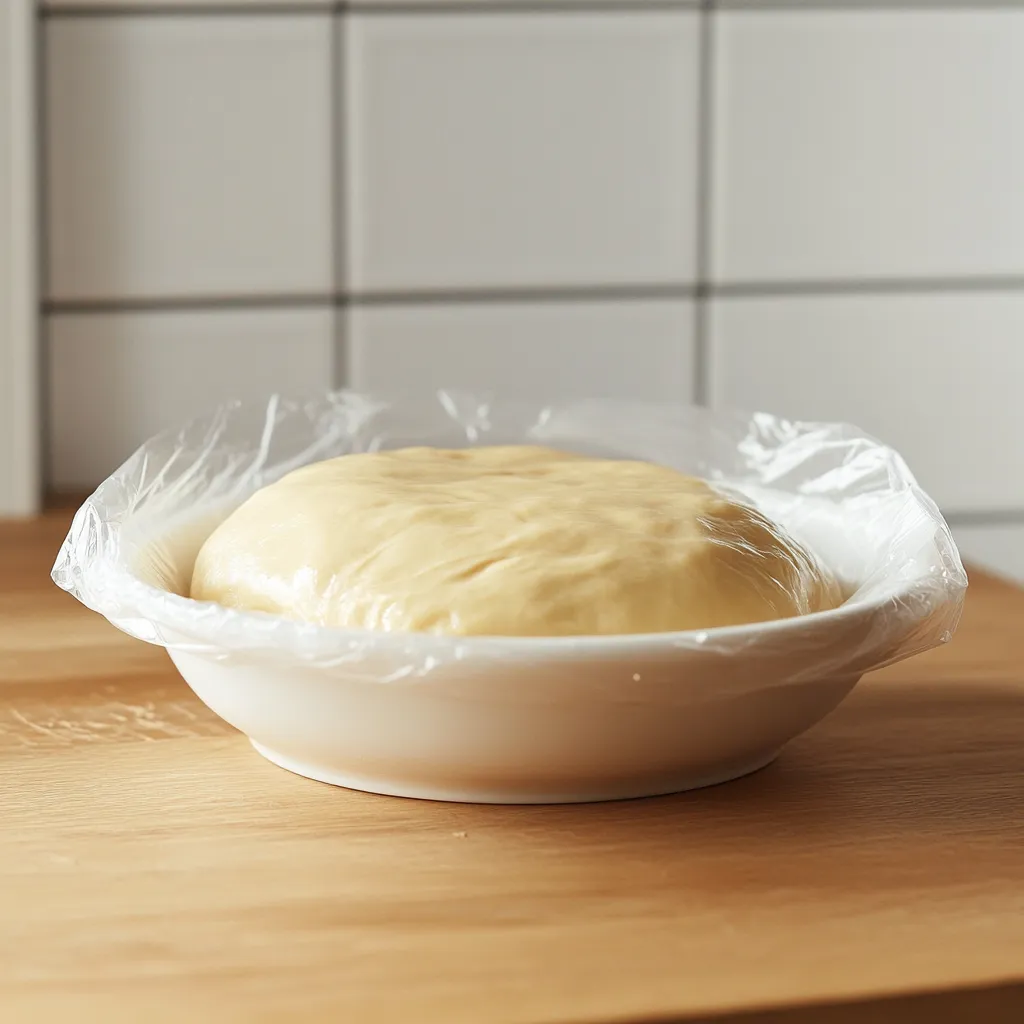
STEP 5: FIRST RISE
Place the kneaded dough into a lightly oiled bowl, turning it once so the top is coated. Cover the bowl with plastic wrap or a clean kitchen towel and let it rise in a warm, draft-free spot for about 1 to 1.5 hours, or until the dough has doubled in size.
Watching dough rise never gets old—it’s the moment that transforms basic ingredients into something truly special.
SHAPE, SCORE, AND STEAM – TURNING DOUGH INTO CRUSTY MINI BAGUETTES
Now that your dough has risen and is light and airy, it’s time to shape it into those iconic mini baguettes. This part of the process brings a hands-on, artisanal feel to your baking, and it’s simpler than you might think. Shaping, scoring, and steaming all play important roles in giving your baguettes their signature look and satisfying crunch.
Let’s go step by step to make sure you get beautifully golden, bakery-style results right from your own oven.
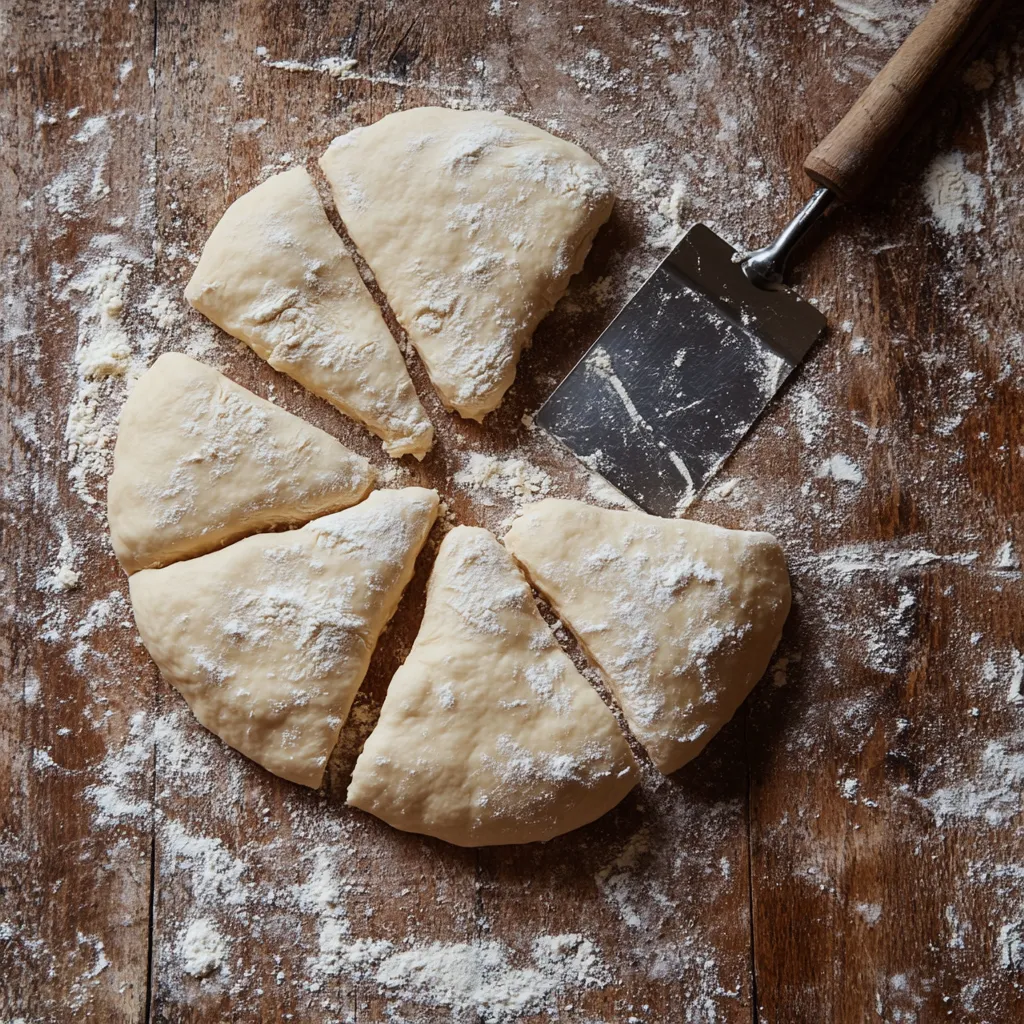
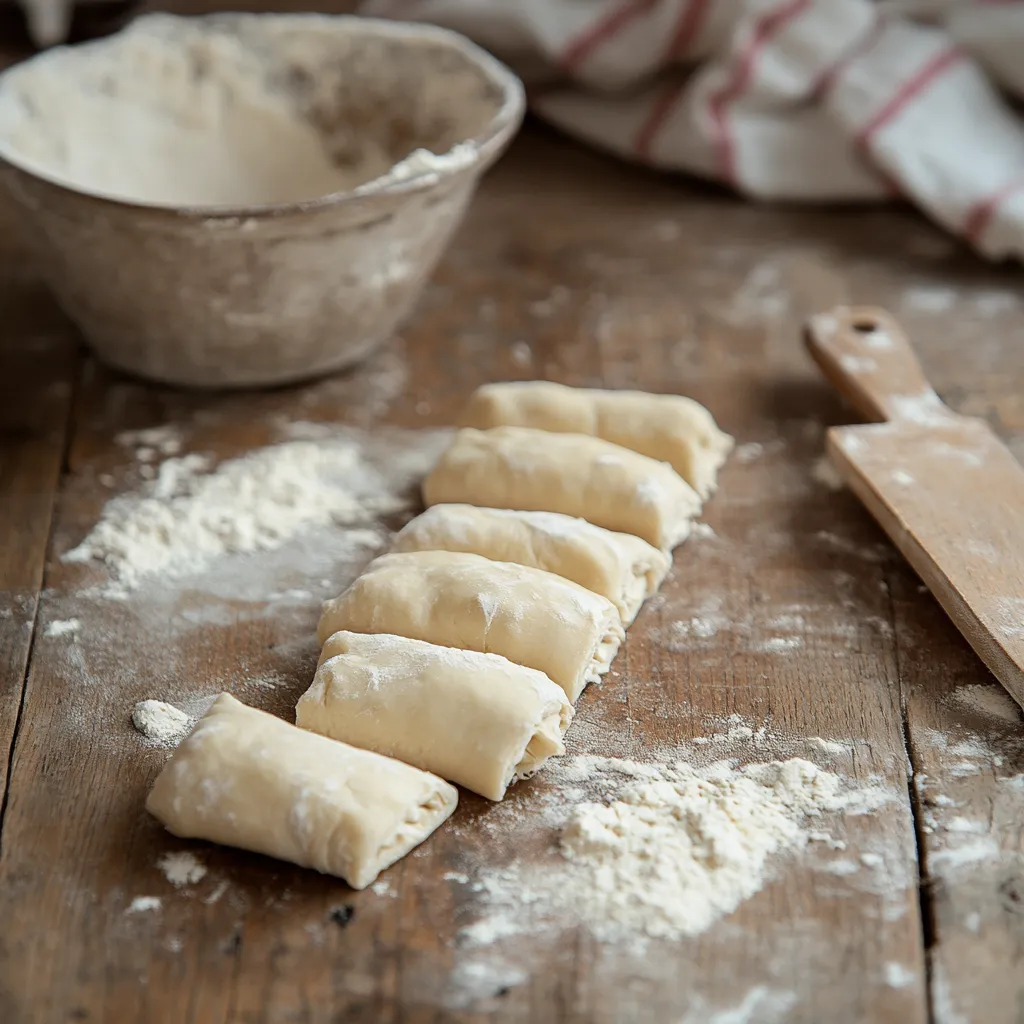
STEP 6: PUNCH DOWN AND DIVIDE THE DOUGH
Once the dough has doubled in size, gently punch it down to release some of the gas. Then turn it out onto a floured surface and divide it into 6 equal pieces using a bench scraper or sharp knife.
These smaller portions will bake into perfectly sized mini baguettes—great for serving individually or slicing for sandwiches or crostini.
STEP 7: SHAPE EACH MINI BAGUETTE
Take one piece of dough at a time and flatten it gently into a rectangle. Then, roll it up tightly from one long edge, forming a log shape. Pinch the seam closed and tuck the ends under slightly to give it that classic baguette silhouette.
Place the shaped dough seam-side down on a parchment-lined baking sheet. Repeat with the remaining pieces.
STEP 8: LET THE BAGUETTES RISE AGAIN
Cover the shaped baguettes loosely with a clean towel or plastic wrap and let them rise for 30 minutes. This second proofing gives the dough time to relax and puff up again, creating a light, airy interior.
During this time, the surface will also dry out slightly, which helps develop that chewy, crisp crust during baking.
STEP 9: PREHEAT THE OVEN AND PREP FOR STEAM
While the baguettes are rising, preheat your oven to 450°F (230°C). To create the steam that makes the crust so crispy, place an empty metal baking pan (not glass, as it can shatter) on the lower rack of your oven. This is where you’ll add water right before baking.
The steam helps keep the surface of the dough soft during the first part of baking, allowing it to expand fully before the crust sets.
STEP 10: SCORE THE BAGUETTES
Right before baking, use a sharp knife or a bread lame to make 2–3 shallow diagonal slashes across the top of each baguette. This not only gives them that signature baguette appearance, but it also allows steam to escape and prevents the crust from cracking in random spots.
Scoring might seem like a small detail, but it has a big impact on both the look and texture of your final loaves.
STEP 11: CREATE STEAM AND BAKE
Just before placing the baking sheet in the oven, carefully pour 1 cup of hot water into the empty pan on the bottom rack. Quickly close the oven door to trap the steam.
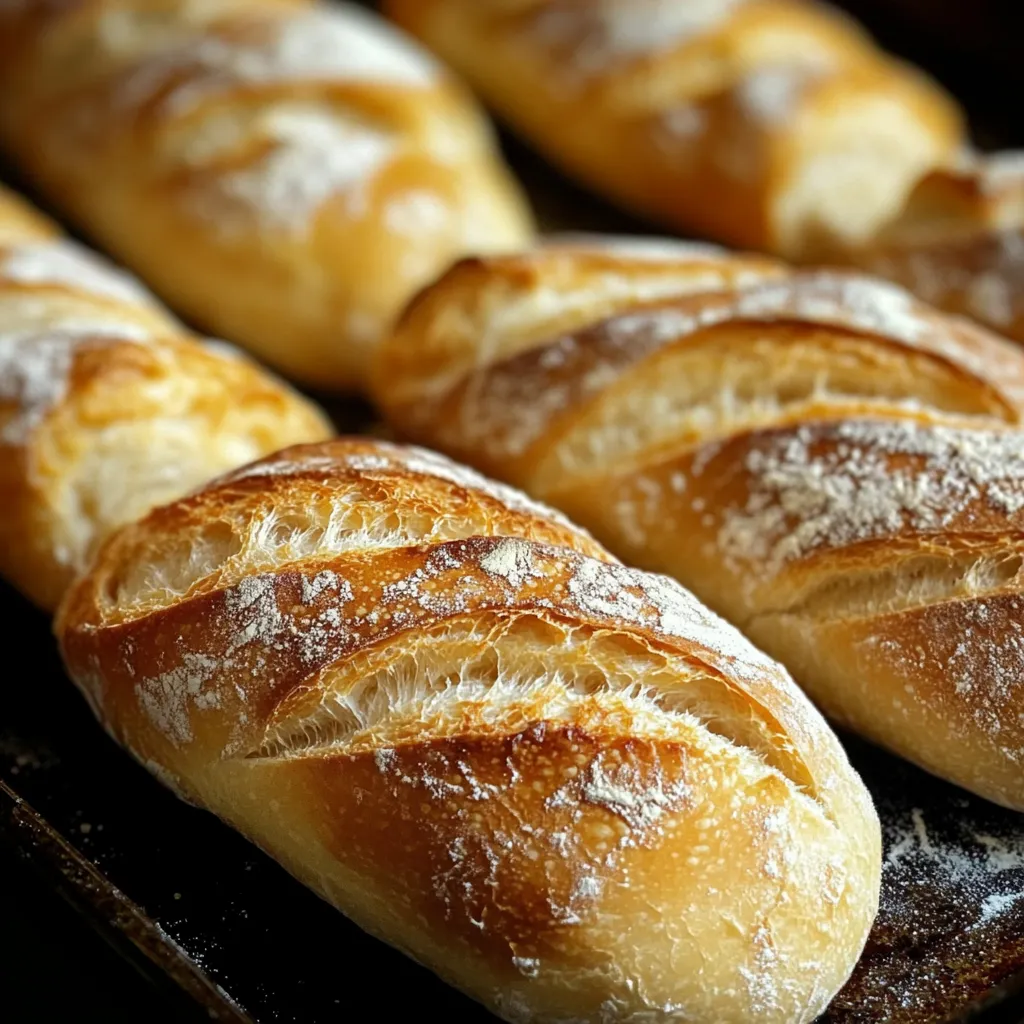
Place your baguettes in the oven and bake for 15–20 minutes, or until they are golden brown and sound hollow when tapped on the bottom. The crust should be crisp and slightly blistered, while the inside stays light and soft.
STEP 12: BAKE UNTIL GOLDEN AND CRUSTY
Once the steam is in the oven and the baguettes are on the middle rack, bake for 15–20 minutes, or until the baguettes are deep golden brown with a crisp, crackly crust. They should sound hollow when tapped on the bottom, which is a good sign they’re baked through.
If your oven runs hot or the tops brown too quickly, you can loosely tent the baguettes with foil during the last few minutes of baking to prevent over-browning.
STEP 13: COOL ON A WIRE RACK BEFORE SERVING
Once baked, remove the baguettes from the oven and transfer them to a wire rack. Let them cool for at least 10–15 minutes before slicing or serving. This rest time allows the crumb (interior) to finish setting and prevents them from becoming gummy inside.
The crust will continue to firm up as the baguettes cool, resulting in that perfect balance of crispy outside and soft, airy inside.
STEP 14: SLICE AND ENJOY YOUR MINI BAGUETTES
Once your mini baguettes have cooled slightly on the wire rack, they’re ready to serve. Use a sharp serrated knife to slice them cleanly—whether you’re going for rustic halves, sandwich-style cuts, or thin rounds for crostini.
Enjoy them warm with butter, cheese, jam, or use them as the base for mini sandwiches or alongside your favorite soups and stews. These baguettes are also perfect for bruschetta, garlic bread, or simply enjoyed fresh out of the oven with olive oil.
They’re best the day they’re made, but if you have leftovers, they toast up beautifully the next day.
SERVING TIPS AND VARIATIONS:
These Crusty Mini Baguettes are incredibly versatile, making them a great staple for meals, snacks, or entertaining. Whether you’re keeping it simple or dressing them up, here are some of the best ways to serve and customize them:
-
Classic with Butter: Slice warm and serve with salted butter or a flavored compound butter for a timeless, comforting bite.
-
Dipping Bread: Perfect with olive oil and balsamic vinegar or a warm bowl of soup like tomato basil or French onion.
-
Mini Sandwiches: Slice lengthwise and fill with deli meats, cheese, and fresh veggies for gourmet-style mini sandwiches.
-
Breakfast Toast: Toast slices and top with scrambled eggs, avocado, or cream cheese with fruit for a savory or sweet morning option.
-
Party Crostini: Slice thin and toast for crostini. Top with bruschetta mix, goat cheese and honey, or smoked salmon and dill.
VARIATIONS
-
Herb-Infused Dough: Add 1–2 teaspoons of dried herbs like rosemary, thyme, or Italian seasoning to the flour for extra aroma and flavor.
-
Cheese Twist: Sprinkle shredded Parmesan or cheddar over the top before baking, or fold it into the dough for cheesy pockets inside.
-
Garlic Butter Crust: Brush the tops with melted garlic butter before baking for an extra flavorful, golden crust.
-
Whole Wheat Version: Swap out up to 50% of the bread flour with whole wheat flour for a heartier, nuttier flavor.
-
Seeded Baguettes: Press sesame seeds, poppy seeds, or flaxseeds onto the top before baking for added crunch and a bakery-style finish.
FREQUENTLY ASKED QUESTIONS & FINAL THOUGHTS ON HOMEMADE MINI BAGUETTES:
After baking your first batch of these beautifully crisp Mini Baguettes, chances are you’ll want to make them again (and again). But before you start your next round, let’s go over a few common questions and helpful tips to make your next bake even better. From ingredient swaps to storage and serving ideas, here’s everything you need to know to master this recipe with confidence.


