There’s nothing quite like the smell of freshly baked bread filling your home. The simplicity of combining a few basic ingredients to create something so delicious is truly magical. While many people are intimidated by the idea of making bread from scratch, this quick German bread recipe proves that homemade bread doesn’t need to be complicated. With just a few steps and some patience, you can have warm, fluffy bread on your table in no time.
German bread is renowned for its rich, hearty flavors and rustic textures. Traditionally, German bread takes several hours, or even days, to prepare, with multiple stages of rising and kneading. However, this recipe speeds up the process while still capturing the essence of what makes German bread so special—its chewy texture and deep flavor. The result is a quick, foolproof version that’s accessible to home bakers of any skill level.
Homemade bread is incredibly versatile. Whether you’re using it for sandwiches, dipping it in soups, or enjoying it with a simple spread of butter, this recipe is sure to impress. With minimal ingredients and straightforward instructions, it’s perfect for anyone looking to bake fresh bread without the hassle of a lengthy process.
The Essential Ingredients Breakdown
Water:
Water is a crucial ingredient in any bread recipe, and the temperature matters more than you might think. In this recipe, 350 ml of room temperature water is used to activate the yeast. Water that’s too hot can kill the yeast, while cold water won’t activate it properly. Room temperature water provides the perfect environment for the yeast to thrive, ensuring a good rise and light texture.
Sugar:
Sugar plays an essential role in the bread-making process. In this recipe, 1 tablespoon of sugar is added to feed the yeast. Sugar provides the energy yeast needs to ferment and produce carbon dioxide, which helps the dough rise. It also contributes a subtle sweetness that enhances the overall flavor of the bread without making it taste sugary.
Yeast:
Dry yeast is the leavening agent that makes the bread rise. In this recipe, 8 grams of dry yeast is used. When activated in warm water with sugar, the yeast begins to ferment, producing bubbles of gas that cause the dough to expand. Dry yeast is convenient and reliable for home bakers, as it has a long shelf life and activates quickly.
Sunflower Oil:
The addition of 25 ml of sunflower oil in this recipe brings moisture and tenderness to the bread. Oil coats the flour particles, which helps soften the dough and create a tender crumb. It also adds a mild, nutty flavor that complements the other ingredients, making the bread more flavorful and easier to slice.
Flour:
Flour is the backbone of any bread recipe. Here, 500 grams of flour is used to give structure and form to the dough. Sifting the flour before adding it to the wet ingredients ensures that it is aerated and free of lumps, which helps create a light, uniform texture in the finished bread. The type of flour used can affect the bread’s final texture, but in this quick recipe, all-purpose or bread flour works well.
Extra Flour for Dusting:
In addition to the flour used in the dough, extra flour is needed for dusting the work surface during shaping. This prevents the dough from sticking while you roll and fold it into shape. Dusting with flour also helps to achieve a rustic, artisanal appearance on the finished loaf while ensuring it’s easier to handle during the shaping process.
Step-by-Step Process and Baking Techniques
Step 1: Yeast Activation
Activating the yeast is the first crucial step in making bread. Yeast is a living organism that needs the right conditions to thrive and cause the dough to rise. The water temperature is key to successful yeast activation. Ideally, the water should be at room temperature, around 37°C (98.6°F). If the water is too hot (above 45°C/113°F), it can kill the yeast, rendering it inactive. On the other hand, if the water is too cold, the yeast won’t properly activate, delaying or preventing fermentation.
In this recipe, 1 tablespoon of sugar is added to the water along with 8 grams of dry yeast. The sugar serves as food for the yeast, helping it “wake up” and begin the fermentation process. As the yeast consumes the sugar, it releases carbon dioxide, which forms bubbles and makes the dough rise.
After stirring the sugar and yeast into the water, let the mixture sit for about 5 minutes. During this time, you should notice the liquid becoming frothy and bubbly. These are visual cues that the yeast is active and ready to use. If no bubbles form, the yeast may be old or the water temperature incorrect. In this case, you’ll need to start over with fresh yeast and carefully measure the water temperature to ensure proper activation.
Common issues with yeast activation include inactive yeast (due to age or improper storage) and incorrect water temperature. If your yeast doesn’t activate, check the expiration date and adjust the water temperature before trying again.

Step 2: Incorporating Oil and Flour
After the yeast is activated, it’s time to add the oil and flour. In this recipe, 25 ml of sunflower oil is incorporated into the mixture. Sunflower oil is a great choice for bread because it provides moisture and helps create a soft, tender crumb. It also adds a subtle flavor without overpowering the other ingredients. Oil helps improve the texture of the bread, making it easier to slice and preventing it from becoming dry.
The next step is to gradually add 500 grams of sifted flour. Sifting the flour serves two important purposes: it removes any lumps and aerates the flour, ensuring a lighter, more even texture in the bread. This step also helps prevent dense or heavy bread, which can occur if the flour is packed too tightly in the measuring cup or bowl.
As you incorporate the flour into the yeast mixture, stir it gradually to avoid lumps. A sticky dough will begin to form as the flour mixes with the liquid. Take care not to overmix the dough. Overmixing can develop too much gluten, leading to a dense, tough bread. Instead, mix until the ingredients are just combined, and the dough is sticky but well-formed.
Step 3: First Rise
Once the dough is mixed, it’s time for the first rise, also known as “proofing.” This step is essential for developing the bread’s texture and flavor. During this time, the yeast ferments the sugars in the dough, producing carbon dioxide and causing the dough to expand. The result is a lighter, airier bread.
To start the first rise, cover the bowl of dough with a clean cloth and place it in a warm, draft-free environment. Ideally, the room temperature should be between 24°C and 30°C (75°F to 85°F). A warm kitchen or an oven with the light turned on (but not heated) can work well. Avoid cold or breezy areas, as these can slow down or inhibit the yeast’s activity.
Let the dough rise for about 1 hour, or until it has doubled in size. The exact time may vary depending on the ambient temperature and the yeast’s activity. During the rise, the dough will become more elastic and less sticky as the gluten develops.
If the dough hasn’t risen after an hour, there are a few possible reasons: the yeast may not have activated properly, the room may be too cold, or the dough may need more time. If you suspect inactive yeast, you can try proofing the dough in a slightly warmer spot, but if that doesn’t work, it’s best to start over.
Step 4: Second Mixing and Resting Period
After the first rise, it’s important to gently stir the dough to release some of the trapped air. This process, known as “punching down” the dough, helps redistribute the yeast and allows for a more even rise during baking. Stirring the dough for about 30 seconds is enough to knock out some of the air while preserving the dough’s structure.
Following this, allow the dough to rest again for 30 minutes. This second rest period is crucial for developing the dough’s gluten network, which gives the bread its chewy, elastic texture. As the dough rests, the gluten strands relax, making the dough easier to shape. This rest also allows the yeast to continue fermenting, which contributes to a more flavorful bread.
To determine when the dough is ready after resting, it should be slightly puffed up but not as much as after the first rise. The dough should feel more pliable and less sticky, making it easier to work with during the shaping process.
This second rest period might seem unnecessary, but it has a significant impact on the final bread. Skipping or shortening this step can result in a bread with a denser texture and less complex flavor. Allowing the dough to fully rest ensures that your bread will be light, airy, and full of flavor.
Step 5: Shaping the Dough
After the dough has rested, it’s time to shape it. Lightly flour a clean work surface to prevent the dough from sticking. Flour your hands as well to make handling the dough easier. Place the dough on the floured surface and gently roll it out into a rectangle. The size of the rectangle can vary depending on how thick or thin you want your final loaf to be.
Once you have rolled out the dough, fold it over itself, creating layers. This folding technique helps create a chewy texture and a well-structured loaf. The layers formed during folding will contribute to a more open crumb and help the bread expand during baking.
After folding, cover the dough again and let it rest for about 10 minutes. This short resting period allows the dough to relax, making it easier to shape into its final form.
Now, shape the dough according to your preference. You can form it into a loaf for slicing, shape it into a round boule for a more rustic look, or divide it into individual rolls. The shaping process affects both the appearance and the texture of the final product. For a more artisanal appearance, you can create a round shape with slashed patterns, or for convenience, a traditional loaf pan can be used.
Shaping is a creative part of the bread-making process, and experimenting with different forms can give you a variety of results.
Step 6: Final Shaping and Baking
Once your dough is shaped, it’s almost time for baking. First, preheat your oven to 230°C (446°F) to ensure it’s hot enough to create a good crust. A properly preheated oven allows the bread to rise quickly during the initial stages of baking, creating a light, airy interior.
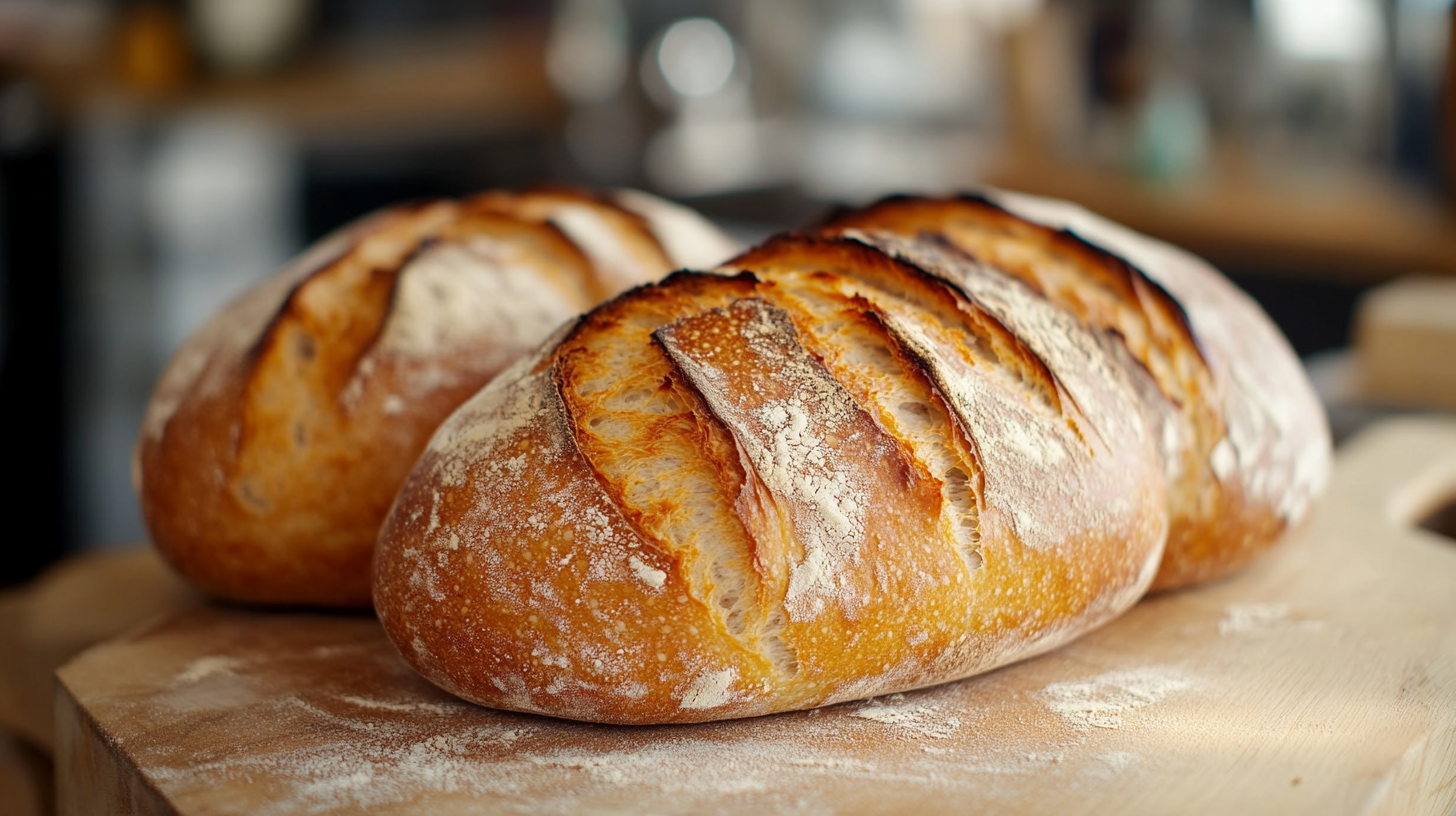
Before placing the dough in the oven, make a few slashes on the top with a sharp knife. These decorative cuts are not only for aesthetic purposes but also serve a functional role. The slashes allow the bread to expand as it bakes, preventing the crust from cracking and helping the dough rise evenly.
For an extra golden, crispy crust, consider adding steam to your oven. You can do this by placing a tray of water on the bottom rack of the oven, which will create steam as the bread bakes. This steam prevents the crust from setting too quickly, allowing the bread to rise fully before forming a crust. As the steam dissipates, the crust will harden and turn a beautiful golden brown.
Bake the bread for 30-40 minutes, depending on your oven and the size of the loaf. A good indicator that the bread is done is a hollow sound when you tap the bottom of the loaf. Additionally, the crust should be golden brown, and the bread should feel light for its size.
If you’re unsure whether the bread is fully baked, you can also use a kitchen thermometer. The internal temperature of the bread should be around 90°C to 95°C (190°F to 205°F) when fully baked.
Step 7: Cooling and Serving
Once the bread is out of the oven, it’s tempting to slice into it immediately, but it’s important to let it cool slightly. Transfer the bread to a wire rack to cool for at least 15-20 minutes. Cooling on a rack allows air to circulate around the bread, preventing the bottom from becoming soggy. This step ensures that the crust remains crisp and the interior sets properly.
Slicing the bread too soon can result in a gummy or doughy texture, as the bread is still finishing the baking process even after it’s removed from the oven. Patience here will reward you with a perfect slice that’s easy to cut and ready to serve.
Once the bread has cooled, you can slice it to your desired thickness. Serve it warm or at room temperature, paired with butter, jams, or as a side to soups and stews. This quick German bread is a perfect accompaniment to almost any meal, whether it’s a light snack or part of a hearty dinner.
Tips for Perfect German Bread Every Time
Using a thermometer: To ensure optimal rising, use a kitchen thermometer to check the dough’s temperature. For the best results, the dough should be around 24°C to 30°C (75°F to 85°F) during the rising process. This will allow the yeast to ferment and the dough to rise effectively.
Storing yeast: Yeast can lose its potency if not stored properly. To keep yeast active for future baking, store it in an airtight container in the fridge for short-term use or in the freezer for long-term storage. Always check the expiration date before use.
Making bread ahead and freezing: You can make this bread in advance by preparing the dough, letting it rise, and shaping it. Then, freeze the unbaked dough in a sealed container. When ready to bake, let it thaw and rise again before baking as usual.
Flour substitutions: You can substitute different types of flour to vary the texture and flavor. Bread flour provides more structure, while all-purpose flour results in a softer loaf. Whole wheat or rye flour can be mixed in for a heartier, more rustic bread, but remember to adjust the liquid slightly, as these flours absorb more moisture.
Recipe Variations
Adding seeds or grains: For added texture and flavor, mix in seeds like sunflower seeds, flax seeds, or poppy seeds into the dough before shaping. You can also sprinkle them on top before baking for extra crunch.
Incorporating whole wheat or rye flour: To make the bread heartier, replace up to half of the white flour with whole wheat or rye flour. These flours add more fiber and a nutty flavor, but they may require a little more water since they absorb more liquid.
Vegan substitutions: To make the bread vegan, simply replace the sunflower oil with a plant-based oil or dairy-free butter. You can also use other neutral oils like olive or vegetable oil. These substitutions will maintain the bread’s soft texture and rich flavor.
Frequently Asked Questions
Why didn’t my dough rise?
If your dough didn’t rise, the yeast may have been inactive due to expired yeast, incorrect water temperature, or an environment that was too cold for fermentation. Ensure the water is room temperature and the yeast is fresh.
Can I use fresh yeast instead of dry yeast?
Yes, fresh yeast can be substituted for dry yeast. Use about three times the amount of fresh yeast compared to dry yeast. Dissolve it in warm water, just as you would with dry yeast.
How can I make my bread more flavorful?
You can add herbs like rosemary, thyme, or garlic to enhance the flavor. Another option is using part whole wheat or rye flour for a more complex, nutty taste.
What’s the best way to store homemade bread?
Store bread in a paper bag or bread box at room temperature for 2-3 days. For longer storage, wrap it tightly and freeze it. Reheat in the oven for a fresh-from-the-oven taste.
Can I make this recipe in a bread machine?
Yes, you can use a bread machine by following the manufacturer’s instructions for dough preparation. You may need to adjust the order of ingredients.
Why is my bread too dense?
Dense bread can result from not enough rising time, insufficient yeast activation, or overmixing the dough. Ensure the dough rises fully, and be careful not to overwork it.

Quick German Bread
Description
This quick German bread recipe combines simplicity with classic German flavors, resulting in a chewy, flavorful loaf that can be ready in just a few hours. Perfect for beginners and experienced bakers alike, this recipe skips the lengthy preparation time of traditional German bread but still delivers a satisfying, homemade loaf. With a few basic ingredients and straightforward techniques, you can enjoy the smell of freshly baked bread in your kitchen without the hassle.
Ingredients
- 350 ml of water (room temperature)
- 1 tablespoon of sugar
- 8 grams of dry yeast
- 25 ml of sunflower oil
- 500 grams of flour (plus extra for dusting)
Instructions
Step 1: Yeast Activation
In a large bowl, combine 350 ml of water, 1 tablespoon of sugar, and 8 grams of dry yeast. Stir gently to dissolve the sugar and yeast. Cover the bowl with a clean cloth and let it sit for 5 minutes. The mixture should become frothy and bubbly, signaling that the yeast is active and ready to use.
Step 2: Incorporate Oil and Flour
Once the yeast has activated, add 25 ml of sunflower oil to the mixture. Gradually sift in 500 grams of flour, stirring as you go. Mix until a sticky dough forms, being careful not to overmix.
Step 3: First Rise
Cover the bowl with a cloth again and let the dough rise in a warm, draft-free area for 1 hour, or until it has doubled in size.
Step 4: Second Mixing and Resting
After the first rise, stir the dough for about 30 seconds to release some of the air. Cover the bowl and let it rest for another 30 minutes.
Step 5: Shaping the Dough
Lightly flour your work surface and roll the dough into a rectangle. Fold the dough over itself to create layers, then cover and let it rest for 10 minutes. Shape the dough into a loaf, boule, or rolls, depending on your preference.
Step 6: Final Shaping and Baking
Preheat the oven to 230°C (446°F). Transfer the shaped dough to a parchment-lined baking tray, and use a sharp knife to make a few decorative slashes on top. Bake for 30-40 minutes, or until the crust is golden brown and the bread sounds hollow when tapped on the bottom.
Step 7: Cool and Serve
Remove the bread from the oven and allow it to cool on a wire rack for at least 15 minutes. Once cooled, slice and serve warm or at room temperature. Pair with butter, jam, or enjoy alongside soups and stews.
Notes
- Yeast Activation Tip: If your yeast doesn’t become frothy after 5 minutes, it may be inactive. Try using fresh yeast and ensure the water is at room temperature, not too hot.
- Dough Resting: The rest periods in this recipe are crucial for developing gluten, which gives the bread its chewy texture. Don’t skip the rest times to ensure the best results.
- Shaping: Get creative with your bread shapes! Whether you make a rustic boule or traditional loaf, the final shape is up to you. Just be sure to make those slashes before baking to help the bread expand properly.
- Storage: Store leftover bread in a paper bag or wrap it in a cloth to preserve its crust. Bread can also be frozen—just slice it before freezing for easier thawing later.






Making a loaf right now! I noted no salt in this recipe. Just making sure that’s correct?
Gina how did the bread turn out?
Other recipes for the same kind of bread have salt in them. Bread needs some salt.
I noticed there was no salt in this recipe. Is this correct?
SALT is MISSING! Add SALT to the recipe!
★