

The Rise of No-Bake Dessert Pinwheels
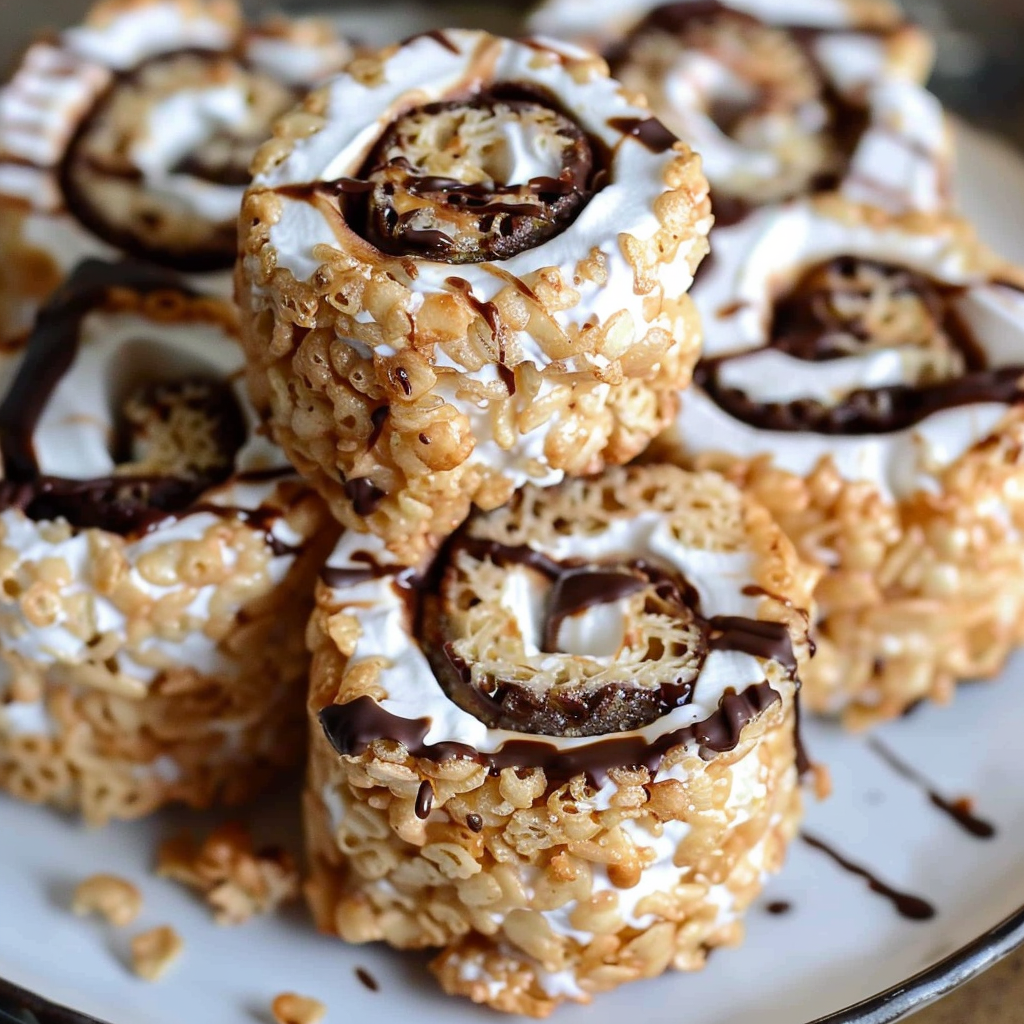
If you’re looking for a quick, crowd-pleasing dessert, few treats are as fun and nostalgic as Rice Krispie pinwheels with marshmallow creme. These no-bake pinwheel desserts are a playful twist on the classic Rice Krispie Treats and bring the flavor of s’mores indoors — without a campfire. Rolled up with marshmallow fluff, graham cracker crumbs, and mini chocolate chips, this dessert delivers gooey, chocolatey bites in a cute, sliceable format.
The surge in popularity of no-bake desserts is no coincidence. With less cleanup, no oven needed, and foolproof methods, recipes like these are perfect for busy families, beginner bakers, and even seasoned pros who want a stress-free treat. According to Wikipedia’s entry on no-bake cookies, these types of confections are traditionally simple, require minimal ingredients, and often rely on refrigeration to set—just like these pinwheels.
This treat also fits right into today’s trend of shareable dessert recipes that are as fun to look at as they are to eat. On Pinterest, you’ll find dozens of creative pinwheel dessert recipes, but few combine the nostalgic crunch of Rice Krispies with the creamy sweetness of marshmallow creme and melty chocolate chips like this one does. Looking to spice up your dessert game? This could be your new go-to.
What Are Rice Krispie Pinwheels with Marshmallow Creme?
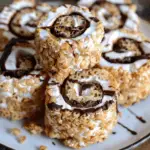
Rice Krispie pinwheels with marshmallow creme are a fun, rolled-up version of the beloved Rice Krispie Treats. Instead of pressing the mixture into a square pan and slicing them into bars, the gooey cereal base is spread into a thin layer, topped with sweet fillings like marshmallow creme and mini chocolate chips, then rolled tightly into a log and sliced into pinwheel-shaped bites.
What makes these treats unique is their resemblance to traditional s’mores, but with a no-bake twist. The addition of graham cracker crumbs in the cereal base replicates the signature crunch and flavor of a graham cracker, while the marshmallow fluff adds an extra creamy texture that binds perfectly with the chocolate. This fusion gives you that nostalgic campfire s’mores vibe in every chewy bite.
Unlike traditional Rice Krispie Treats, this version takes things up a notch both in presentation and flavor. The spiral shape not only looks impressive on dessert trays, but also makes portioning simple and kid-friendly. For example, Rice Krispies on Wikipedia outlines how the cereal was originally designed to be light and crispy — ideal for forming into structured desserts like these.
Pinterest boards like S’mores Desserts are filled with takes on this flavor combo, but few are as mess-free and travel-friendly as these pinwheels. Whether you’re packing school lunches or setting up a party platter, this recipe turns a simple snack into a fun, eye-catching dessert.
Why You’ll Love This No-Bake Recipe
There’s a reason Rice Krispie pinwheels with marshmallow creme are becoming a kitchen favorite—they check all the boxes for the perfect easy dessert. Whether you’re short on time or want a fun project with the kids, these no-bake treats deliver big on flavor and presentation without much effort.
Here’s why this recipe belongs in your dessert rotation:
-
Quick and Simple Preparation
From start to finish, this recipe takes under an hour, including chill time. No oven, no complicated techniques—just a saucepan, a baking sheet, and a handful of familiar ingredients. -
Minimal Ingredients, Maximum Flavor
The six main ingredients—butter, mini marshmallows, Rice Krispies cereal, graham cracker crumbs, marshmallow creme, and mini chocolate chips—come together to recreate a gooey, chocolatey s’mores flavor in every bite. As noted on Wikipedia’s marshmallow page, this classic confection is prized for its ability to add softness and sweetness to a wide range of desserts. -
Perfect for All Ages
Kids love the soft, chewy texture and chocolatey swirls, while adults appreciate the nostalgic taste of campfire s’mores. Plus, the pinwheel shape makes these treats ideal for parties, bake sales, and holiday spreads. -
Great for Gifting and Sharing
Because they’re individually sliced and hold their shape well, these pinwheels are easy to package and share. On Pinterest’s no-bake dessert boards, you’ll find countless ways to dress them up for events or holidays using sprinkles, candy drizzle, or themed wrappers. -
Creative and Customizable
With just a few tweaks, you can make this recipe your own. Add a peanut butter layer, use different chocolate chips, or try colored marshmallow fluff for a festive touch.
In a world where time is short and sweet cravings hit fast, these Rice Krispie treat pinwheels deliver a satisfying solution. They blend familiar ingredients into a dessert that feels fresh, fun, and totally irresistible.
Ingredients Breakdown & Substitutions
The beauty of Rice Krispie pinwheels with marshmallow creme lies in their simplicity. Each ingredient plays a specific role in creating the perfect balance of texture and flavor. Below, you’ll find a breakdown of the essential ingredients along with recommended substitutions and add-ins for customizing your no-bake dessert to suit your taste or dietary needs.
Main Ingredients
-
3 tablespoons unsalted butter
This helps melt the marshmallows smoothly and adds richness. You can substitute with vegan butter or coconut oil for a dairy-free version. -
1 (10 oz) bag mini marshmallows
These create the base for the treat, binding everything together. Mini versions melt more quickly, but you can also use chopped large marshmallows as needed. According to Wikipedia’s marshmallow article, traditional marshmallows are aerated confections made from sugar and gelatin, giving them that perfect meltability. -
5 cups Rice Krispies cereal
This provides the signature crunch. For gluten-free options, look for certified gluten-free crisped rice cereal, as many mainstream brands contain malt flavoring. Learn more on the Rice Krispies Wikipedia page. -
1 ½ cups graham cracker crumbs
These add that classic s’mores flavor. Swap with gluten-free graham crackers, or substitute with crushed digestive biscuits or Nilla wafers if desired. -
7 oz marshmallow crème (fluff)
This layer adds creamy sweetness and helps the chocolate chips adhere. If you don’t have fluff, you can use softened marshmallows, but the texture may differ. Check out Pinterest’s marshmallow creme recipes for creative alternatives. -
1 ½ cups mini chocolate chips
These melt slightly when rolled, giving you gooey chocolate pockets in every bite. Substitute with white chocolate, dark chocolate, or even candy-coated chocolate chips for a festive touch. Learn more about chocolate chips on Wikipedia.
Optional Add-ins & Substitutions
-
Peanut Butter or Nutella
Spread a thin layer over the marshmallow fluff for a richer flavor. -
Chopped nuts or pretzels
Add crunch and contrast—just be mindful of allergies. -
Sprinkles or crushed candy
These make the treats extra fun for birthdays or holidays. -
Vegan or allergy-friendly swaps
Use plant-based butter, gelatin-free marshmallows, and dairy-free chocolate to make this recipe suitable for restricted diets.
This ingredient list is not only simple but flexible. And for more unique twists, browse Rice Krispie treat variations on Pinterest to discover countless ways to make this recipe your own.
Tools and Equipment Needed
Making Rice Krispie pinwheels with marshmallow creme doesn’t require fancy tools—just a few kitchen basics to ensure smooth preparation and easy cleanup. Here’s everything you’ll need:
-
Large saucepan or pot
Use a heavy-bottomed saucepan to melt the butter and mini marshmallows evenly without burning. -
10×15-inch jelly roll pan or baking sheet
This size gives the perfect thickness for rolling. A rimmed pan is best to contain the mixture. -
Parchment paper
Essential for lining your pan and helping you roll the pinwheels cleanly. Leave an overhang to lift the base out. -
Greased spatula or wax paper
Use a buttered spatula or wax paper to evenly press the mixture into the pan without sticking. -
Offset spatula or butter knife
Great for evenly spreading the marshmallow crème layer. -
Refrigerator space
Chilling the rolled log helps it firm up for cleaner slicing. -
Sharp knife
Use a serrated or non-stick knife to slice the pinwheels without tearing them.
These basic tools are likely already in your kitchen, and they make it easy to whip up this no-bake dessert with minimal fuss. Need more inspiration on similar dessert tools and styling ideas? Check out Pinterest’s pinwheel dessert boards.
Step-by-Step Instructions for Rice Krispie S’mores Pinwheels
Creating these Rice Krispie pinwheels is a simple, satisfying process. Follow these steps to ensure perfectly swirled, delicious results every time.
Step 1: Prepare the Pan
Line a 10×15-inch jelly roll pan with parchment paper, leaving extra on the sides for easy lifting. Lightly grease the parchment to prevent sticking.
Step 2: Melt the Marshmallows
In a large saucepan, melt 3 tablespoons unsalted butter over low heat. Add 1 (10 oz) bag mini marshmallows and stir constantly until completely melted and smooth.
Step 3: Mix in Dry Ingredients
Quickly remove the pan from heat and stir in 5 cups Rice Krispies cereal and 1½ cups graham cracker crumbs. Mix until everything is evenly coated and sticky.
Step 4: Spread the Mixture
Transfer the mixture to the prepared pan. Use a greased spatula or wax paper to press it down into an even layer. Make sure it’s tightly packed and level—this helps during rolling.
Step 5: Cool Slightly
Let the base cool for 10 minutes to prevent the marshmallow crème from melting when added.
Step 6: Add the Filling
Spread 7 oz of marshmallow crème evenly over the cooled base using an offset spatula. Be gentle to avoid tearing the surface.
Step 7: Sprinkle Chocolate Chips
Sprinkle 1½ cups mini chocolate chips evenly across the marshmallow layer. Press them down lightly so they stick. For a visual, scroll through Pinterest’s s’mores desserts for layout inspiration.
Step 8: Roll the Pinwheel
Starting from the long edge, carefully roll the treat into a tight log, using the parchment paper to guide and shape it. Roll slowly to keep everything aligned.
Step 9: Chill the Log
Wrap the rolled log tightly in parchment and refrigerate for 30 minutes to firm it up for slicing.
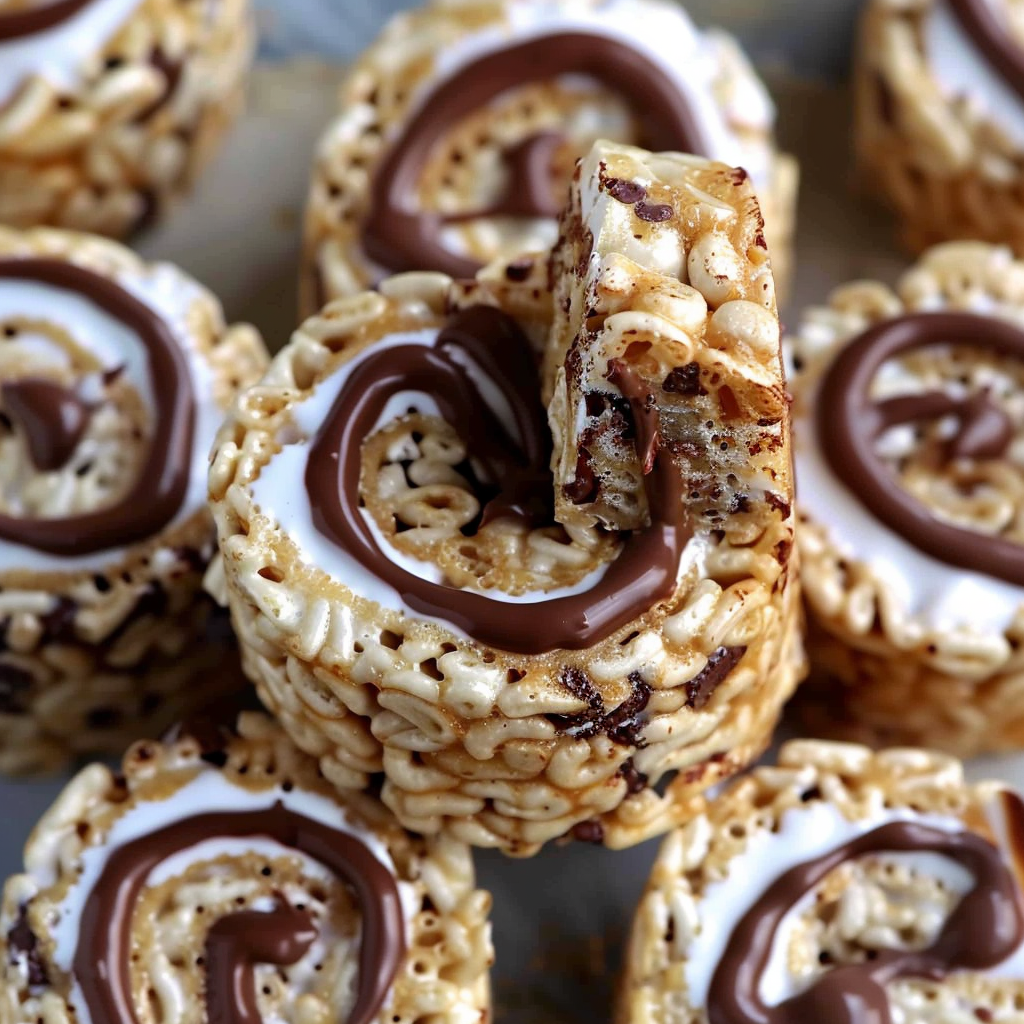
Step 10: Slice and Serve
Unwrap the chilled log and use a sharp knife to slice into 1-inch thick pinwheels. Serve immediately or store for later.
This method makes it easy to achieve uniform, photogenic swirls with every slice—ideal for dessert trays, lunchboxes, or casual snacking.
Tips for Perfect Pinwheels Every Time
Even simple recipes benefit from a few expert tips. Here’s how to make sure your Rice Krispie pinwheels with marshmallow creme turn out perfect every time:
-
Don’t overheat the marshmallows
Low heat is best. Overheating causes the mixture to harden too quickly. -
Grease your hands and tools
Use butter or non-stick spray to handle sticky ingredients easily. -
Let the base cool slightly
If it’s too hot, the marshmallow fluff may melt and become difficult to spread. -
Roll tightly, but gently
Avoid squishing the layers—use the parchment paper to help control the shape. -
Chill before slicing
Refrigeration firms up the log, making clean slicing much easier. -
Use a sharp, non-stick knife
A serrated knife or one sprayed with cooking spray ensures smooth cuts. -
Store properly
Keep in an airtight container at room temperature for up to 3 days, or refrigerate for up to a week.
By following these tips, you’ll create treats that look as good as they taste—just like the ones on Pinterest’s Rice Krispie treat variations.
Creative Variations of Rice Krispie Pinwheels
Once you’ve mastered the basic recipe, there are endless ways to make these pinwheels your own. Here are some delicious and fun variations:
-
Holiday Edition
Add red and green sprinkles for Christmas or pastel-colored chocolate chips for Easter. Top with a drizzle of white chocolate for a snowy effect. -
Peanut Butter S’mores
Spread a thin layer of peanut butter or Nutella between the marshmallow and chocolate chip layers for extra richness. -
Cookies and Cream
Swap out the graham cracker crumbs for crushed Oreos and use white chocolate chips for a cookies-and-cream twist. -
Birthday Pinwheels
Add rainbow sprinkles and use colorful marshmallows or flavored fluff. Great for kids’ parties. -
Trail Mix Style
Mix in chopped nuts, pretzels, and dried fruit with the cereal base for a sweet-and-salty variation.
For even more inspiration, explore the no-bake dessert ideas on Pinterest that show how to adapt these treats for any season or occasion.
How to Store and Serve Rice Krispie Pinwheels
Proper storage keeps these treats fresh and chewy, while creative presentation makes them party-ready.
Storage Tips:
-
Store pinwheels in an airtight container at room temperature for up to 3 days.
-
For longer freshness, refrigerate for up to 7 days. Let them sit at room temperature for 10–15 minutes before serving to soften.
-
To freeze, wrap individual pinwheels in plastic wrap and store in a freezer bag for up to 1 month. Thaw at room temperature.
Serving Ideas:
-
Serve on a dessert platter with other bite-sized treats.
-
Pack into school lunches as a sweet surprise.
-
Wrap individually with ribbon for edible party favors.
These no-bake pinwheel desserts are perfect for any occasion, and they hold up beautifully whether you’re serving them fresh or saving some for later.
Are Rice Krispie Treats Gluten-Free?
This question comes up often, and the answer depends on the brand of ingredients you use.
-
Traditional Rice Krispies cereal contains malt flavoring, which is derived from barley and is not gluten-free.
-
To make a gluten-free version, use a certified gluten-free crisped rice cereal. Brands like Nature’s Path offer gluten-free alternatives.
-
Substitute gluten-free graham crackers to complete the swap.
-
Always double-check labels, especially for marshmallows and chocolate chips, which may contain traces of gluten.
Want to learn more? Check out Rice Krispies on Wikipedia for ingredient details and product history.
FAQs
Can I use large marshmallows instead of mini?
Yes. Chop them before melting, and measure by weight (10 oz). Stir continuously for even melting.
How do I keep Rice Krispie treats soft?
Avoid overcooking the marshmallows and store in an airtight container. Too much heat = hard treats.
What can I use instead of marshmallow crème?
You can melt additional marshmallows with a bit of butter as a substitute, though the consistency will be different.
Can I freeze Rice Krispie pinwheels?
Absolutely. Wrap each slice in plastic, then freeze in a zip-top bag. Thaw at room temperature before eating.
Why won’t my treats stick together?
This usually means the marshmallow-to-cereal ratio is off or the mixture was too dry. Stick to the recipe quantities and stir well.
Rice Krispie Pinwheels with Marshmallow Creme
- Author: Naomi
Description
Bring campfire vibes into your kitchen with these S’mores Rice Krispie Treat Pinwheels. Rolled up with marshmallow crème, graham cracker crumbs, and mini chocolate chips, these no-bake desserts are fun, fast, and full of nostalgic flavor. Perfect for parties, gifting, or a weekday treat, they offer gooey, chewy deliciousness in every swirled slice.
Ingredients
- 3 tablespoons unsalted butter
- 1 (10 oz) bag mini marshmallows
- 5 cups Rice Krispies cereal
- 1 ½ cups graham cracker crumbs
- 7 oz marshmallow crème (fluff)
- 1 ½ cups mini chocolate chips
Instructions
- Line a 10×15-inch jelly roll pan with parchment paper, leaving an overhang on the sides to lift it later. Lightly grease the parchment.
- In a large saucepan, melt the butter over low heat. Add the mini marshmallows and stir until completely melted and smooth.
- Remove from heat and quickly stir in the Rice Krispies cereal and graham cracker crumbs until evenly coated.
- Transfer the mixture to the prepared pan. Press it down into an even layer using a greased spatula or wax paper.
- Let the base cool for about 10 minutes. Then, spread marshmallow crème evenly over the entire surface.
- Sprinkle mini chocolate chips over the marshmallow layer, pressing them down lightly so they stick.
- Starting from the long edge, carefully roll the treat into a tight log, using the parchment paper to help guide and shape it.
- Once rolled, wrap the log tightly in parchment and refrigerate for 30 minutes to firm up.
- Remove from the fridge, unwrap, and slice into pinwheels about 1 inch thick. Serve and enjoy!
Notes
-
Use fresh marshmallows for the best texture—stale ones won’t melt properly.
-
Press the cereal base evenly and firmly to make rolling easier.
-
Roll while the base is still slightly warm to avoid cracks.
-
Chill well before slicing to keep the pinwheels neat and uniform.
-
Store extras in an airtight container to preserve freshness and chewiness.


