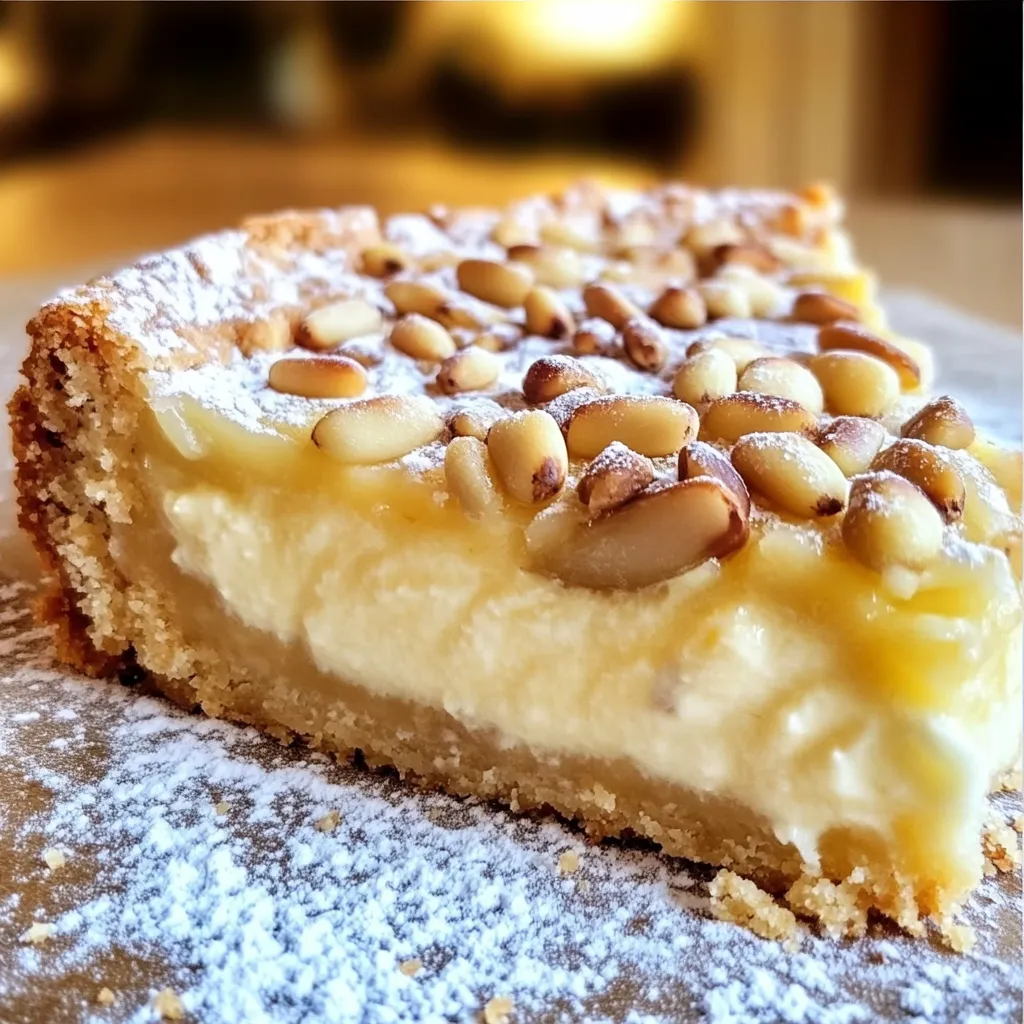
If you’re searching for an authentic Italian dessert that’s as comforting as it is impressive, look no further than Torta della Nonna. Translated as “Grandmother’s Cake,” this classic Tuscan tart features a delicate shortcrust pastry filled with silky lemon-scented custard, topped with pine nuts and a dusting of powdered sugar. It’s simple, rustic, and deeply nostalgic—a dessert many Italians grew up enjoying at their nonna’s table.
This beloved dessert is the perfect balance of textures and flavors: buttery pastry, smooth and fragrant custard, the subtle crunch of pine nuts, and a light sweetness that lingers without overwhelming. Whether you’re baking it for Sunday dinner, a holiday table, or simply to bring a bit of Italy into your kitchen, this recipe is a keeper.
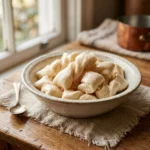
Let’s begin with the first steps of this traditional treat by making the pasta frolla (shortcrust pastry) and preparing the rich, creamy crema pasticcera.
INGREDIENTS YOU’LL NEED:
For the pastry (pasta frolla):
2 1/2 cups (300g) all-purpose flour
1/2 cup (100g) granulated sugar
1/2 teaspoon baking powder
Pinch of salt
1/2 cup (115g) unsalted butter, cold and cubed
2 large eggs
Zest of 1 lemon
For the custard filling (crema pasticcera):
2 cups (500ml) whole milk
1/2 cup (100g) granulated sugar
4 large egg yolks
1/4 cup (30g) cornstarch
Zest of 1 lemon
1 teaspoon vanilla extract
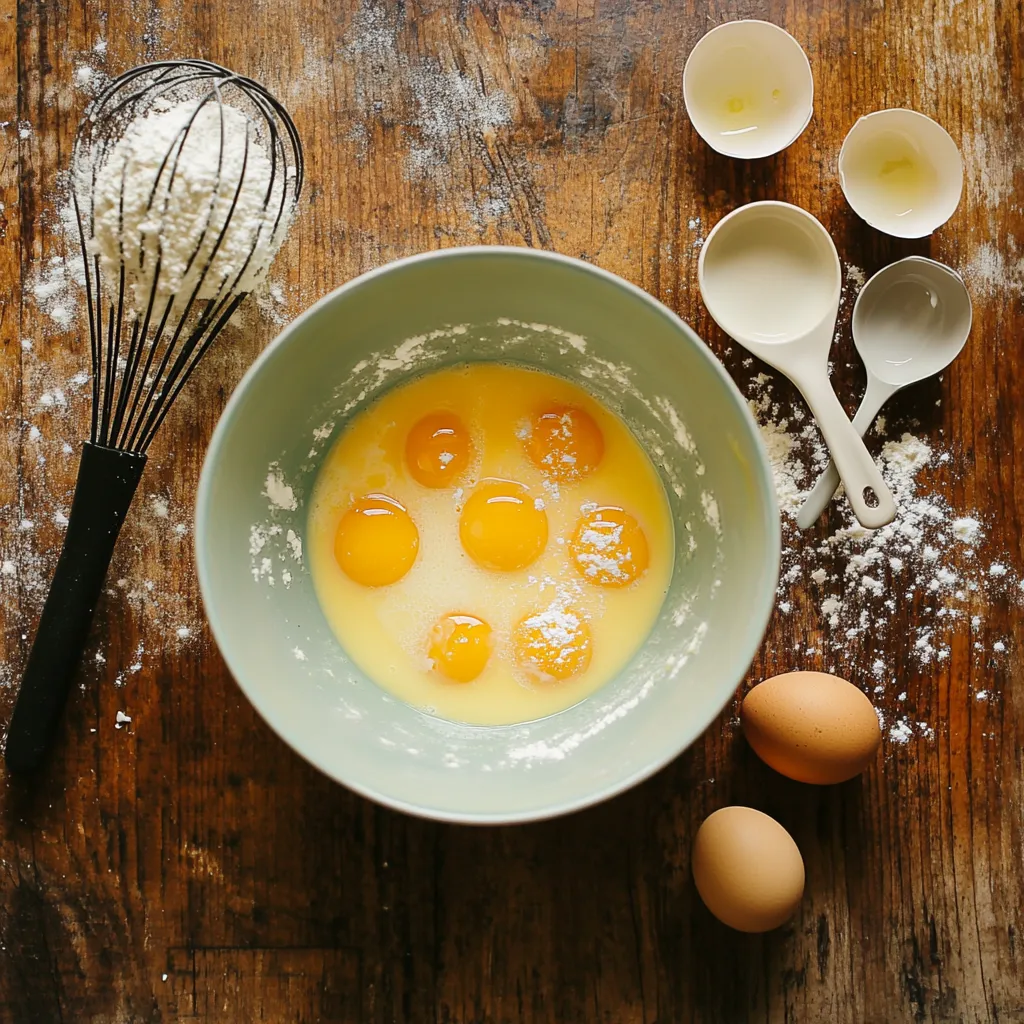
STEP 1: MAKE THE PASTRY DOUGH
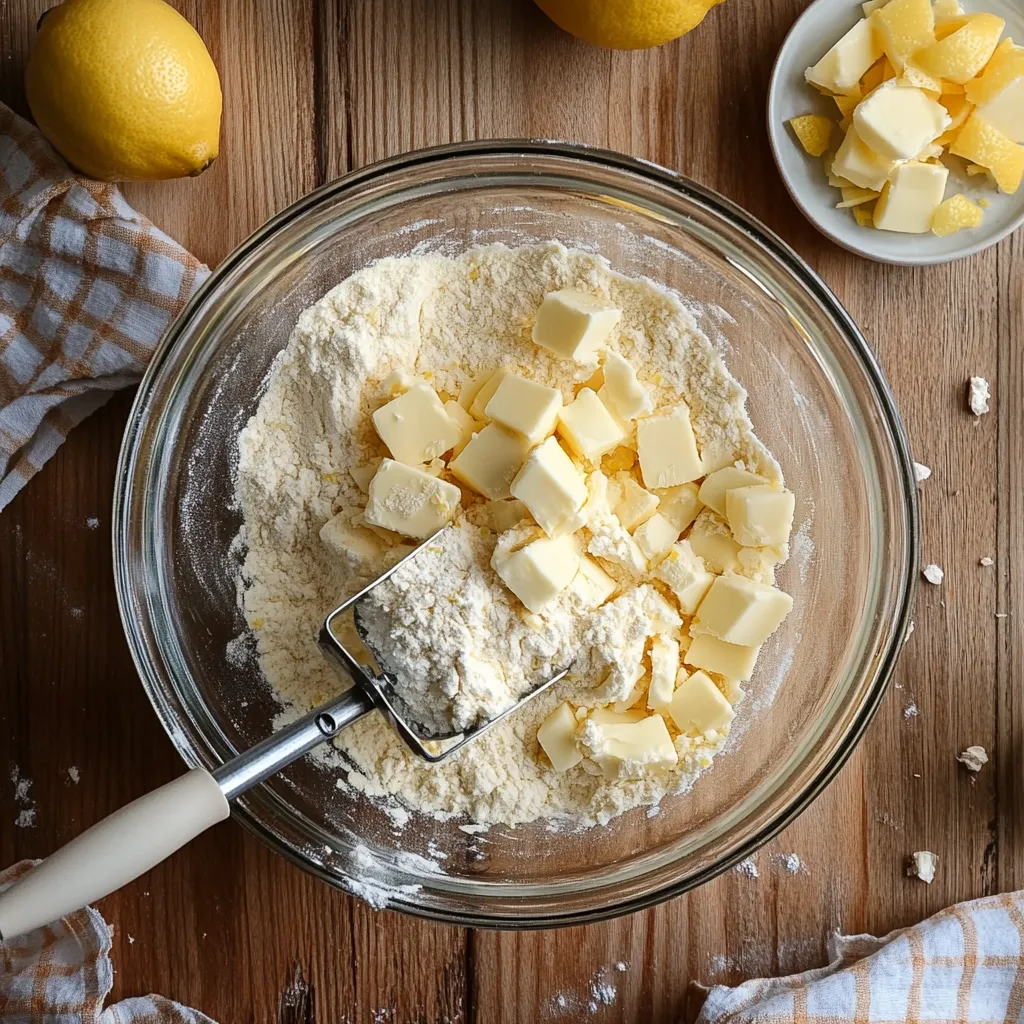
Start by making the base of your tart. In a large bowl, whisk together the flour, sugar, baking powder, salt, and lemon zest. The lemon zest gives the crust a subtle citrus aroma that pairs beautifully with the custard filling.
STEP 2: CUT IN THE BUTTER
Add the cold, cubed butter to the dry ingredients. Use your fingertips or a pastry cutter to rub it into the flour until the mixture resembles coarse crumbs. This step is key to creating a tender, flaky crust. The goal is to keep the butter cold so that it melts during baking, creating small pockets in the dough for a light texture.
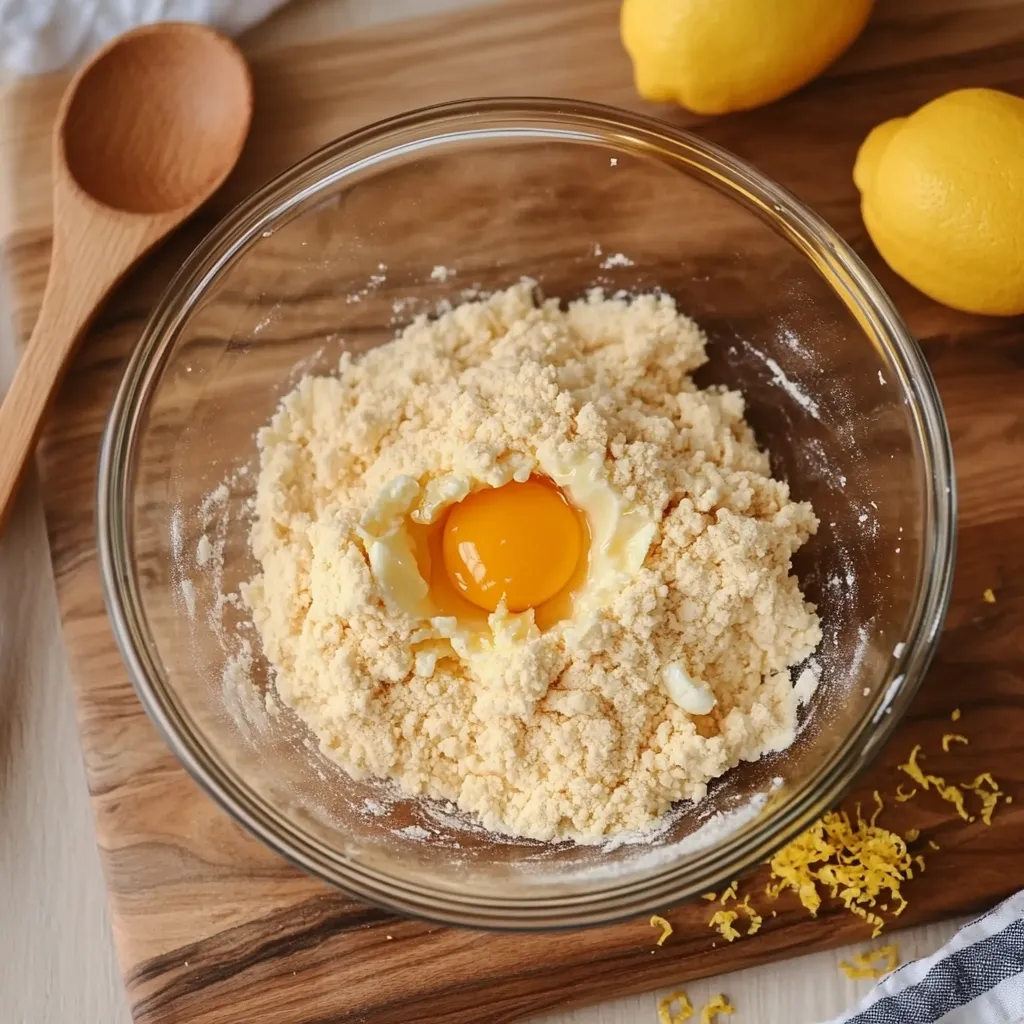
STEP 3: ADD EGGS AND FORM THE DOUGH
Next, add the two eggs to the flour mixture. Mix until a smooth dough forms. You can do this by hand or with a fork—just be careful not to overwork the dough. Once it comes together, shape it into a disk, wrap it in plastic wrap, and chill it in the refrigerator for at least 30 minutes. Chilling helps relax the gluten and firm the butter, making the dough easier to roll out later.
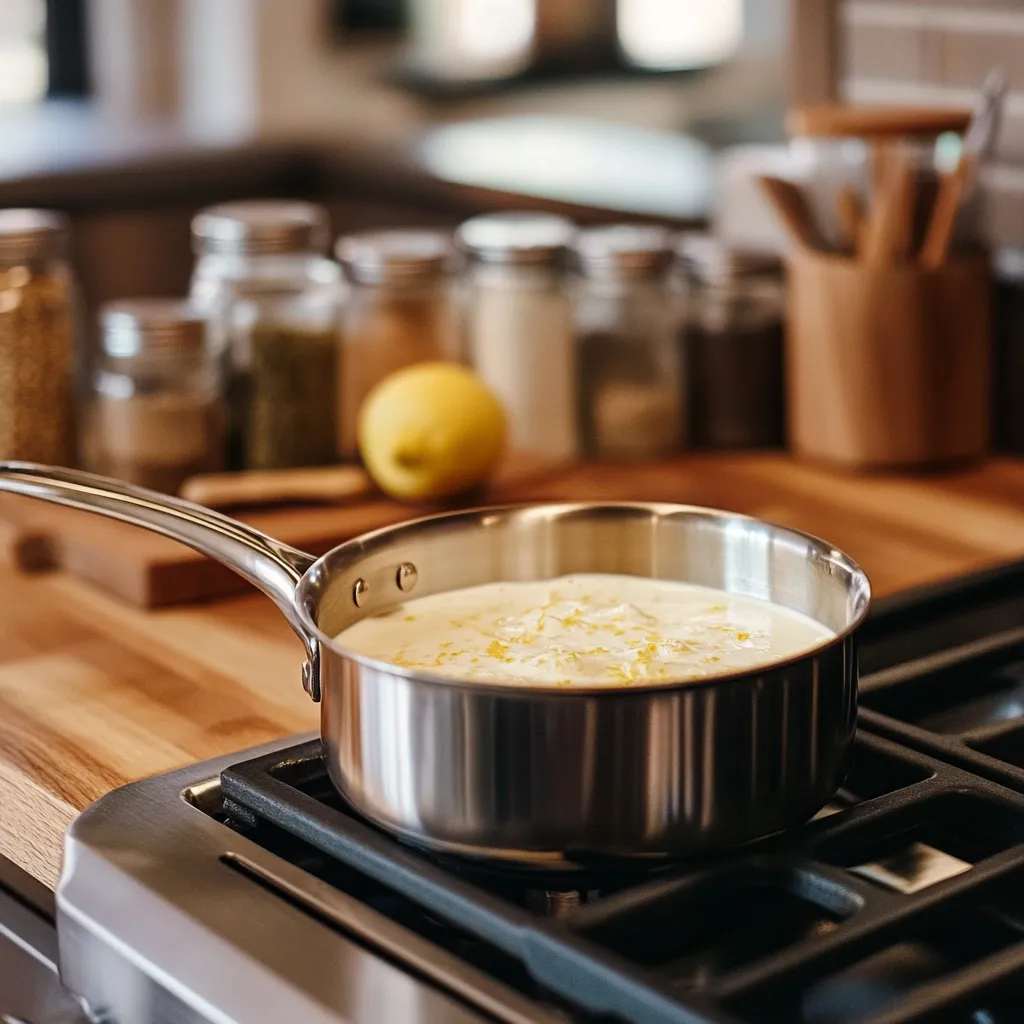
STEP 4: PREPARE THE CUSTARD FILLING
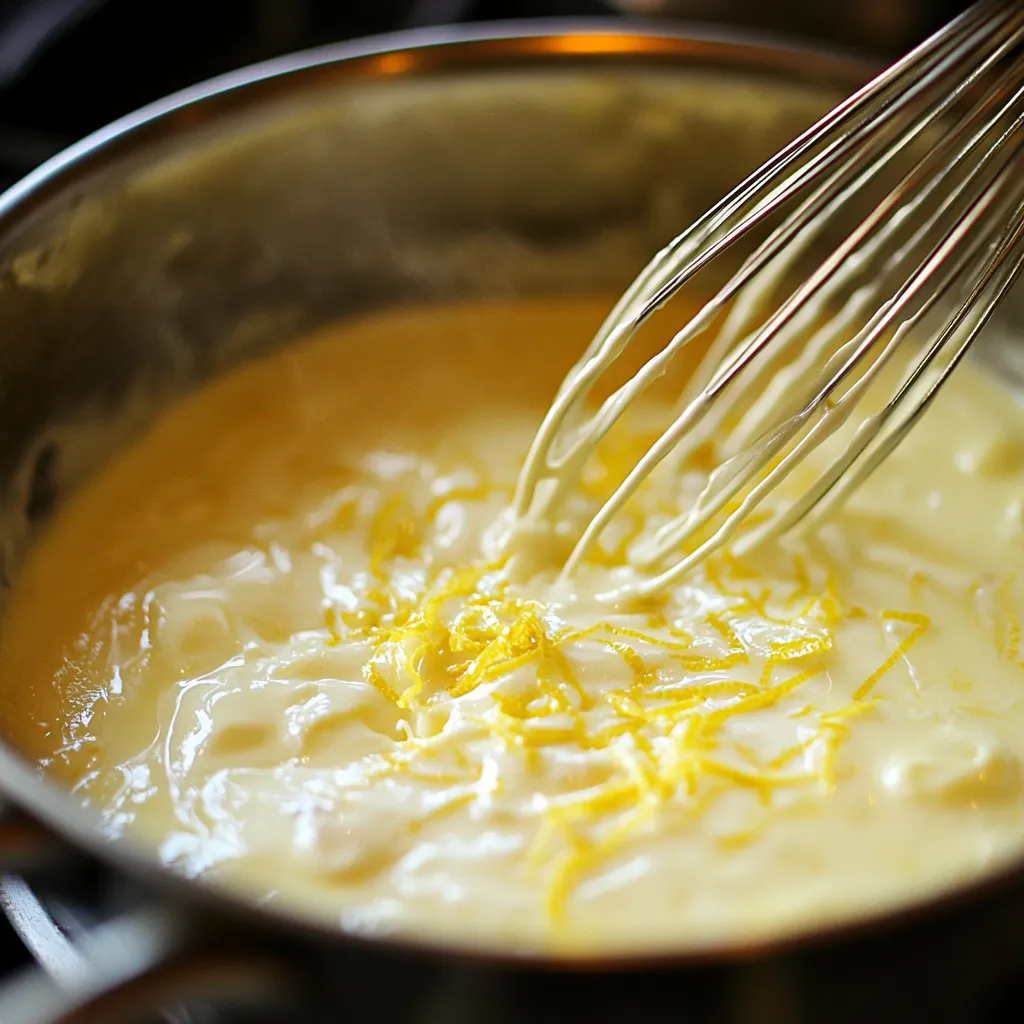
While your dough chills, begin making the crema pasticcera. In a medium saucepan, heat the milk and lemon zest over medium heat until just steaming. Be careful not to let it boil—you want it hot enough to infuse the lemon flavor, but not scalded.
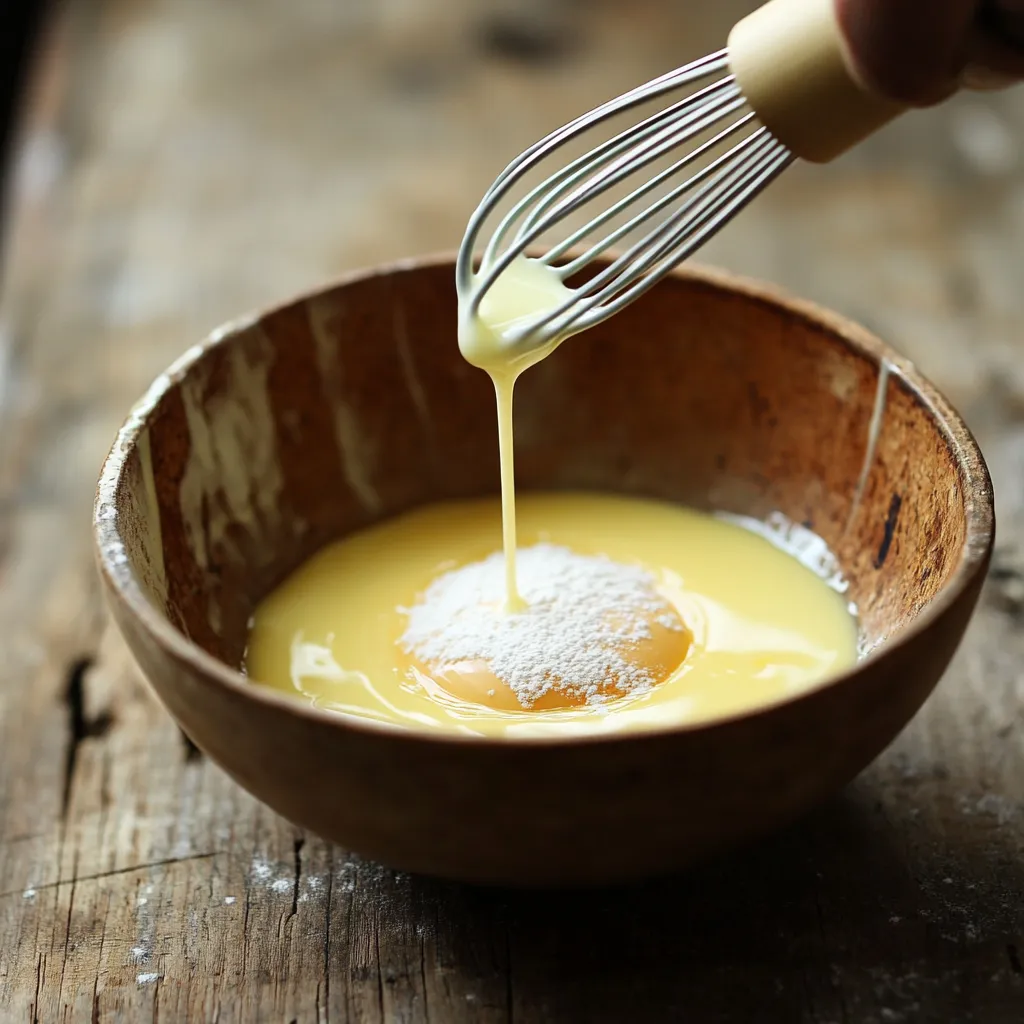
STEP 5: WHISK EGG YOLKS, SUGAR, AND CORNSTARCH
In a separate bowl, whisk together the egg yolks, sugar, and cornstarch until smooth and pale. This mixture will thicken the custard. Whisking well at this stage ensures a smooth, lump-free filling later on.
STEP 6: TEMPER THE EGG MIXTURE
Slowly pour the hot milk into the egg yolk mixture while whisking constantly. This step, known as tempering, prevents the eggs from scrambling by gradually raising their temperature.
COOK, ASSEMBLE, AND BAKE – BRINGING TORTA DELLA NONNA TO LIFE
With the dough chilling and the custard mixture prepped, it’s time to bring the heart of this dessert together. The next few steps are where the magic really happens—cooking the custard until thick and creamy, layering it into the pastry, and baking the tart until golden, fragrant, and ready to impress.
Let’s walk through how to complete the custard, assemble your tart, and get that classic golden finish that makes Torta della Nonna a true showstopper.
STEP 7: COOK THE CUSTARD UNTIL THICKENED
Pour the tempered egg and milk mixture back into the saucepan. Place it over medium heat and cook, whisking constantly, for about 5–7 minutes, or until the custard thickens to a pudding-like consistency. Keep the heat moderate and whisk steadily to prevent any lumps or scorching.
Once the custard has thickened, remove it from the heat and stir in the vanilla extract for added depth and warmth.
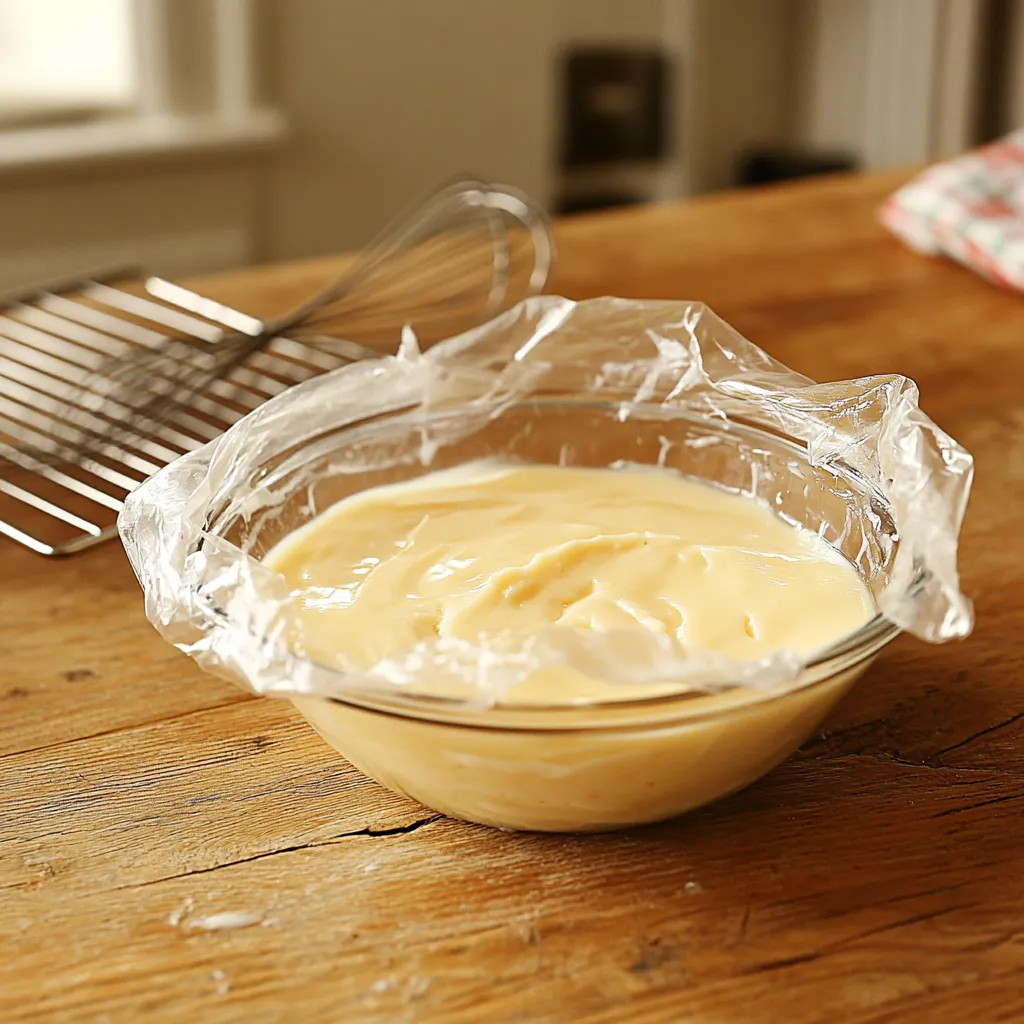
STEP 8: COOL THE CUSTARD
Transfer the custard to a bowl and cover the surface directly with plastic wrap (this prevents a skin from forming). Let it cool to room temperature, then refrigerate until it’s no longer warm. The custard can be made a day in advance if you’d like to break the prep into stages.
STEP 9: PREHEAT THE OVEN
When you’re ready to assemble the tart, preheat your oven to 350°F (175°C). Make sure your oven rack is in the center position for even baking.
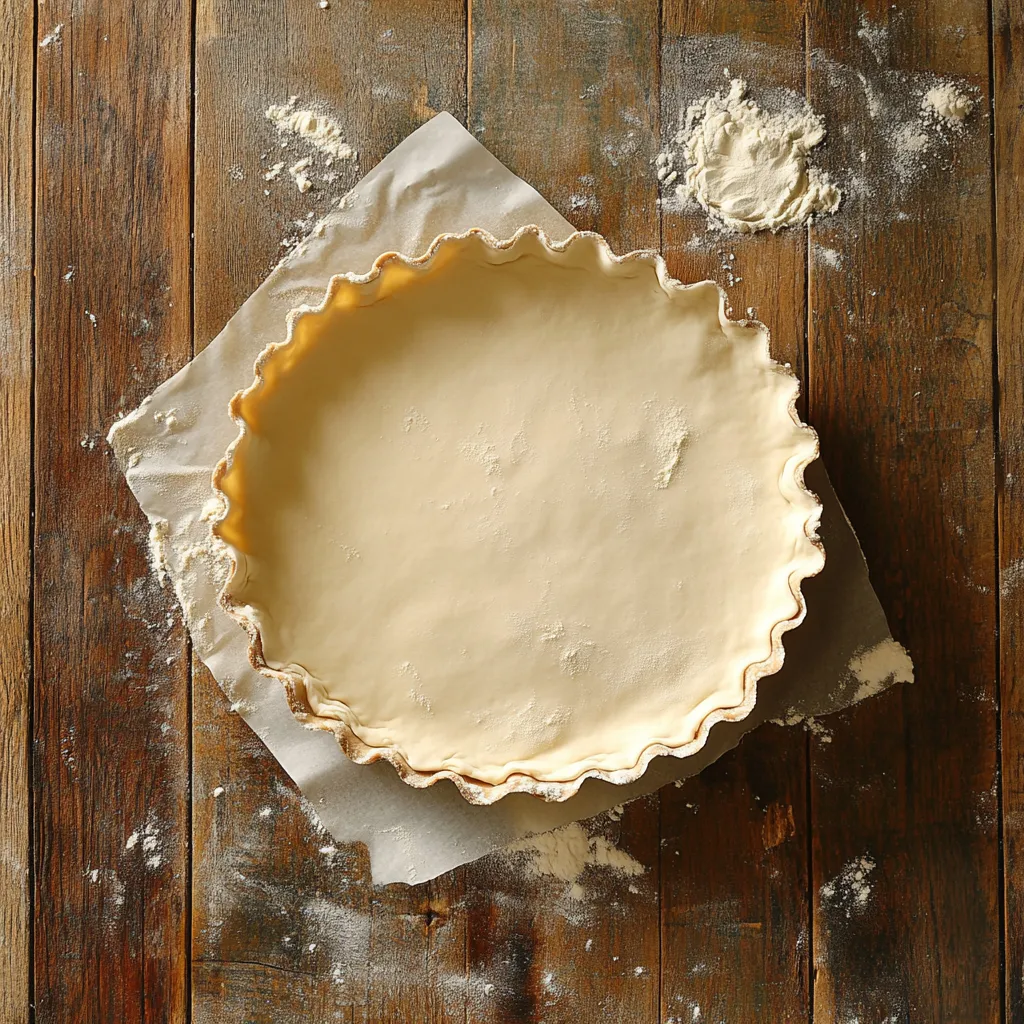
STEP 10: ROLL OUT THE DOUGH AND LINE THE TART PAN
Take the chilled pastry dough from the fridge. Divide it into two parts, using about two-thirds for the base. On a floured surface, roll it out into a circle about 1/8 inch thick and large enough to line a 9-inch tart pan. Carefully press the dough into the pan, making sure to get into the corners. Trim off any excess with a knife or by rolling your rolling pin across the top edge of the pan.
STEP 11: ADD THE CUSTARD FILLING
Once the tart shell is ready, pour the cooled custard into the crust and spread it evenly with a spatula. The filling should reach just below the top edge of the crust.
STEP 12: ADD THE TOP LAYER OR LATTICE
Roll out the remaining one-third of dough and carefully place it over the custard to create a full top layer, or cut it into strips and arrange in a lattice pattern. Gently seal the edges of the top crust to the bottom crust to keep the filling enclosed.
If you’re using a full top crust, you can cut a few small slits in the center for steam to escape.
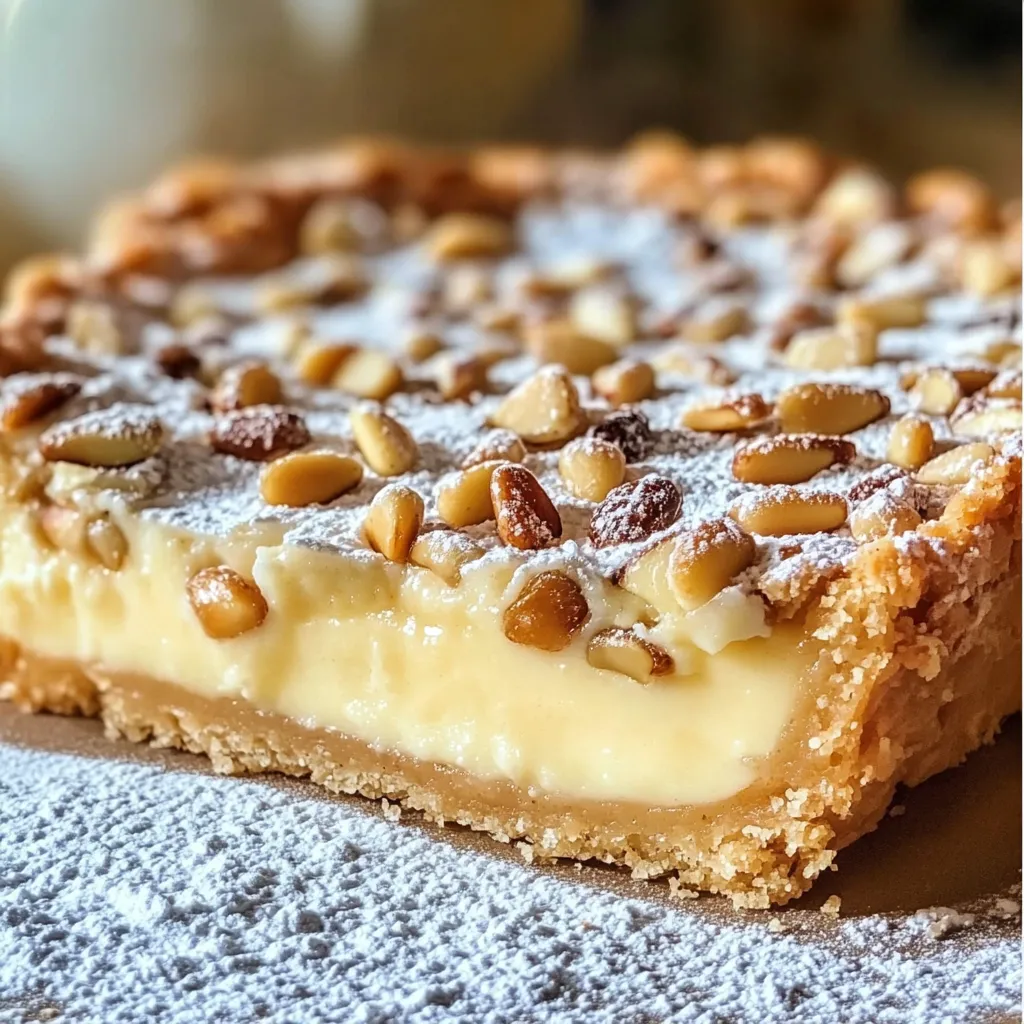
STEP 13: SPRINKLE WITH PINE NUTS
Evenly sprinkle 2 tablespoons of pine nuts over the top of the tart. These add a subtle crunch and traditional finish that makes Torta della Nonna so unique. For best results, press them lightly into the dough so they stick during baking.
STEP 14: BAKE TO GOLDEN PERFECTION
Place the tart in your preheated oven and bake for 35–40 minutes, or until the crust is golden brown and the pine nuts are lightly toasted. The top should feel set, and the crust will pull slightly away from the edges of the pan.
Keep an eye on it toward the end of baking to avoid over-browning. If needed, you can tent the top loosely with foil during the final 10 minutes.
STEP 15: COOL COMPLETELY AND DUST WITH POWDERED SUGAR
Once your Torta della Nonna is baked to a beautiful golden brown, remove it from the oven and let it cool completely in the tart pan. This is an important step—allowing the tart to rest ensures the custard sets properly and slices cleanly.
After it has cooled, dust the top generously with powdered sugar just before serving. This final touch not only adds a delicate sweetness but also gives the tart its signature look. Slice and serve at room temperature or chilled—either way, it’s a classic Italian dessert that delivers every time.
STEP 16: SLICE AND SERVE
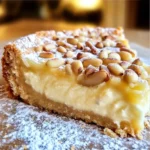
Once the tart has cooled and been dusted with powdered sugar, carefully remove it from the tart pan and transfer to a serving plate. Use a sharp knife to slice into wedges, making sure each piece showcases the creamy custard center and golden pine nut topping. Serve as-is, or pair with a dollop of whipped cream or a cup of espresso for an extra indulgent treat.
SERVING TIPS AND VARIATIONS:
Torta della Nonna is a dessert that shines all on its own, but it also lends itself beautifully to a variety of serving styles and subtle variations. Whether you’re keeping it traditional or giving it a modern twist, here are some ideas to help you make the most of this Italian classic.
Room Temperature or Chilled: This tart is delicious served slightly chilled or at room temperature. Let it sit out for 15–20 minutes before serving if refrigerated.
With Coffee or Tea: Pair a slice with espresso, cappuccino, or black tea for a truly authentic Italian-style dessert experience.
Add a Dollop of Whipped Cream: A small spoonful of freshly whipped cream (lightly sweetened and flavored with vanilla or lemon zest) complements the custard filling beautifully.
Dust Just Before Serving: Always dust the powdered sugar right before serving to keep the tart looking fresh and picture-perfect.
Slice Cleanly: For neat slices, use a sharp knife wiped clean between cuts. This helps maintain the layered presentation.
VARIATIONS
Open-Faced Version: Skip the top crust entirely and sprinkle the pine nuts directly onto the custard. This is a common and equally authentic presentation.
Lattice Crust: Instead of a full top crust, cut strips of dough and create a lattice pattern for a decorative finish that still allows the custard to peek through.
Orange Zest Instead of Lemon: Swap the lemon zest in the pastry and custard with orange zest for a warmer citrus note.
Nut-Free Option: Omit the pine nuts entirely if you’re avoiding nuts. The tart still works beautifully with just the custard and powdered sugar.
Chocolate Twist: Add mini chocolate chips to the custard for a richer, dessert-forward version. Fold them in once the custard has cooled.
Almond Custard Filling: Stir in a few drops of almond extract or use almond milk in place of whole milk for a subtle nutty variation.
FREQUENTLY ASKED QUESTIONS & FINAL THOUGHTS ON TORTA DELLA NONNA
Torta della Nonna is one of those timeless desserts that never fails to impress. With its silky custard center, buttery pastry, and the nutty crunch of toasted pine nuts, it strikes a perfect balance of comfort and elegance. Before you dive into your second slice (and you probably will), let’s go over a few frequently asked questions to help you master this Italian classic every time.
1. Can I make the tart in advance?
Yes. In fact, Torta della Nonna tastes even better the next day. You can make it up to 24 hours in advance and store it in the refrigerator. The flavors meld beautifully, and the custard sets perfectly for clean slicing.
2. What can I use if I don’t have pine nuts?
Pine nuts are traditional, but you can substitute with slivered almonds or chopped hazelnuts if needed. If you prefer to leave them off entirely, the tart will still be delicious—just dust with powdered sugar before serving.
3. Can I use store-bought pastry dough?
Yes, a good-quality shortcrust pastry or sweet tart crust can be used in place of homemade pasta frolla if you’re short on time. However, the flavor and texture of homemade dough really do elevate the dessert.
4. Can I freeze Torta della Nonna?
It’s not ideal to freeze the finished tart due to the custard filling, which can change texture after thawing. However, you can freeze the dough (pasta frolla) before assembling. Wrap it tightly and freeze for up to one month. Thaw in the fridge before using.
5. How do I prevent the top from over-browning?
If the top crust is browning too quickly, tent it loosely with aluminum foil during the last 10–15 minutes of baking. This will allow the tart to finish baking through without burning the top or pine nuts.
6. Can I make it without a top crust or with a lattice?
Yes. You can either leave it open-faced (with just the custard and pine nuts on top) or make a lattice crust for a decorative twist. Both options are traditional and equally delicious.
FINAL THOUGHTS: A SLICE OF ITALIAN TRADITION IN EVERY BITE
There’s something truly special about Torta della Nonna. It’s rustic yet refined, indulgent but not overly sweet, and carries with it a sense of tradition and warmth that only a heritage recipe can offer. Whether you’re enjoying it with family on a Sunday afternoon, serving it at a holiday gathering, or simply baking it to satisfy your sweet tooth, this dessert brings a little taste of Italy into your kitchen.
What makes this tart so memorable is its simplicity. With just a few everyday ingredients and some careful steps, you can recreate a classic that’s been passed down through generations. From the lemon-zested custard to the flaky pastry and toasted pine nuts, every layer is full of flavor and texture.
If you try this recipe, I’d love to hear how it turned out. Did you go with the full top crust or a lattice? Did you stick to tradition or add your own twist? Share your baking stories—and don’t forget to serve it with a sprinkle of powdered sugar and maybe a little espresso on the side.
Here’s to baking from the heart, honoring old recipes, and savoring each slice of something truly timeless. Buon appetito!
A true Italian classic, Torta della Nonna combines a buttery lemon-scented pastry with luscious vanilla-lemon custard and a sprinkle of pine nuts. Finished with powdered sugar, it’s a beautiful dessert that feels like a warm hug from an Italian grandmother.
Ingredients
Scale
For the pastry (pasta frolla)
2 1/2 cups (300g) all-purpose flour
1/2 cup (100g) granulated sugar
1/2 teaspoon baking powder
Pinch of salt
1/2 cup (115g) unsalted butter, cold and cubed
2 large eggs
Zest of 1 lemon
For the custard filling (crema pasticcera)
2 cups (500ml) whole milk
1/2 cup (100g) granulated sugar
4 large egg yolks
1/4 cup (30g) cornstarch
Zest of 1 lemon
1 teaspoon vanilla extract
For the topping
2 tablespoons pine nuts
Powdered sugar, for dusting
Instructions
1️⃣ Make the pastry dough: In a large bowl, whisk together flour, sugar, baking powder, salt, and lemon zest.
2️⃣ Cut in the butter: Add cold cubed butter and rub into the dry ingredients using your fingers or a pastry cutter until it resembles coarse crumbs.
3️⃣ Form the dough: Add the eggs and mix until a smooth dough forms. Wrap it in plastic wrap and refrigerate for at least 30 minutes.
4️⃣ Heat the milk: While the dough chills, gently heat the milk and lemon zest in a saucepan over medium heat until steaming, not boiling.
5️⃣ Whisk egg mixture: In a bowl, whisk together the egg yolks, sugar, and cornstarch until smooth and pale.
6️⃣ Temper the eggs: Slowly pour the hot milk into the egg yolk mixture, whisking constantly to avoid scrambling.
7️⃣ Cook the custard: Return the mixture to the saucepan. Cook over medium heat, whisking continuously, until thickened—about 5–7 minutes.
8️⃣ Finish and cool: Remove from heat, stir in vanilla extract, and transfer the custard to a bowl. Cover with plastic wrap directly on the surface and let cool.
9️⃣ Preheat the oven to 350°F (175°C).
🔟 Assemble the base: Roll out two-thirds of the chilled dough and line a 9-inch tart pan, trimming any excess.
1️⃣1️⃣ Fill the tart: Pour the cooled custard into the crust and spread evenly.
1️⃣2️⃣ Top with dough: Roll out the remaining dough and place it over the top (or make a lattice). Seal the edges well.
1️⃣3️⃣ Add pine nuts: Sprinkle the pine nuts evenly across the top of the tart.
1️⃣4️⃣ Bake for 35–40 minutes, or until the pastry is golden brown.
1️⃣5️⃣ Cool and serve: Let the tart cool completely, then dust generously with powdered sugar before serving.
Notes
For added depth, chill the baked tart for a few hours before serving—it’s wonderful slightly cold.
You can toast the pine nuts lightly before baking for extra flavor.
Make sure the custard is fully cooled before assembling to avoid a soggy crust.