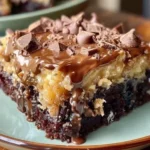
The Chocolate Peanut Butter Volcano Cake is a dessert that epitomizes indulgence. This culinary masterpiece combines the rich, velvety texture of chocolate with the creamy, savory taste of peanut butter, creating a flavor eruption that’s hard to resist. Its name, “volcano cake,” aptly describes the gooey, molten center that flows like lava upon slicing, making every bite a decadent experience.
Originating from a creative twist on traditional chocolate cakes, this dessert has quickly climbed the ranks in the world of sweet treats. Its popularity can be attributed to the harmonious blend of flavors that appeal to both chocolate and peanut butter enthusiasts alike. The cake’s unique appearance and texture have made it a favorite for celebrations, family gatherings, and those moments when only a seriously comforting dessert will do.
The journey of the Chocolate Peanut Butter Volcano Cake from a home kitchen experiment to a beloved dessert is a testament to the magic that happens when chocolate meets peanut butter. For a deeper dive into the history of chocolate cake, explore this Wikipedia article, which traces the evolution of chocolate cake through the ages. Meanwhile, peanut butter lovers can appreciate the process of making peanut butter by visiting this Wikipedia link. These resources provide fascinating insights into the ingredients that make our volcano cake so irresistible.
In crafting this dessert, bakers weave together the simplicity of a box cake with the sophistication of a homemade peanut butter filling. The result is a visually stunning and deliciously rich cake that promises to be the centerpiece of any dining table. As we delve into the ingredients and steps required to bring this volcanic delight to life, prepare to embark on a baking adventure that’s as rewarding as it is sweet.
Ingredients and Required Tools
Creating a Chocolate Peanut Butter Volcano Cake requires a blend of simple ingredients and basic kitchen tools. Here’s what you’ll need to embark on this baking journey:
Ingredients:
- 1 box of chocolate cake mix and the ingredients called for on the box (eggs, oil, and water)
- 1 cup of creamy peanut butter
- 1 cup of powdered sugar
- 1/2 cup of milk
- 1/2 cup of softened butter
- 1 teaspoon of vanilla extract
- 2 cups of chopped Reese’s Peanut Butter Cups
- 1 cup of semi-sweet chocolate chips
Required Tools:
- 9×13 inch baking dish
- Mixing bowls
- Electric mixer or whisk
- Measuring cups and spoons
- Spatula
The process begins with preparing the chocolate cake according to the package instructions, a straightforward task that sets the foundation for our volcanic creation. For those interested in exploring various chocolate cake mixes, Pinterest offers a wealth of inspiring cake decorating ideas that can enhance the visual appeal of your volcano cake.
Next, the peanut butter filling is prepared by blending peanut butter, powdered sugar, milk, butter, and vanilla extract until smooth. This mixture, when dolloped onto the cake batter and baked, creates the molten center characteristic of the volcano cake. For a deeper understanding of the culinary arts involved in baking, this Wikipedia link offers insights into the techniques and principles that underpin this delicious endeavor.
Gathering these ingredients and tools is the first step in creating a dessert that’s as fun to make as it is to eat. With everything in place, you’re ready to proceed to the heart of the baking process, where the magic truly happens.
Step-by-Step Baking Guide
Preparing the Batter
Begin your Chocolate Peanut Butter Volcano Cake adventure by preheating your oven to 350°F (175°C). Grease your 9×13 inch baking dish lightly to ensure easy removal of the cake once baked. In a large mixing bowl, prepare the chocolate cake mix according to the package instructions. This usually involves blending the cake mix with water, oil, and eggs until smooth. Pour the batter into the prepared baking dish, creating an even layer that will serve as the base for your volcanic creation.
Mixing the Peanut Butter Filling
In a separate bowl, combine 1 cup of creamy peanut butter with 1 cup of powdered sugar, 1/2 cup of milk, 1/2 cup of softened butter, and 1 teaspoon of vanilla extract. Use an electric mixer or a whisk to blend these ingredients until the mixture is smooth and well combined. This peanut butter filling will create the gooey, molten center that gives the volcano cake its name.
Layering the Cake and Filling
With the chocolate cake batter in place, it’s time to add the peanut butter filling. Drop spoonfuls of the filling over the cake batter, spacing them evenly. There’s no need to spread the filling; as the cake bakes, it will sink into the batter, creating pockets of peanut butter goodness. Next, sprinkle 2 cups of chopped Reese’s Peanut Butter Cups and 1 cup of semi-sweet chocolate chips over the top. These add texture and an extra chocolatey punch to the cake, enhancing its volcanic appearance.
Baking Tips for Perfection
Place the baking dish in the preheated oven and bake for 35-40 minutes. The cake is done when it’s set and the top is bubbly. A good tip is to insert a toothpick into the center of the cake (avoiding the peanut butter pockets); if it comes out clean, the cake is ready. Allow the cake to cool in the dish before serving. This resting period lets the cake set properly, ensuring that the peanut butter filling creates a stunning lava flow when cut.
For those interested in adding a personal touch to their volcano cake, Pinterest provides a treasure trove of gluten-free dessert ideas, allowing everyone, regardless of dietary restrictions, to enjoy this decadent treat.
This step-by-step guide ensures that even novice bakers can successfully create a Chocolate Peanut Butter Volcano Cake that’s as visually impressive as it is delicious. By following these instructions, you’re not just baking a cake; you’re crafting an experience that’s sure to erupt with flavor at every bite. Remember, baking is as much about the journey as it is about the destination. So, take your time, enjoy the process, and get ready to indulge in a dessert that’s truly explosive.
Decorating and Serving Suggestions
Once your Chocolate Peanut Butter Volcano Cake has cooled, the real fun begins. Decorating this decadent dessert not only enhances its visual appeal but also adds an extra layer of flavor. Begin by drizzling melted peanut butter and chocolate over the top. This not only adds to the “volcano” effect but also introduces a delightful contrast of textures. For an artistic touch, consider using a piping bag to create decorative patterns.
Sprinkle additional chopped Reese’s Peanut Butter Cups and mini chocolate chips across the top for a crunchy texture that complements the gooey interior. For those looking to elevate their cake further, edible gold dust or colorful sprinkles can add a festive flair, making it perfect for special occasions or celebrations.
When it comes to serving, a warm slice of this cake pairs beautifully with a scoop of vanilla ice cream. The cool, creamy ice cream contrasts wonderfully with the warm, molten center, creating a symphony of flavors and temperatures. For a more adult twist, a glass of cold milk or a cup of strong coffee can balance the sweetness of the cake, providing a refreshing end to a rich meal.
For more inspiration on serving and presentation, explore this Pinterest board on Perfect Beverage Pairings, offering creative ideas to complement your dessert. Additionally, understanding the art of cooking and baking can provide further insights into creating dishes that are as beautiful as they are delicious.
Presenting your Chocolate Peanut Butter Volcano Cake with these decorative and serving suggestions will surely make your dessert the highlight of any dining experience, leaving your guests impressed and satisfied.
Nutritional Information
For those curious about the nutritional aspects of the Chocolate Peanut Butter Volcano Cake, it’s important to note that this dessert is rich in both flavor and calories. A single serving can contain a significant amount of calories, fats, and sugars, primarily due to the dense ingredients like peanut butter, chocolate, and sugar. However, it also offers some nutritional benefits, such as protein from the peanut butter and antioxidants from the chocolate.
Here’s a rough breakdown of the nutritional content per serving:
- Calories: High
- Total Fat: High (with a notable amount of saturated fat from butter and chocolate)
- Carbohydrates: High (mainly from sugars and the cake mix)
- Protein: Moderate (thanks to the peanut butter)
- Fiber: Low to moderate (depending on the type of chocolate and peanut butter used)
For those interested in a healthier version of this indulgent dessert, consider substituting some ingredients. Using a sugar-free cake mix, low-fat peanut butter, and dark chocolate chips can reduce the calorie and sugar content. Additionally, incorporating a gluten-free dessert idea can make it suitable for those with dietary restrictions.
Understanding the nutritional content of foods is crucial for a balanced diet. For more detailed information on nutrition, this Wikipedia link provides a comprehensive overview of nutritional science, helping you make informed choices about your diet.
While the Chocolate Peanut Butter Volcano Cake is a treat best enjoyed in moderation, it’s also a delightful way to indulge on special occasions. By being mindful of portion sizes and potential ingredient substitutions, you can enjoy this decadent dessert without compromising your nutritional goals.
Variations of the Recipe
The Chocolate Peanut Butter Volcano Cake is a versatile dessert that can be adapted to suit various dietary needs and flavor preferences. Here are some creative variations to try:
- Vegan Version: Substitute the cake mix for a vegan-friendly option and use plant-based milk and butter. Vegan chocolate chips and peanut butter ensure the dessert is entirely animal product-free. For those exploring vegan baking, Pinterest offers a plethora of Vegan Baking Inspirations.
- Gluten-Free Adaptation: Opt for a gluten-free chocolate cake mix and ensure that all other ingredients, including the peanut butter and chocolate chips, are certified gluten-free. This adjustment allows those with gluten sensitivities to enjoy this indulgent treat without worry.
- Nut-Free Option: For those with nut allergies, replace the peanut butter with a nut-free alternative like sunflower seed butter. Ensure the chocolate and other ingredients are nut-free as well.
- Healthier Twist: Reduce the sugar content by choosing unsweetened peanut butter and dark chocolate with a high cocoa content. Swap the regular cake mix for a whole wheat or lower sugar option to make it a tad healthier.
- Flavor Variations: Experiment with different fillings such as caramel, marshmallow fluff, or raspberry jam to add a unique twist to the classic recipe. Each filling can create a new “volcano” experience, offering a delightful surprise with every bite.
For those interested in further customizing their baking projects, understanding the culinary arts can provide valuable insights into the principles of recipe adaptation and ingredient substitution. By experimenting with these variations, you can tailor the Chocolate Peanut Butter Volcano Cake to fit any preference or dietary requirement, making it a versatile dessert that everyone can enjoy.
Pairing with Beverages
The Chocolate Peanut Butter Volcano Cake pairs wonderfully with a variety of beverages, enhancing the overall dining experience. Here are some pairing suggestions to consider:
- Coffee: A strong, black coffee can cut through the richness of the cake, providing a delightful contrast. The bitterness of the coffee balances the sweetness of the chocolate and peanut butter, making for a harmonious combination.
- Milk: Cold milk is a classic pairing for any chocolate dessert. Its creamy texture and cool temperature complement the gooey, warm center of the volcano cake, creating a comforting and satisfying experience.
- Tea: For those who prefer tea, a robust black tea or a sweet herbal tea like vanilla rooibos can be an excellent match. The tea’s warmth and flavors can enhance the cake’s taste profile without overpowering it.
- Adult Beverages: For an adult twist, consider pairing the cake with a dessert wine, such as a Port or a sweet Sherry. These wines have rich flavors that can stand up to the intense taste of the cake. Alternatively, a creamy liqueur like Baileys Irish Cream can add an extra layer of indulgence.
For more creative beverage pairing ideas, explore this Pinterest board on Perfect Beverage Pairings, offering a wide range of options to complement your dessert. Additionally, gaining a deeper understanding of the art of cooking and baking can enhance your ability to match desserts with appropriate beverages, elevating the overall dining experience.
Choosing the right beverage to accompany your Chocolate Peanut Butter Volcano Cake can turn a simple dessert into a gourmet treat, making each bite more enjoyable and memorable. Whether you prefer a hot cup of coffee, a glass of milk, a soothing tea, or an adult beverage, there’s a perfect pairing for everyone to enjoy alongside this decadent dessert.
FAQs
Q: Can I make the Chocolate Peanut Butter Volcano Cake ahead of time?
A: Yes, you can prepare the cake a day in advance. Store it covered at room temperature. If you prefer to serve it warm, gently reheat it in the oven before serving.
Q: How do I store leftovers?
A: Leftover cake can be stored in an airtight container at room temperature for up to 3 days or refrigerated for up to a week. For the best texture, bring it to room temperature before serving if refrigerated.
Q: Can I freeze this cake?
A: This cake freezes well. Wrap individual slices or the entire cake securely in plastic wrap and then aluminum foil. Freeze for up to 3 months. Thaw overnight in the refrigerator or at room temperature for a few hours.
Q: Is there a substitute for Reese’s Peanut Butter Cups?
A: If Reese’s aren’t available or you prefer something different, any chocolate candy with a peanut butter filling can work. Alternatively, a mix of chopped nuts and chocolate chips can also mimic the texture and flavor.
Q: Can I use natural peanut butter in the recipe?
A: Yes, natural peanut butter can be used, but it may affect the texture slightly due to its oil separation. Stir it well before using. For a consistent texture, commercial brands of peanut butter are recommended.
For those seeking more detailed baking tips and tricks, consider exploring resources like How to Write and Optimize in Surfer Content Editor for enhancing your content creation skills, not just in baking but across various topics.
Print
Chocolate Peanut Butter Volcano Cake
- Author: Naomi
- Total Time: 1 hour
- Yield: 6 servings 1x
Description
Indulge in the ultimate dessert experience with the Chocolate Peanut Butter Volcano Cake. This decadent cake combines the rich, velvety texture of chocolate with the creamy, savory goodness of peanut butter, creating a flavor explosion that’s hard to resist.
Ingredients
- 1 box chocolate cake mix (and ingredients called for on the box)
- 1 cup peanut butter
- 1 cup powdered sugar
- 1/2 cup milk
- 1/2 cup butter, softened
- 1 teaspoon vanilla extract
- 2 cups chopped Reese’s Peanut Butter Cups
- 1 cup semi-sweet chocolate chips
Instructions
- Preheat the oven to 350°F (175°C) and prepare a 9×13 inch baking dish by greasing it lightly. Prepare the chocolate cake mix according to the package instructions and pour into the prepared baking dish.
- In a separate bowl, mix together peanut butter, powdered sugar, milk, butter, and vanilla extract until smooth.
- Drop spoonfuls of the peanut butter mixture over the cake batter.
- Sprinkle the chopped Reese’s Peanut Butter Cups and chocolate chips over the top.
- Bake for 35-40 minutes or until the cake is set and the top is bubbly.
- Let the cake cool before serving.
- It will have a gooey, earthquake-like appearance.
Notes
- Preparation Time: The total preparation time, including baking, is approximately 1 hour. This allows for a leisurely pace, ensuring each step is completed with care.
- Serving Size: This recipe yields about 12 servings, making it ideal for sharing with family and friends.
- Ingredient Substitutions: Feel free to experiment with ingredient substitutions to cater to dietary restrictions or personal preferences. Vegan and gluten-free options are easily accommodated with the right substitutes.
- Storage Tips: Proper storage is key to maintaining the cake’s texture and flavor. Follow the storage guidelines for leftovers to enjoy this treat for days.
- Serving Suggestions: Enhance your dessert experience with recommended beverage pairings or by exploring creative decorating ideas to make your cake a visual feast.
- Customization: Don’t hesitate to add your twist to the recipe. Whether it’s through flavor variations or decorative touches, making this cake your own will add to the enjoyment.
- Prep Time: 20 minutes
- Cook Time: 40 minutes
- Category: Dessert
- Cuisine: American


