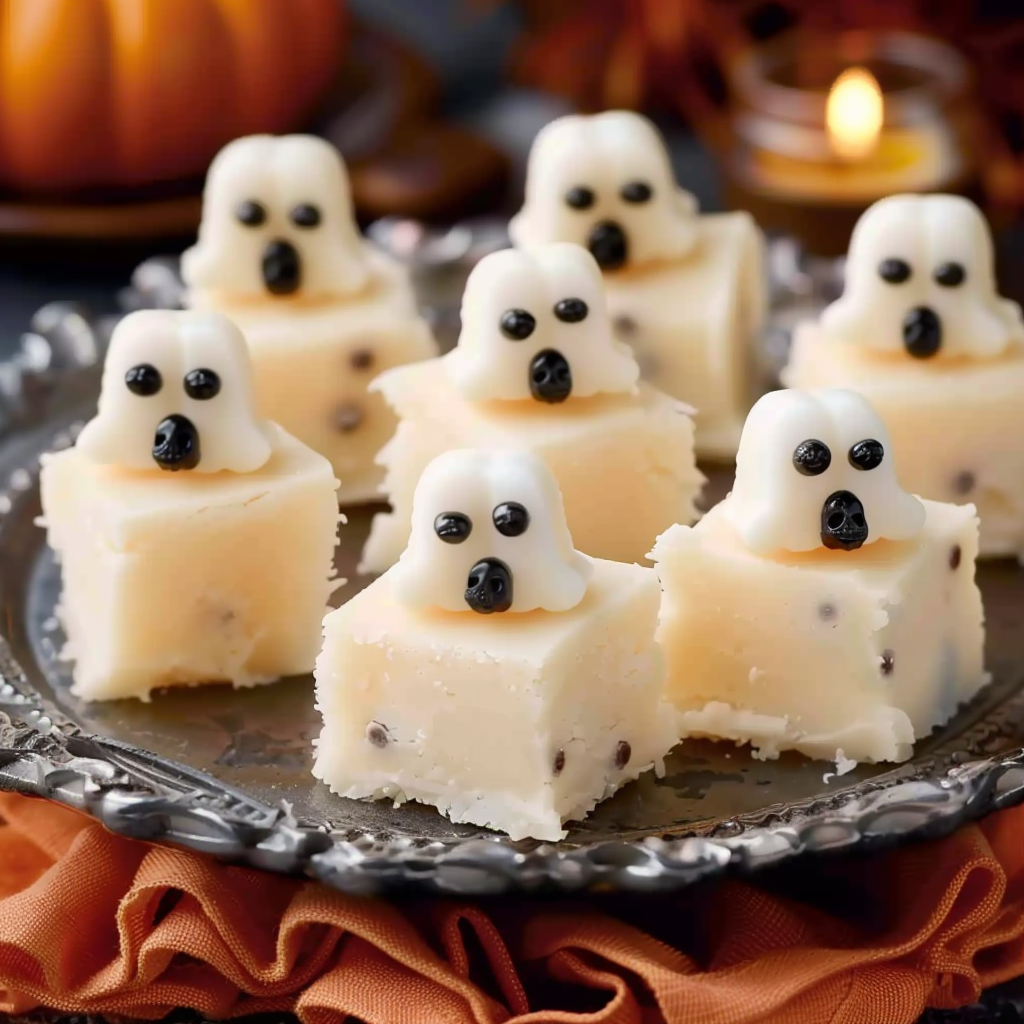
When planning a Halloween party, quick, no-bake treats that look festive and taste delicious are a host’s best friend. Halloween Phantom Vanilla Fudge with White Chocolate Swirls is the ultimate example of a no-fuss dessert that’s eye-catching, kid-friendly, and easy to prepare in minutes. With its marbled swirl of spooky colors—orange, purple, and black—this treat adds a ghostly flair to dessert tables and gift bags alike.
This fudge recipe requires only a few simple ingredients—white chocolate chips, sweetened condensed milk, and vanilla extract. It skips the stove and baking process, making it ideal for parents and kids to create together. If you’re looking to expand your Halloween dessert menu with more no-bake Halloween treats, Pinterest’s collection of themed ideas can offer inspiration for variety and presentation.
The swirled colors give this fudge its signature “phantom” look. As the base melts together smoothly, food coloring creates playful and eerie marbling. This easy dessert doesn’t just slice cleanly—it holds its shape perfectly for classroom parties, potlucks, or gift boxes. For curious readers wanting to dive deeper into what makes this confection tick, this Wikipedia entry on fudge outlines how this classic dessert has evolved across cultures.
If you’ve been searching for the perfect no-cook Halloween dessert, this Phantom Vanilla Fudge checks every box: fast, fun, festive, and foolproof. Whether you’re making it for kids or just embracing your spooky side, it’s guaranteed to make your treat table a hit.
Why Halloween-Themed Treats Are a Must-Have
Creating Halloween-themed treats isn’t just about adding orange frosting or spooky sprinkles—it’s about bringing the spirit of the holiday into every bite. Whether you’re throwing a full-blown Halloween bash or simply packing goodies for a classroom party, themed desserts like vanilla fudge bars help elevate the experience for both kids and adults.
One of the biggest reasons to embrace festive snacks during Halloween is the visual appeal. Bright colors and fun shapes grab attention and build excitement. For example, a tray of Phantom Vanilla Fudge swirled with black, purple, and orange instantly sets the mood. It’s more than just dessert—it’s part of the decoration. If you’re looking to see how others bring this idea to life, explore a Halloween party dessert table layout on Pinterest to get visual inspiration.
Halloween treats are also an easy way to involve children in the kitchen. Simple recipes like this no-cook fudge allow kids to participate in pouring, coloring, and swirling without worrying about heat or safety hazards. Not only does it give them a sense of accomplishment, but it also introduces them to basic kitchen skills. Ingredients like white chocolate and food-safe gel colorings make it a safe and enjoyable project for little hands.
In settings like schools, themed treats are especially effective because they are easy to portion, allergy-conscious, and easy to distribute. When individually wrapped, these fudge squares make ideal classroom gifts or party favors. They’re a more exciting alternative to store-bought candies, and with no cooking involved, they come together quickly—even on Halloween morning.
What is Phantom Vanilla Fudge?
Phantom Vanilla Fudge is a playful twist on classic vanilla fudge, enhanced by bold Halloween colors and whimsical swirling techniques. At its core, this treat combines white chocolate chips, sweetened condensed milk, and vanilla extract to create a rich, creamy base. The “phantom” aspect comes from swirling in gel food coloring—typically black, purple, and orange—to evoke a ghostly, marbled design that’s both spooky and fun.
Unlike traditional fudge that often involves boiling sugar and careful temperature control, this version is no-cook and stress-free. Once melted together, the mixture is divided and colored, then swirled into a pan to chill. The result is a vibrant and eye-catching slab that slices neatly into squares. You can view this phantom fudge Halloween recipe on Pinterest for visual reference.
The texture is soft but firm enough to hold its shape, thanks to the stabilizing properties of sweetened condensed milk. This not only contributes to the creamy mouthfeel but also eliminates the need for added sugars or syrups. It’s a base that adapts well to flavor and color customizations, making it a versatile choice for seasonal treats.
The phantom fudge theme plays on the idea of spirits and ghosts, common motifs in Halloween celebrations. As you swirl the colors together, the effect can resemble haunted mists or eerie apparitions. For curious crafters, swirl technique for Halloween treats provides step-by-step visuals that help achieve that spectral look.
This recipe also lends itself well to creative toppings. Add candy eyeballs, edible glitter, or themed sprinkles for extra flair. The simplicity of the base makes it an ideal canvas for decoration, while the marbled colors add dramatic contrast. Whether you’re preparing it as a standalone dessert or as part of a Halloween dessert spread, it’s guaranteed to be a conversation starter.
If you’re interested in learning more about the core ingredient behind the fudge’s flavor, explore this Wikipedia article on vanilla extract for a deeper look into its origins and culinary uses. Vanilla brings a subtle warmth to the fudge, balancing the sweetness of the chocolate without overwhelming it.
In essence, Phantom Vanilla Fudge is the perfect intersection of creativity, simplicity, and festive flavor. It brings together the nostalgia of traditional fudge with the excitement of Halloween, delivering a dessert that’s as delightful to make as it is to eat.
Overview of the Recipe
This Halloween vanilla fudge recipe stands out for its simplicity, visual appeal, and flexibility. With just a few pantry staples and no need for baking or special equipment, it’s the ultimate last-minute treat for Halloween parties, classroom gifts, or spooky movie nights at home.
To prepare Phantom Vanilla Fudge, you’ll need only three main ingredients: white chocolate chips, sweetened condensed milk, and vanilla extract. These come together to form a creamy, rich base that holds its shape when chilled. By dividing the mixture and tinting each portion with gel food coloring, you can create a vivid swirl of Halloween hues—black, purple, and orange. This technique adds a ghostly, marbled look that resembles swirling mists or phantom trails. You can enhance the spooky vibe with add-ons like Halloween sprinkles, candy eyeballs, or edible glitter.
The best part? No cooking required. Simply melt the ingredients gently on the stove or in a microwave, stir in the flavoring, separate and color the mixture, then layer and swirl in a parchment-lined pan. Chill it in the fridge for about two hours, and it’s ready to slice. For a quick reference to this process, check out a visually styled Pinterest Halloween fudge board.
This recipe is perfect for both new and seasoned home bakers, especially those short on time. It’s an excellent choice for busy parents or teachers needing a treat that travels well and cuts into clean, even bars. If you’re curious about how the base ingredient affects texture and sweetness, the Wikipedia entry on white chocolate provides useful background on its composition and uses in confections.
Not only is this fudge a fun, hands-on project that kids can help make, but it’s also highly customizable. You can experiment with different colors, flavors, and even shapes using silicone molds or cookie cutters. This adaptability makes phantom vanilla fudge a reliable go-to for festive occasions all season long.
Ingredients Breakdown
Understanding each ingredient in Halloween Phantom Vanilla Fudge is essential for achieving the perfect texture, flavor, and spooky appearance. Each component contributes to the fudge’s creamy consistency and vibrant marbled effect, making it a standout treat on any Halloween table.
-
White Chocolate Chips: The foundation of this fudge, white chocolate provides a sweet, smooth base that melts easily. Using high-quality chips ensures the fudge won’t seize and delivers a creamy texture. Learn more about its composition and uses in the Wikipedia article on white chocolate.
-
Sweetened Condensed Milk: This ingredient adds both sweetness and structure. Its thick consistency stabilizes the fudge, helping it set firmly while remaining soft and sliceable. For an in-depth look, check sweetened condensed milk.
-
Vanilla Extract: Vanilla enriches the fudge with aromatic depth, balancing the sweetness of the chocolate. The subtle flavor enhances the overall taste without overpowering the visual impact of the colored swirls. More details can be found in vanilla extract.
-
Gel Food Coloring: Gel colors are ideal because they provide vivid, concentrated hues without altering the fudge’s texture. Typically, black, purple, and orange are used to evoke a Halloween theme. For visual guidance on swirling techniques, see swirl technique for Halloween treats.
Optional enhancements include candy eyes, Halloween sprinkles, or mini marshmallows for added texture and fun. This ingredient list is versatile, accommodating substitutions like dairy-free chocolate or natural colorings for dietary preferences.
Using quality ingredients is key to producing a visually stunning and delicious fudge that holds its shape. The combination of white chocolate and sweetened condensed milk ensures a creamy texture, while gel colors make it a festive centerpiece. For inspiration on creative variations, explore these Pinterest Halloween fudge ideas and consider integrating the fudge into a broader Halloween dessert table.
This simple yet effective ingredient breakdown demonstrates that a few carefully chosen items can result in a dessert that is visually striking, flavorful, and perfect for parties, classroom treats, or gifts. The mix of color, texture, and flavor sets this fudge apart from ordinary desserts.
Step-by-Step Instructions
Creating Halloween Phantom Vanilla Fudge is straightforward, making it perfect for both beginner and experienced home bakers. Follow these steps to ensure smooth, creamy fudge with vibrant, ghostly swirls.
-
Prepare the Pan: Line an 8×8-inch square baking pan with parchment paper and set aside. This ensures easy removal once the fudge is firm.
-
Melt the Base: In a medium saucepan over low heat, combine white chocolate chips and sweetened condensed milk. Stir constantly until the mixture is smooth and fully melted. Avoid overheating, which can cause the chocolate to seize.
-
Add Flavor: Remove from heat and stir in vanilla extract. This adds aromatic depth to the fudge. For more information on vanilla, see vanilla extract.
-
Divide and Color: Split the mixture evenly into three bowls. Add one gel food coloring to each bowl—black, purple, and orange—stirring until fully incorporated. For visual tips on swirling, check Pinterest swirl techniques.
-
Create the Swirl: Drop spoonfuls of each colored mixture randomly into the prepared pan. Use a knife or skewer to gently swirl the colors together. Be careful not to overmix; you want distinct, ghostly patterns.
-
Level and Chill: Tap the pan gently on the counter to flatten the top. Refrigerate for at least two hours or until fully firm.
-
Slice and Store: Once set, lift the fudge out using the parchment paper and cut into squares. Store in the refrigerator to maintain firmness.
For inspiration on presentation, explore Pinterest Halloween fudge ideas and consider integrating the fudge into a themed Halloween dessert table.
This step-by-step process ensures smooth, creamy vanilla fudge with vibrant, spooky colors. The no-cook method keeps the process simple and clean, perfect for classroom parties or last-minute Halloween preparations.
Tips for Perfect Swirling and Coloring
Achieving a striking phantom swirl effect in your Halloween vanilla fudge requires a few simple techniques. The goal is to create a marbled appearance where the colors remain distinct yet blend just enough to resemble ghostly mists.
-
Use a light hand when swirling. Insert a skewer or knife into the fudge and drag it through the colors in gentle curves or loops. Avoid overmixing to maintain vibrant contrasts.
-
Drop spoonfuls randomly into the pan rather than layering in straight lines. This encourages natural, unpredictable marbling.
-
Ensure each colored portion is well-mixed before swirling. Gel food coloring should be fully incorporated to prevent streaks of concentrated pigment.
-
To make the fudge even more visually appealing, rotate the pan while swirling. This creates dynamic patterns that look professional with minimal effort.
-
For a ghostly effect, leave some portions untouched by the knife, allowing the colors to pool naturally.
Using these techniques ensures each piece is unique and festive. For more inspiration, refer to Pinterest swirl technique for Halloween treats, which demonstrates creative ways to manipulate color patterns effectively.
No Cook, No Fuss: Why This Recipe Works
No-cook recipes like this Halloween vanilla fudge are perfect for stress-free entertaining. They require minimal ingredients, limited equipment, and are forgiving for beginners.
-
Time-saving: The recipe takes under 15 minutes to prepare, plus chilling time.
-
Kid-friendly: Children can help with coloring and swirling without handling hot ingredients.
-
Mess-free: No baking reduces kitchen cleanup and eliminates the risk of burning.
-
Consistent results: Unlike cooked fudge, which can fail due to temperature fluctuations, this no-cook version is reliable and creamy every time.
For more insights on the history and variations of fudge, see Wikipedia: Fudge.
Creative Add-Ons and Variations
This fudge recipe is highly adaptable. Consider adding:
-
Candy eyes or edible glitter to enhance the ghostly theme
-
Mini marshmallows for added texture
-
Halloween sprinkles for a festive pop of color
-
Flavor twists: add mint extract, pumpkin spice, or a few drops of orange extract for seasonal variety
-
Use silicone molds or cookie cutters to create ghost, pumpkin, or bat shapes for extra fun
These variations allow you to tailor the fudge to any party, classroom, or personal preference, making it a versatile dessert choice.
Serving Suggestions and Storage Tips
-
Presentation: Serve squares on a Halloween-themed platter, or wrap individually for gift bags or classroom treats.
-
Storage: Keep in an airtight container in the refrigerator for up to two weeks.
-
Portioning: Cut the fudge into uniform squares to make it easier to serve and package.
-
Pairings: Combine with other Halloween desserts like witch finger cookies, popcorn hands, or monster cupcakes for a full themed spread.
Halloween Party Spread Ideas
-
Use Phantom Vanilla Fudge as the centerpiece of a spooky dessert table.
-
Complement with simple treats like popcorn balls, candy corn, and themed cupcakes.
-
Layer fudge with other no-bake desserts for a visually dynamic and kid-friendly buffet.
FAQs
Can I make this fudge ahead of time?
Yes, it can be prepared a day or two in advance and stored in the refrigerator. Wrap tightly to prevent drying out.
What kind of food coloring works best for fudge?
Gel food coloring is preferred because it provides vibrant hues without affecting texture. Avoid liquid colors that can make fudge runny.
Can I freeze vanilla fudge?
Yes, fudge can be frozen for up to three months. Wrap in parchment and place in an airtight container before freezing. Thaw in the refrigerator before serving.
What’s the best way to cut fudge cleanly?
Use a sharp knife, warmed slightly in hot water, and wipe clean between cuts for neat squares.
Is this recipe safe for kids to help make?
Absolutely. The no-cook method eliminates hot surfaces, allowing children to participate safely in stirring, coloring, and swirling.

Halloween Phantom Vanilla Fudge With White Chocolate Swirls
- Author: Naomi
Description
Halloween Phantom Vanilla Fudge with White Chocolate Swirls is a quick, no-bake dessert that combines creamy white chocolate, sweetened condensed milk, and vibrant gel colors to create a spooky, marbled treat. Perfect for classroom parties, Halloween gift bags, or themed dessert tables, this fudge is kid-friendly, easy to slice, and visually stunning. The ghostly swirls in black, purple, and orange make each square unique and festive, while optional add-ins like candy eyes or sprinkles add a playful touch.
Ingredients
- 3 cups white chocolate chips
- 1 (14 oz) can sweetened condensed milk
- 1 1/2 tsp vanilla extract
- Black gel food coloring
- Purple gel food coloring
- Orange gel food coloring
Instructions
Line an 8×8-inch square baking pan with parchment paper and set aside.
In a medium saucepan over low heat, combine the white chocolate chips and sweetened condensed milk. Stir constantly until melted and smooth.
Remove from heat and stir in the vanilla extract.
Divide the mixture evenly into three bowls.
Tint each bowl with one of the gel food colorings: one black, one purple, one orange. Stir each until the color is fully incorporated.
Drop spoonfuls of each colored fudge randomly into the prepared pan, alternating colors.
Once all the fudge is in the pan, use a knife or skewer to swirl the colors together slightly to create a marbled effect.
Gently tap the pan on the counter to level the top.
Refrigerate until firm, at least 2 hours.
Once set, lift the fudge from the pan using the parchment paper and cut into squares. Store in the refrigerator.
Notes
-
Use high-quality white chocolate for a smoother texture and richer flavor.
-
Chill thoroughly to ensure the fudge holds its shape when sliced.
-
Experiment with different colors or flavors to customize for your Halloween theme.
-
Store in an airtight container in the fridge for up to two weeks.
-
For clean cuts, use a knife warmed under hot water and wiped between slices.
-
Perfect for pairing with other Halloween desserts like cupcakes, cookies, and popcorn treats.